To share a board with one or multiple people, you need to first open Sharing Settings, which you can do:
1. Within Google Drive
To open the board folder in Google Drive faster, use the Open in Drive button in the board settings.
Once you're in Google Drive, click on the Share button and type in the user’s email in the pop-up window.
2. Within Kanbanchi
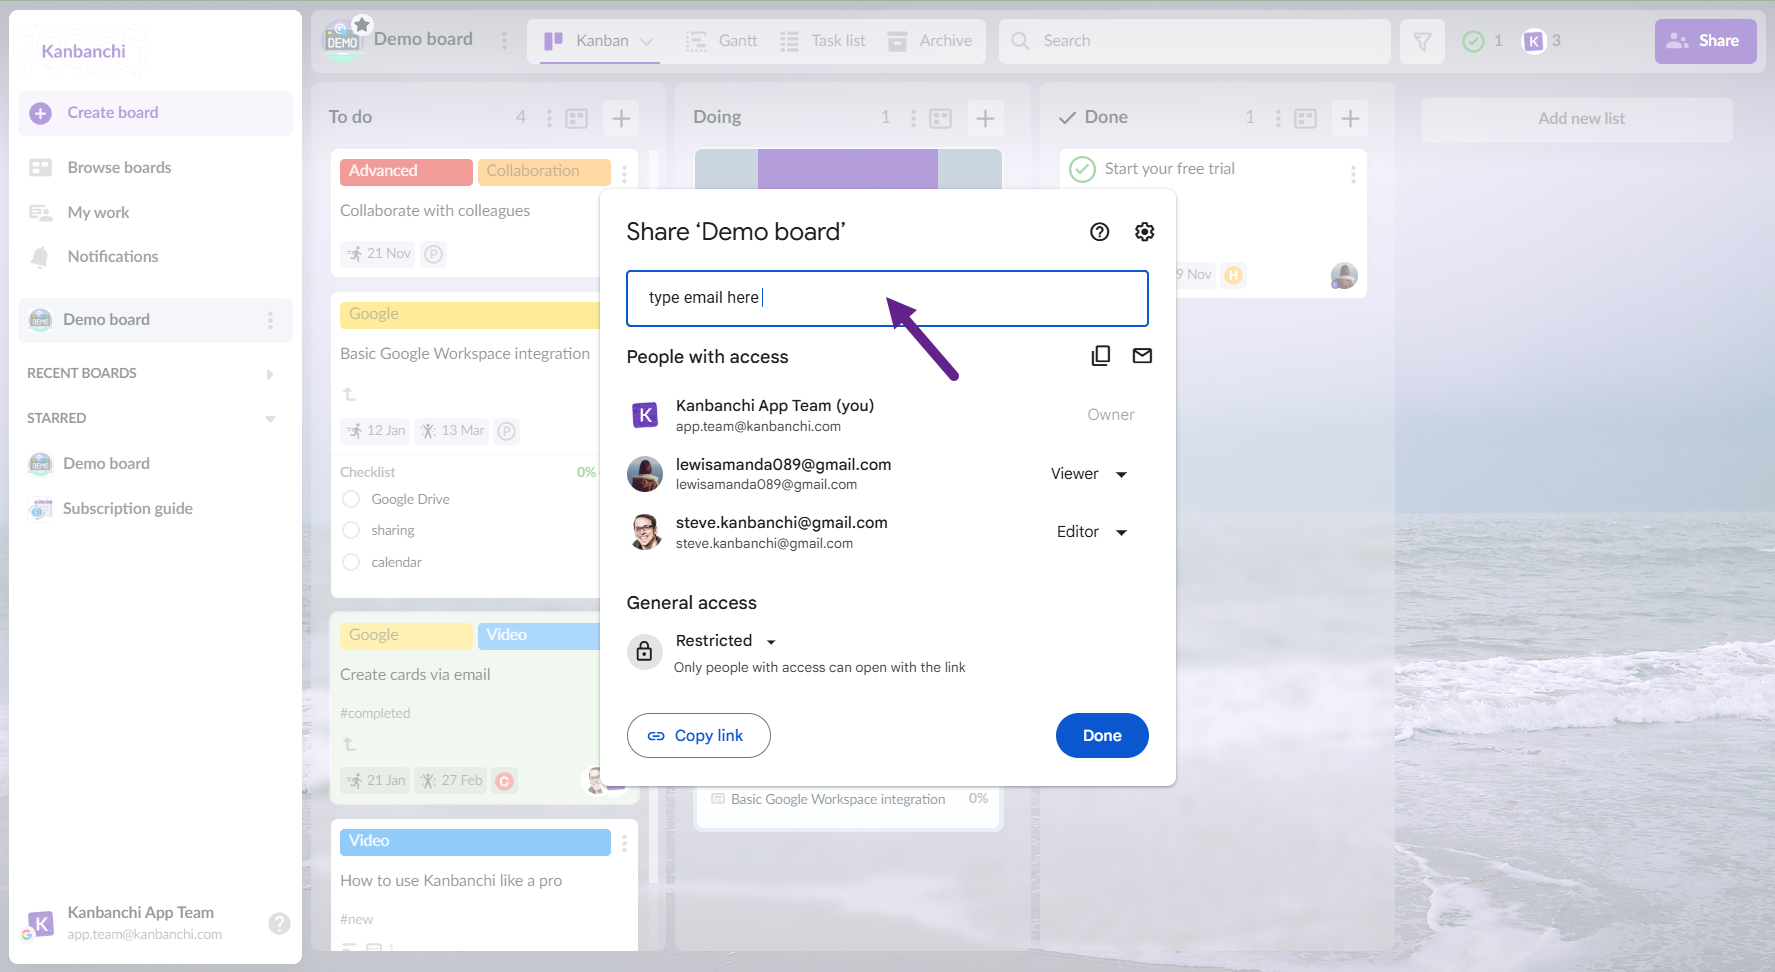
Click on the Share button at the top right corner of a board, and you will see familiar Google Drive Sharing.
Define permissions for the invited members. Click on the drop-down menu near them and select Editor, Commentor or Viewer. Then click on Done.
You can allow people to edit, comment, or view your board just by giving them a URL for the board from the address bar of your browser. However, you will first need to make sure that your board is available to Anyone with the link.
Click on the Share button, then click on Get link at the bottom of the appeared screen. Change Restricted for Anyone with the link option and define permissions, choosing between Editor, Commentor, and Viewer.
Note: After you change permissions, feel free to send an URL from the browser address bar to a person https://kanban-chi.appspot.com/dashboard/xxxxxx/d-xxxxxx), as the generated shareable link provided by Google in the Google sharing screen doesn't work to open Kanbanchi boards.
2. How can I receive email notifications when my board is changed?
If you want to receive email notifications when changes have been made to your board you need to enable them in the Board Details. To do this, first click on the board’s title in the top panel, then select Board Settings from the drop-down menu.
After that, turn on email notifications.
Then you can choose from the drop-down list how often the App will send you emails:
as soon as possible,
once an hour,
once a day.
You also need to choose which cards on the board you want to receive notifications for:
all cards,
cards assigned to me,
watched cards.
You can tick all the variants.
Kanbanchi will notify you when: – a card has been assigned to you – a new card has been created – a card has been deleted – a new comment appears – a card’s name has been changed – a card’s description has been added or changed – a file has been attached – a card’s due date passed – a card has been moved to another list – a card’s priority has been changed
Note, that notifications will be sent only if you are not the only member on this board and changes are made by other people.
If you would like to complement email notifications with in-app notifications, learn how to activate in-app notifications. You may also receive browser notifications in Kanbanchi.
Kanbanchi makes it easy to export your board data, giving you complete control over your project insights.
Need to analyze trends or track progress? You can quickly generate reports and keep a backup of important information. Choose to export active tasks, archived data, or time tracker details—whatever suits your needs. This feature also helps with collaboration, making it easy to share key information with stakeholders.
Plus, it’s available on both Google Workspace and Microsoft platforms, so you can work seamlessly in your preferred ecosystem. Check out the following FAQs to find out how to export your data depending on your platform type:
You can buy and manage subscriptions right in the application. To purchase the subscription, follow the instructions.
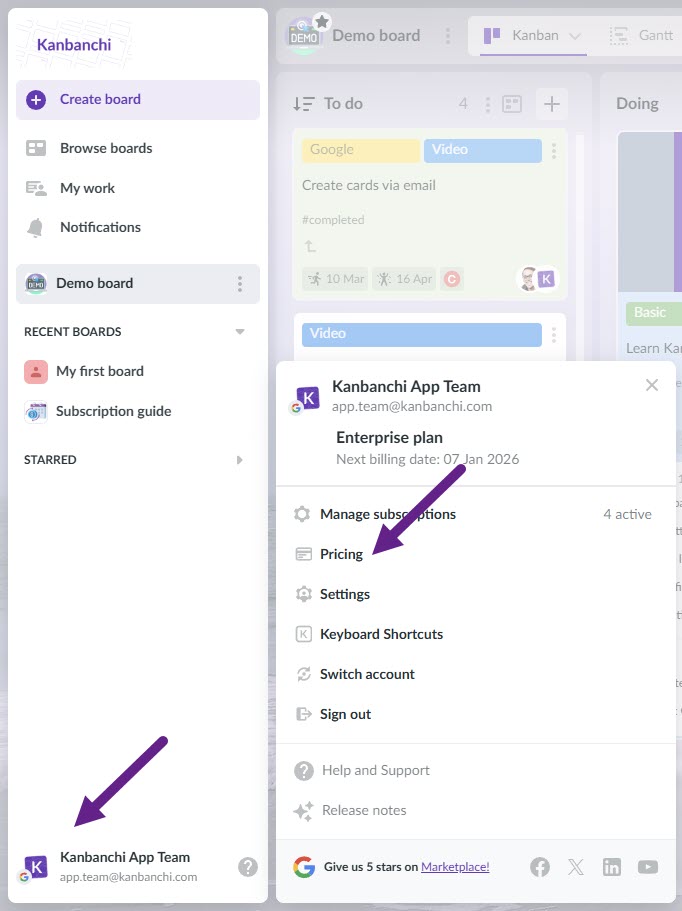
Click your profile picture or company logo in the bottom left corner. Click Pricing in the pop-up menu.
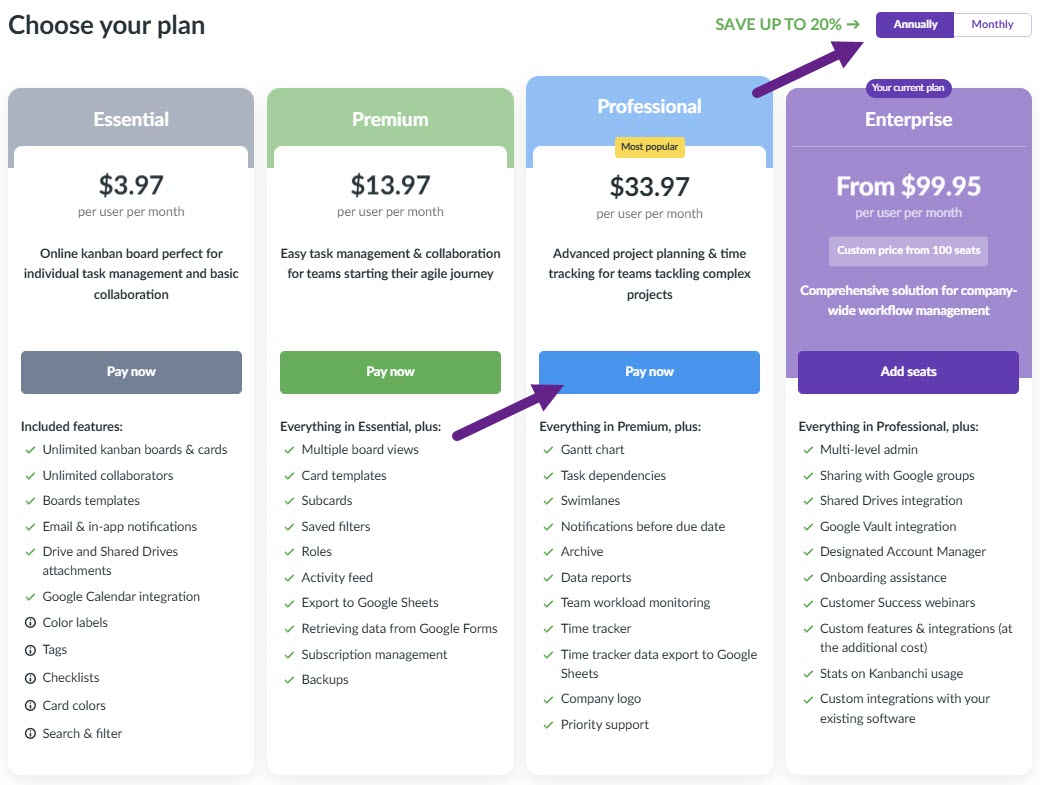
Choose whether you want to pay Annually or Monthly. Choose the plan you want to buy by clicking "Pay now" under the plan that you want to have.
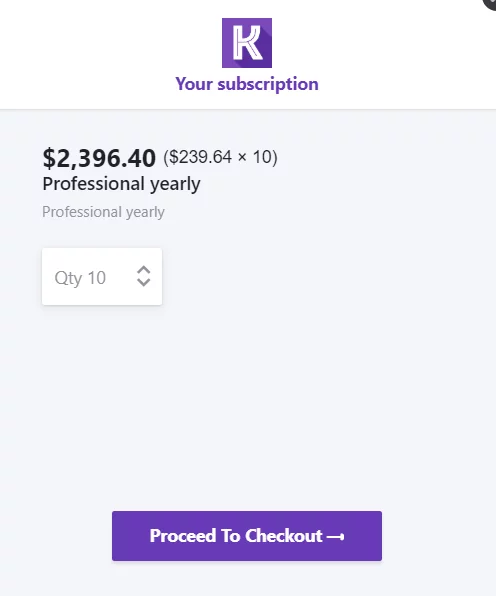
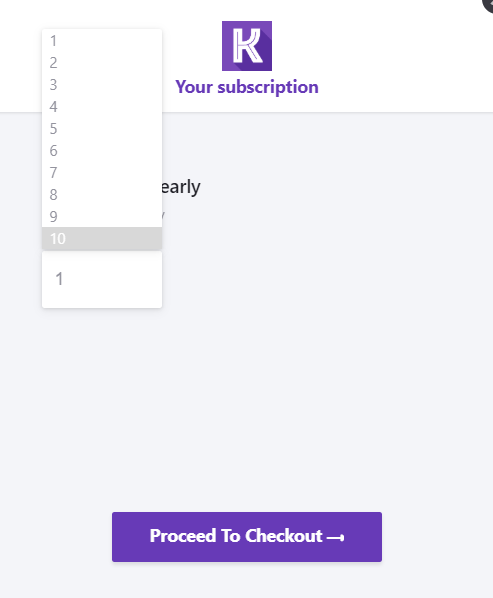
Choose the number of seats by clicking Qty 1.
Choose the appropriate quantity in the pop-up menu.
Please note: if you want to purchase more than 10 seats, you can manually enter the number.
Click Proceed to checkout to continue the purchase.
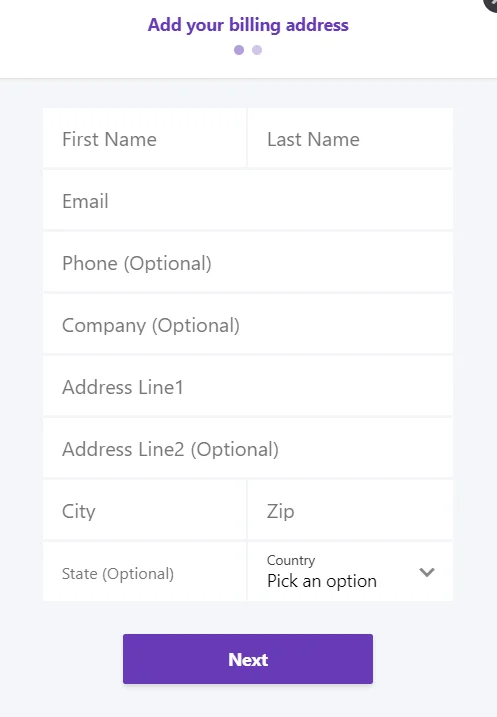
Fill in the form and click Next.
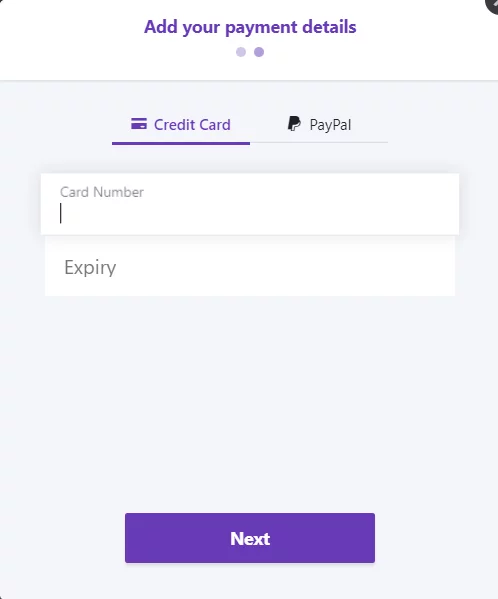
Please select the payment method and provide your payment details. Then, click Next to purchase a Kanbanchi subscription. We kindly remind you that AMEX cards can't be used for international payments; therefore, we do not accept them.
5. How can I manage my subscription in the application?
You can manage your subscription right in the application. You can manage your subscription status (number of allocated and available seats and expiration date) in Kanbanchi.
Click your profile picture or company logo in the lower left corner. Click Manage subscriptions in the pop-up menu.
You will see the information about the plan and billing type you’ve chosen, the number of available and used seats, and the subscription's expiration date.
Click the Add membersbutton to add your team members. Use name@domain.com format. You can add them one by one or by a list. Click Add.
If you would like to manage a Kanbanchi subscription but you don’t need the application for yourself, delete your email from the list of users by clicking the trash can icon. You may transfer your seat to another team member.
After you have distributed seats, your subscription is set up. It will activate immediately or on the scheduled day.
Subscription Administrators
A subscription administrator is a user who enters billing information, adds a payment method, and distributes seats. The subscription admin can give the right to distribute seats to extra admins. So several users may manage the same subscription.
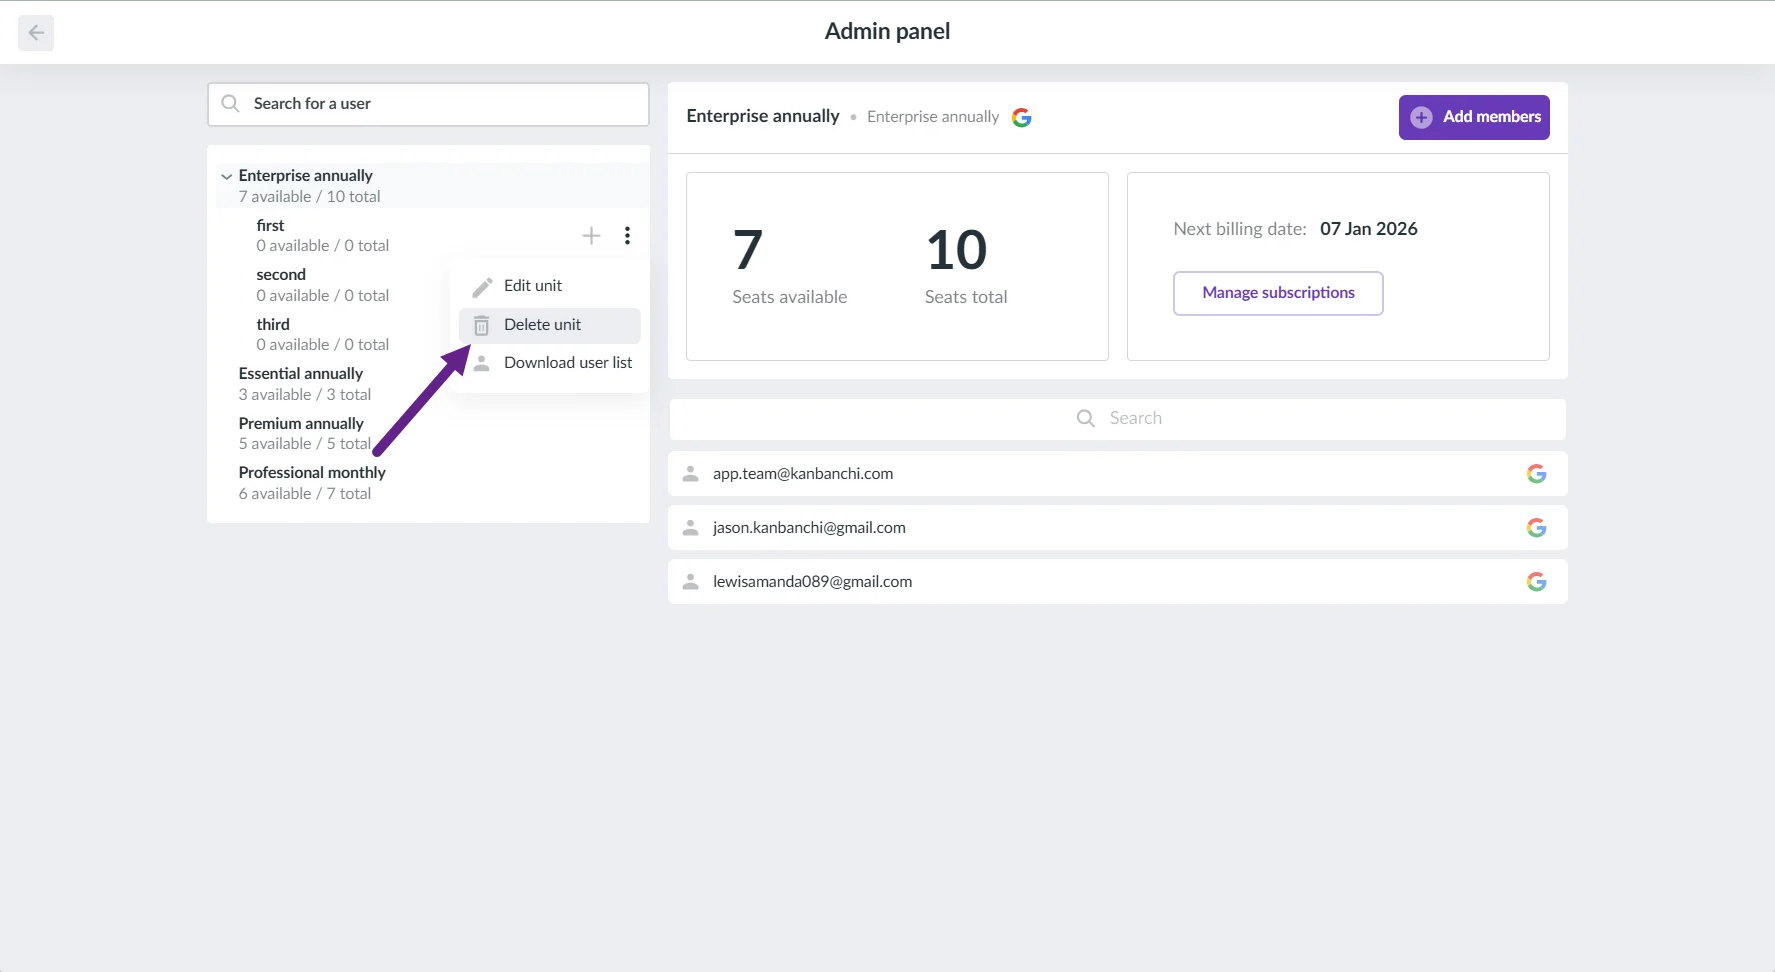
To add an extra admin to a subscription, open the Admin panel, choose the subscription, click the three-dots icon, and choose Edit unit.
Please note that subunit admins cannot add/change admins. You may contact the subscription's super admins and ask them to add additional admins to the subunit. If you would like to set everything up on your own, you can create a subunit and add more admins.
You will see a pop-up window. Type the email of the additional admin in the Admins field and click Add. This will activate the Save button. Click it to confirm the changes.
I don't need admin rights anymore. What should I do?
Please make sure the subscription has another user as an admin. Ask the user to delete your account from the list.
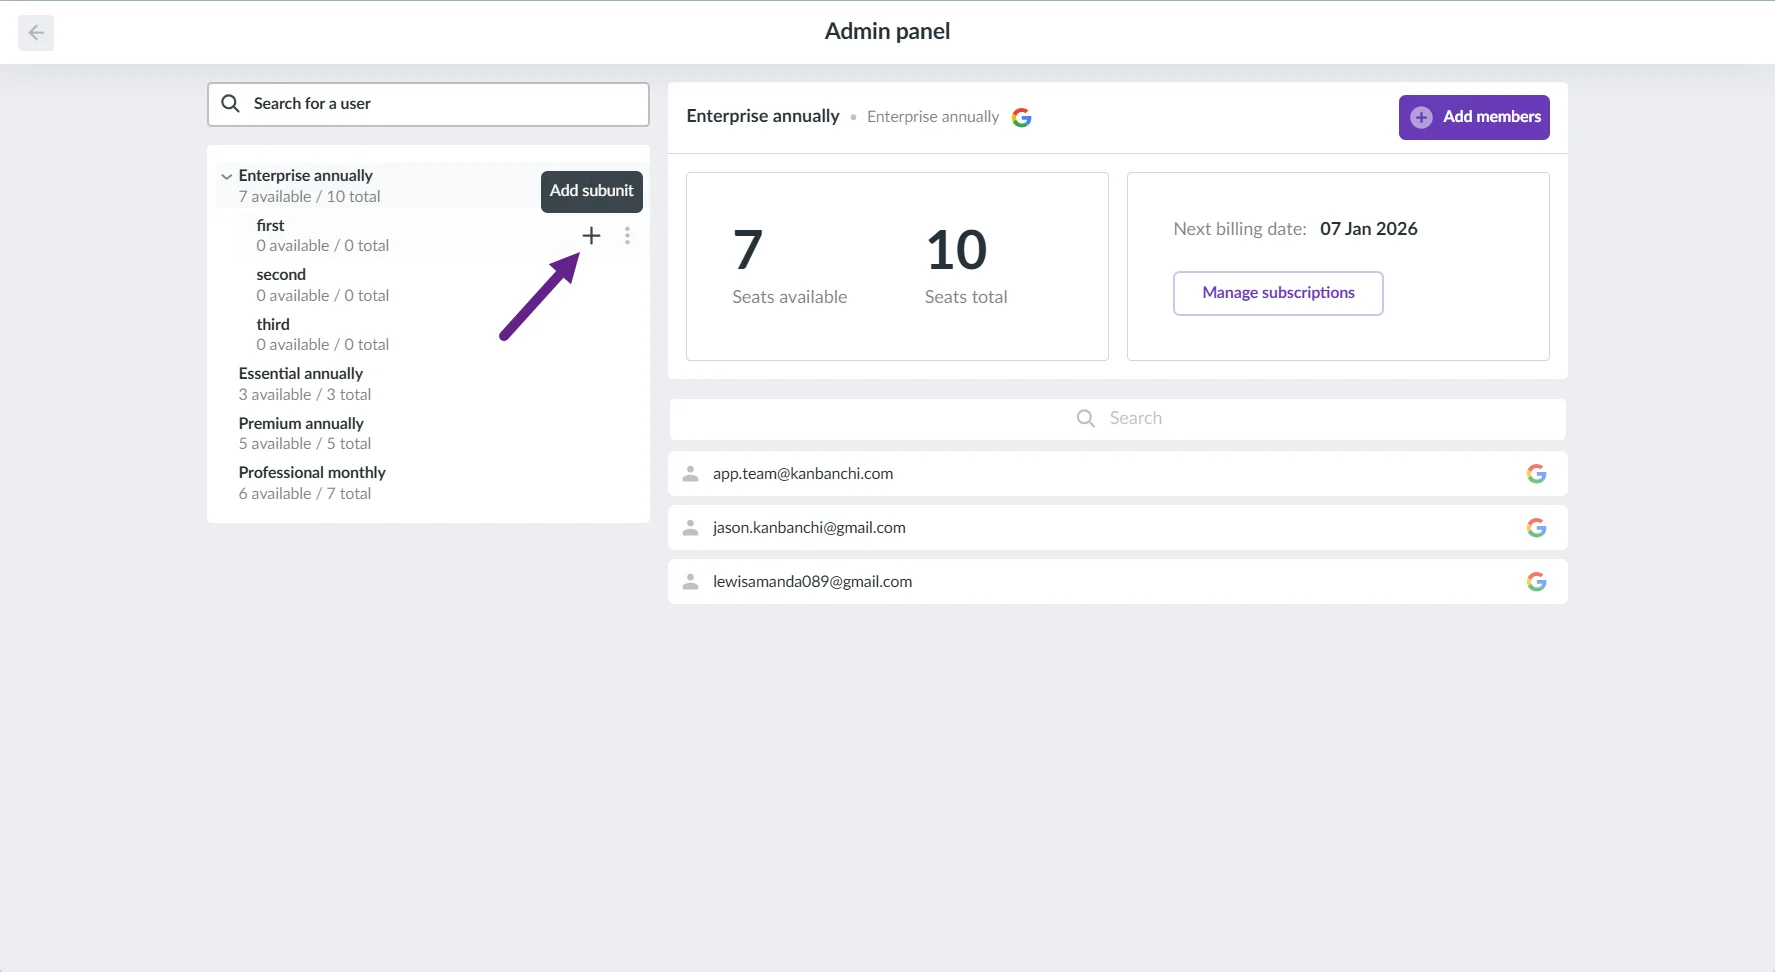
How to add subunits to the subscription?
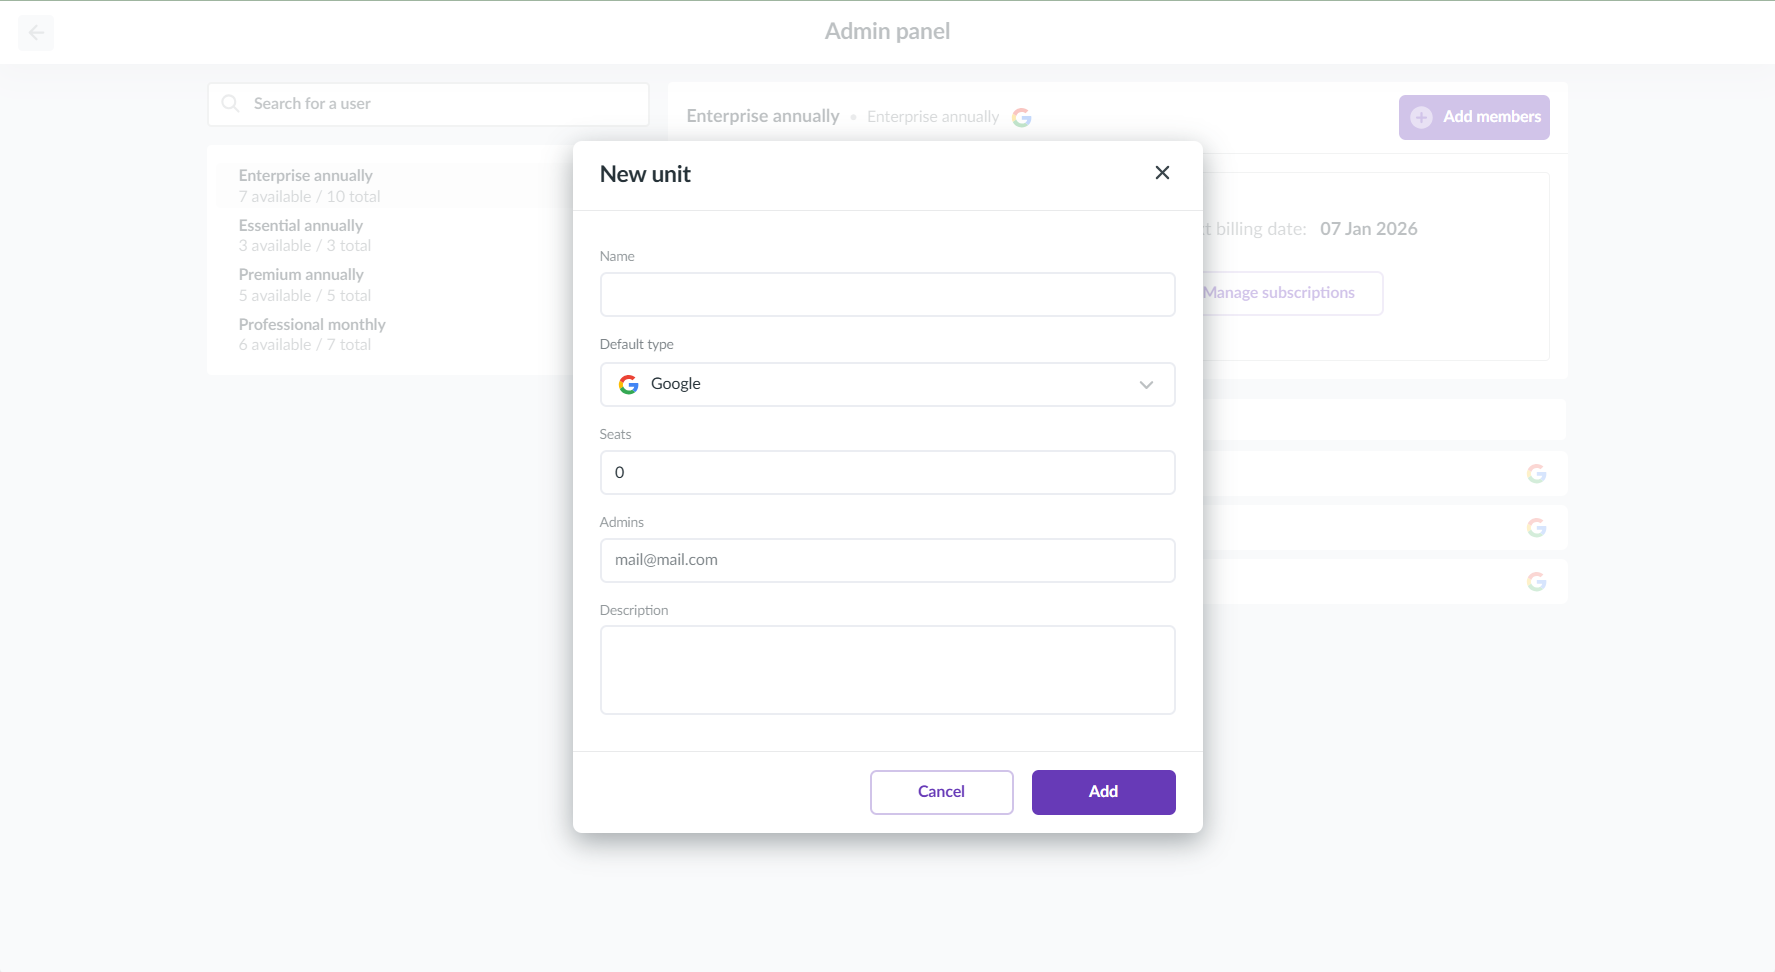
To add a subunit to a subscription, open the Admin panel, choose the subscription, and click the plus button.
Type in the name and number of seats for the new subunit. You may also add admins and a description. Then click the Add button to save the changes.
Each subunit may have its own subunits. Just click the plusbutton on the right to add them.
You may also edit or delete a subunit. To do it, click the three-dots icon on the right and choose the desired action.
How to add seats to the subscription?
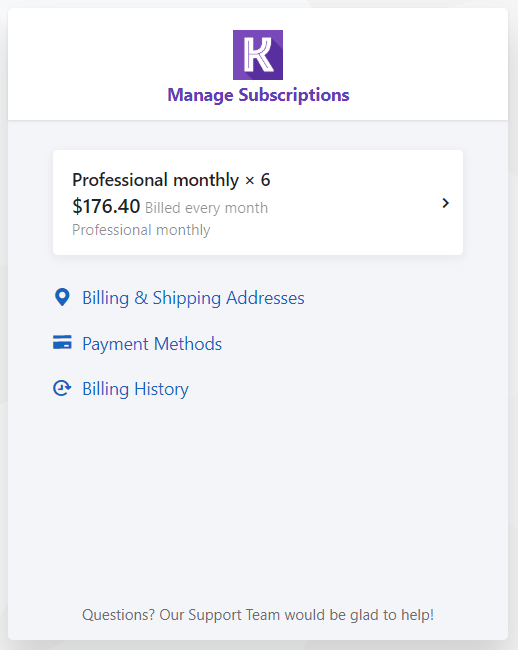
If you would like to add seats to the subscription, click Manage Subscription. The Customer Portal is open.
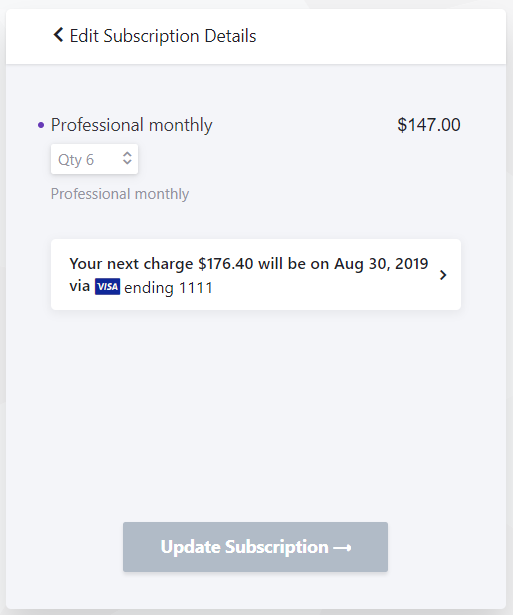
Click on the subscription information (e.g., Professional monthly x 6).
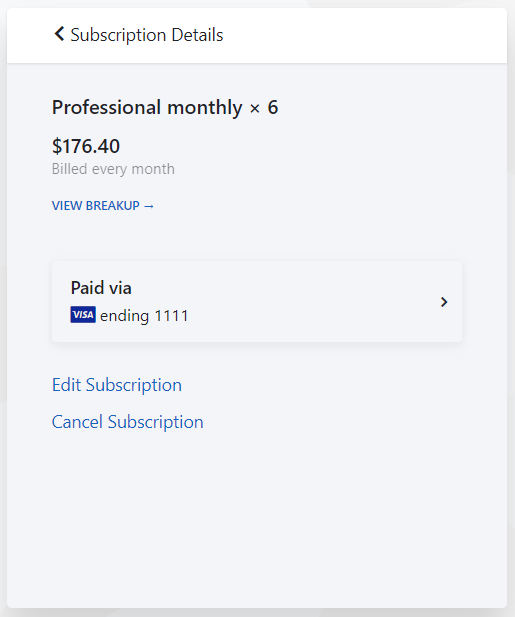
Click Edit Subscription. You see the number of seats available in the subscription now.
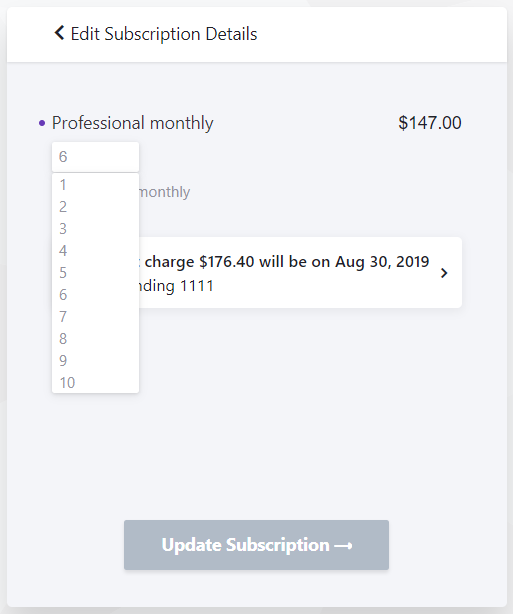
Click the button to change the number of seats. Please note that if the number is more than 10, you should enter it manually.
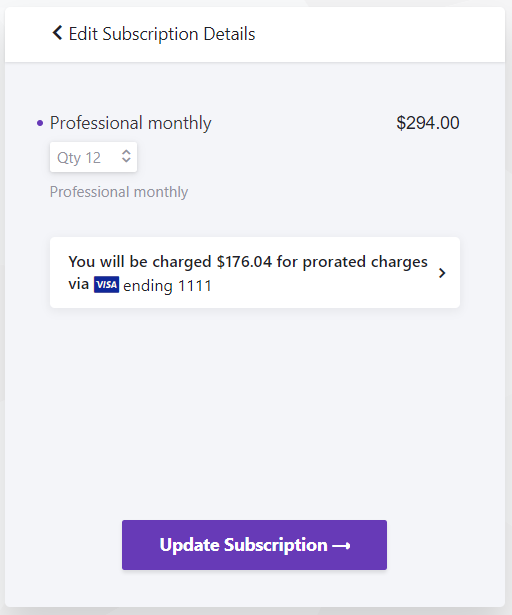
Click Update Subscription.
You may reduce the number of seats in the same way.
Please note: if the Kanbanchi team created your subscription, you should add billing details and a payment method to the account first.
7. How to create recurring tasks (cards) in Kanbanchi?
If you have tasks that repeat regularly, you can automate the process of creating cards for these tasks. Such cards that will be re-created according to the rule you set are called recurring cards. To create a recurring card, open the card with the task you want to repeat regularly. Click the three dots in the actions menu, then choose Make recurring. Then select the date it should start repeating, and set the repeating rule.
To view the list of all recurring cards, edit or delete them, click on the board title (or three dots next to the title), and choose Recurring cards.
You will see a panel with all your recurring cards, and you will be able to create them from scratch - just set the rules and give your recurring tasks names.
9. How can I use Kanbanchi on a mobile device? Is there a mobile app?
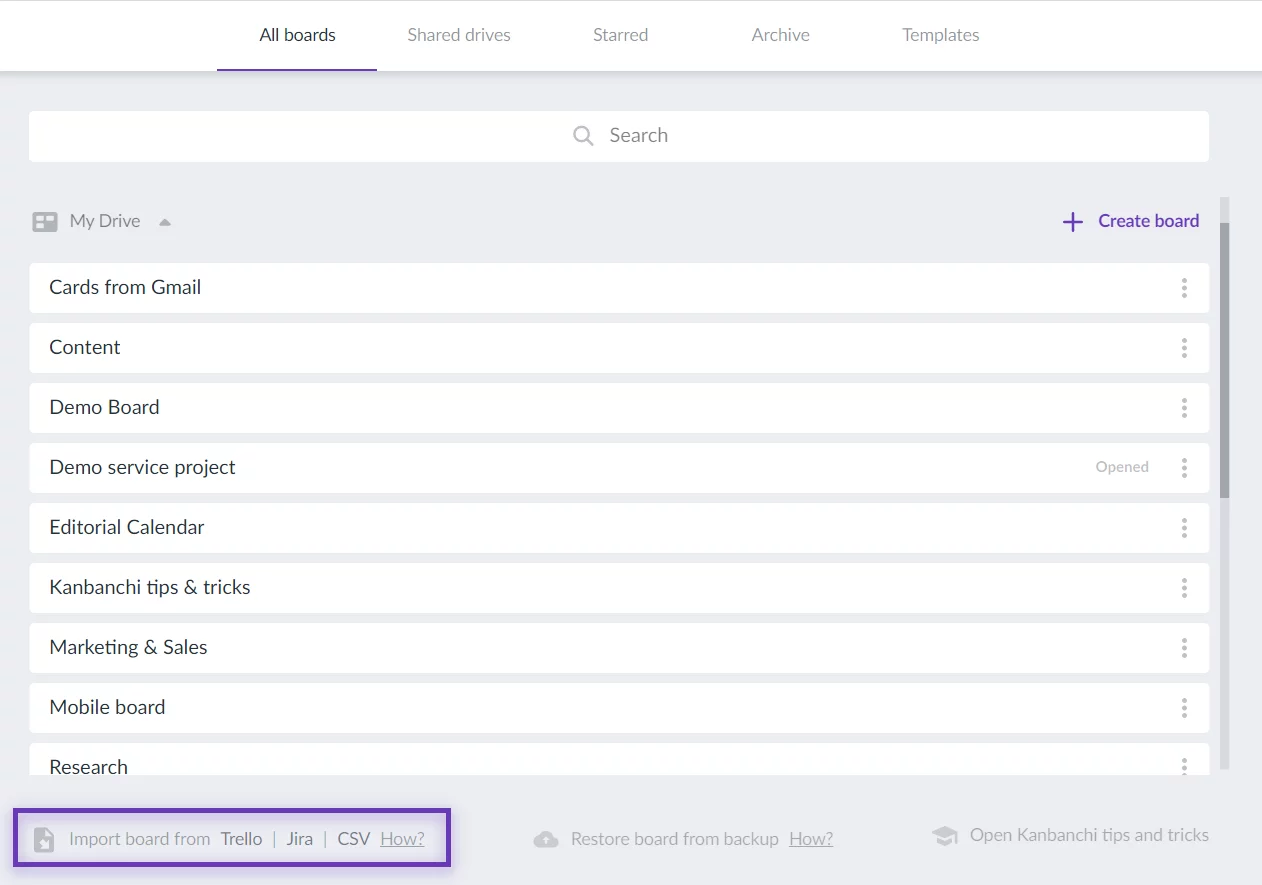
If you're looking for Kanbanchi mobile app then you will be interested in several options of how you may use Kanbanchi on your mobile device:
Any mobile browser. Just open app.kanbanhi.com and use it the same way you do it on your PC. Allows you to start working as well as to evaluate Kanbanchi during a piloting period.
Install a separate web-based app on your mobile phone. This is a more proficient way of using the app on your phone/tablet. it gives you more opportunities and control over the app on your mobile device.
Separate Kanbanchi app on mobile devices
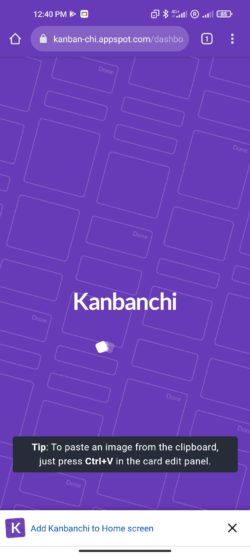
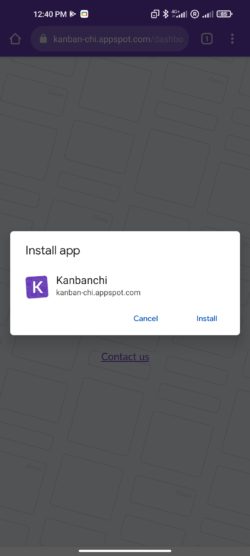
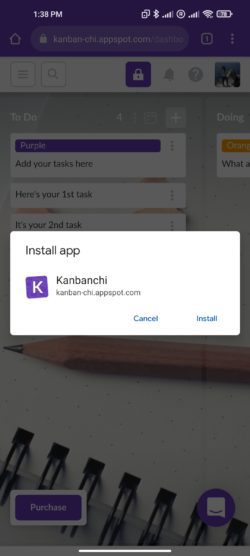
We do care about your Kanbanchi experience on mobile devices. Currently, you are able to install Kanbanchi as a separate app on your mobile device. First of all, if you haven't yet done it, the app itself will suggest this option to you whenever you try to log in from your mobile browser. You will see the suggestion to add Kanbanchi to your Home screen. Choose this option and then choose to Install the app.
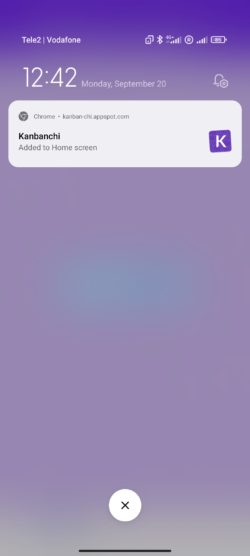
When the installation is completed, your phone should send a notification, and also you will see the Kanbanchi app among your apps. You may change its location as any other app on your mobile phone.
*What if I missed or declined Kanbanchi's suggestion to add itself to my Home screen?
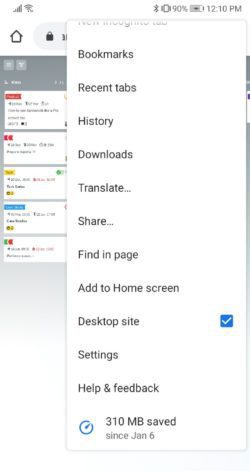
You may install the Kanbanchi app at any time. Whenever you want to do it, please, log in to Kanbanchi in your mobile browser and tap on a three-dot sign in the upper right corner. From the list of actions, please, choose Install app and then confirm that you want to perform this action. Kanbanchi app will appear among your other apps on your mobile device.
Using Kanbanchi in a mobile browser
All you need to do is open Kanbanchi in a mobile browser. Quick access from the home screen can be configured in most browsers. Just open browser settings and choose “Add to home screen”. You will see the Kanbanchi icon on the home screen. Additionally, you may switch from the mobile version to the desktop one in case you need a bigger visual. To switch, open browser settings and check in the checkbox beside the “Desktop site” option.
Please, don’t hesitate to contact us and share what's your preferred way of using Kanbanchi and why. Your feedback is the most important thing that can help us make a better app.
10. How can I automate my workflow with Kanbanchi?
To automate your workflow you may use the following Kanbanchi features:
Board templates: you may choose one of the defaults Kanbanchi templates to adopt the app easily and start project planning right away. Additionally, you may save an existing board as a template and use the same structure for another department.
Card templates: in case most of your cards are of the same structure, you may use card templates and perform fewer actions while setting your board up.
Recurring cards: tasks of recurring nature are common for most types of workflows. Set up the schedule and parameters and Kanbanchi will create the cards for you.
Dependency chain shift on the Gantt chart: you may change dates for the group of dependent tasks at once.
Card progress automation: depending on the status of a card, it will be put into a specific list of your board or the other way round, when you move a card to a specific list, it will merked as done.