FAQ - Boards
- 1. How do you make a Kanban board?
Kanban is a popular, easy to use lean management system. Its help in visualizing a team’s workflow difficult to overestimate. Thus, a Kanban board may help your team to improve general task efficiency and show better results as a team. To make a Kanban board, first, you need to choose a tool.
Initially, the kanban board was a physical tool. However, lately, the typical workplace has changed greatly: remote work grows more popular and teams might be spread not only between cities but even between continents. The main advantage of digital boards is that you can work with them anywhere with a Wi-Fi connection. It makes them an ideal solution essential for remote teams.
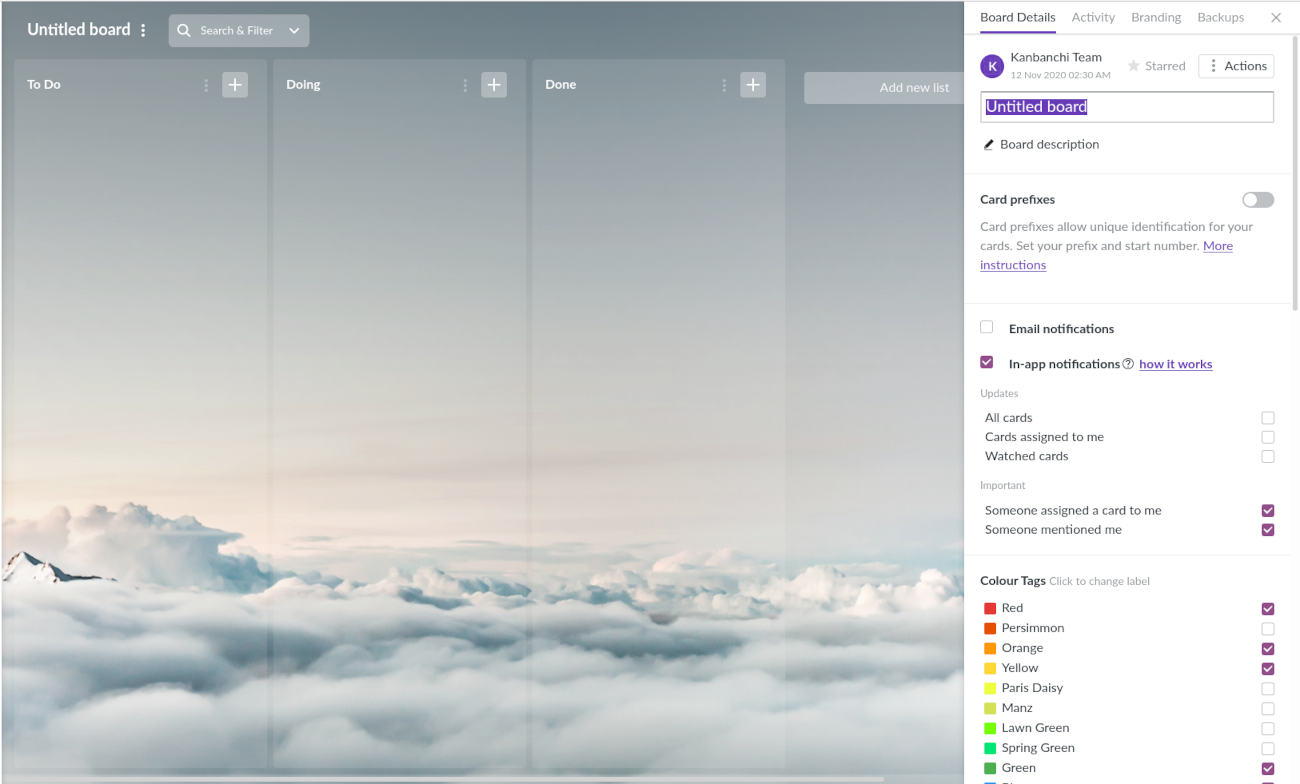
There are quite a lot of digital kanban boards nowadays, which makes it much more difficult to choose the right one. However, we advise you not to waste time and opt for Kanbanchi. Kanbanchi is not just a kanban board, it is a complete project manager app fully integrated with Google Workspace. So you need only to sign in with your Google account and accept permission requests the App asks for on the Google Authorization screen. At first, your board will look like this:

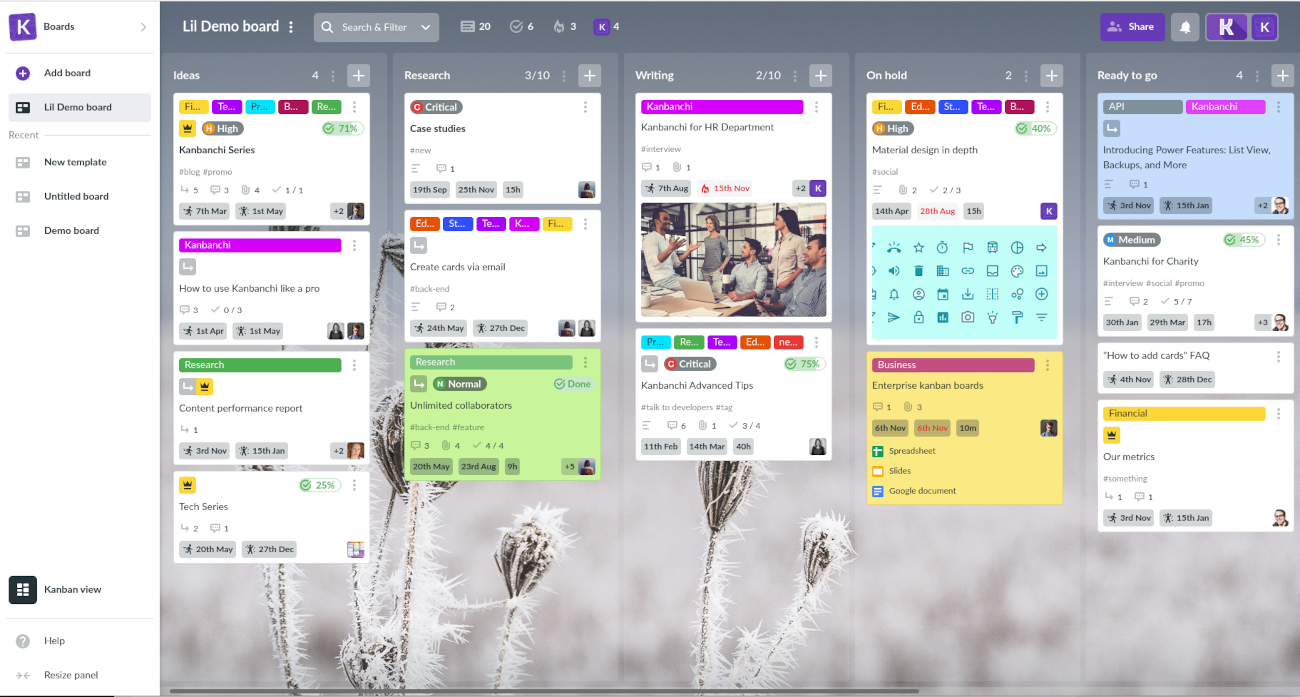
Now it's time for the fun part: you just need to map your workflow process. Think it over to configure properly. The Kanban method assumes that lists on your board should reflect the stages of your workflow. Your working process can include as many stages, as you need.
When you are done with it, start to fill up your board with cards. Each card on the Kanban board represents a task. You can use colour-code to identify the types of your tasks depending on the type of work you do. You may also use other card features for easy visibility.

Start your free trial More - 2. How to make my board a template?
You can create templates from any of your existing boards.
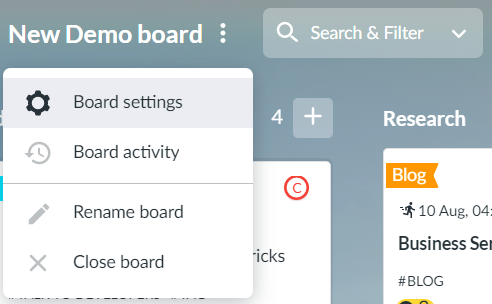
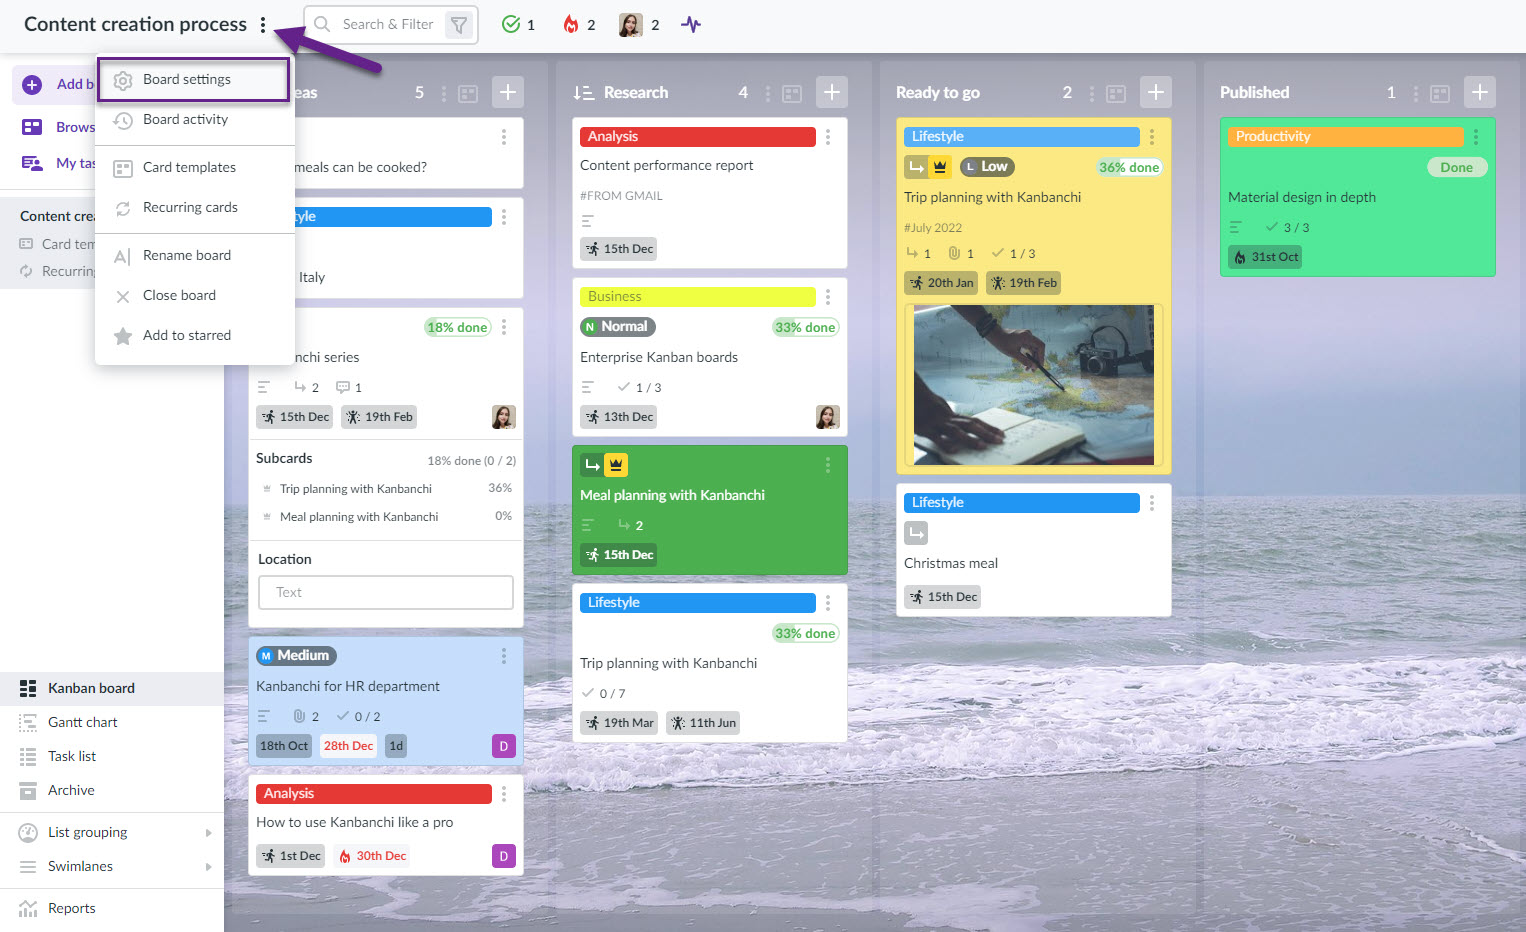
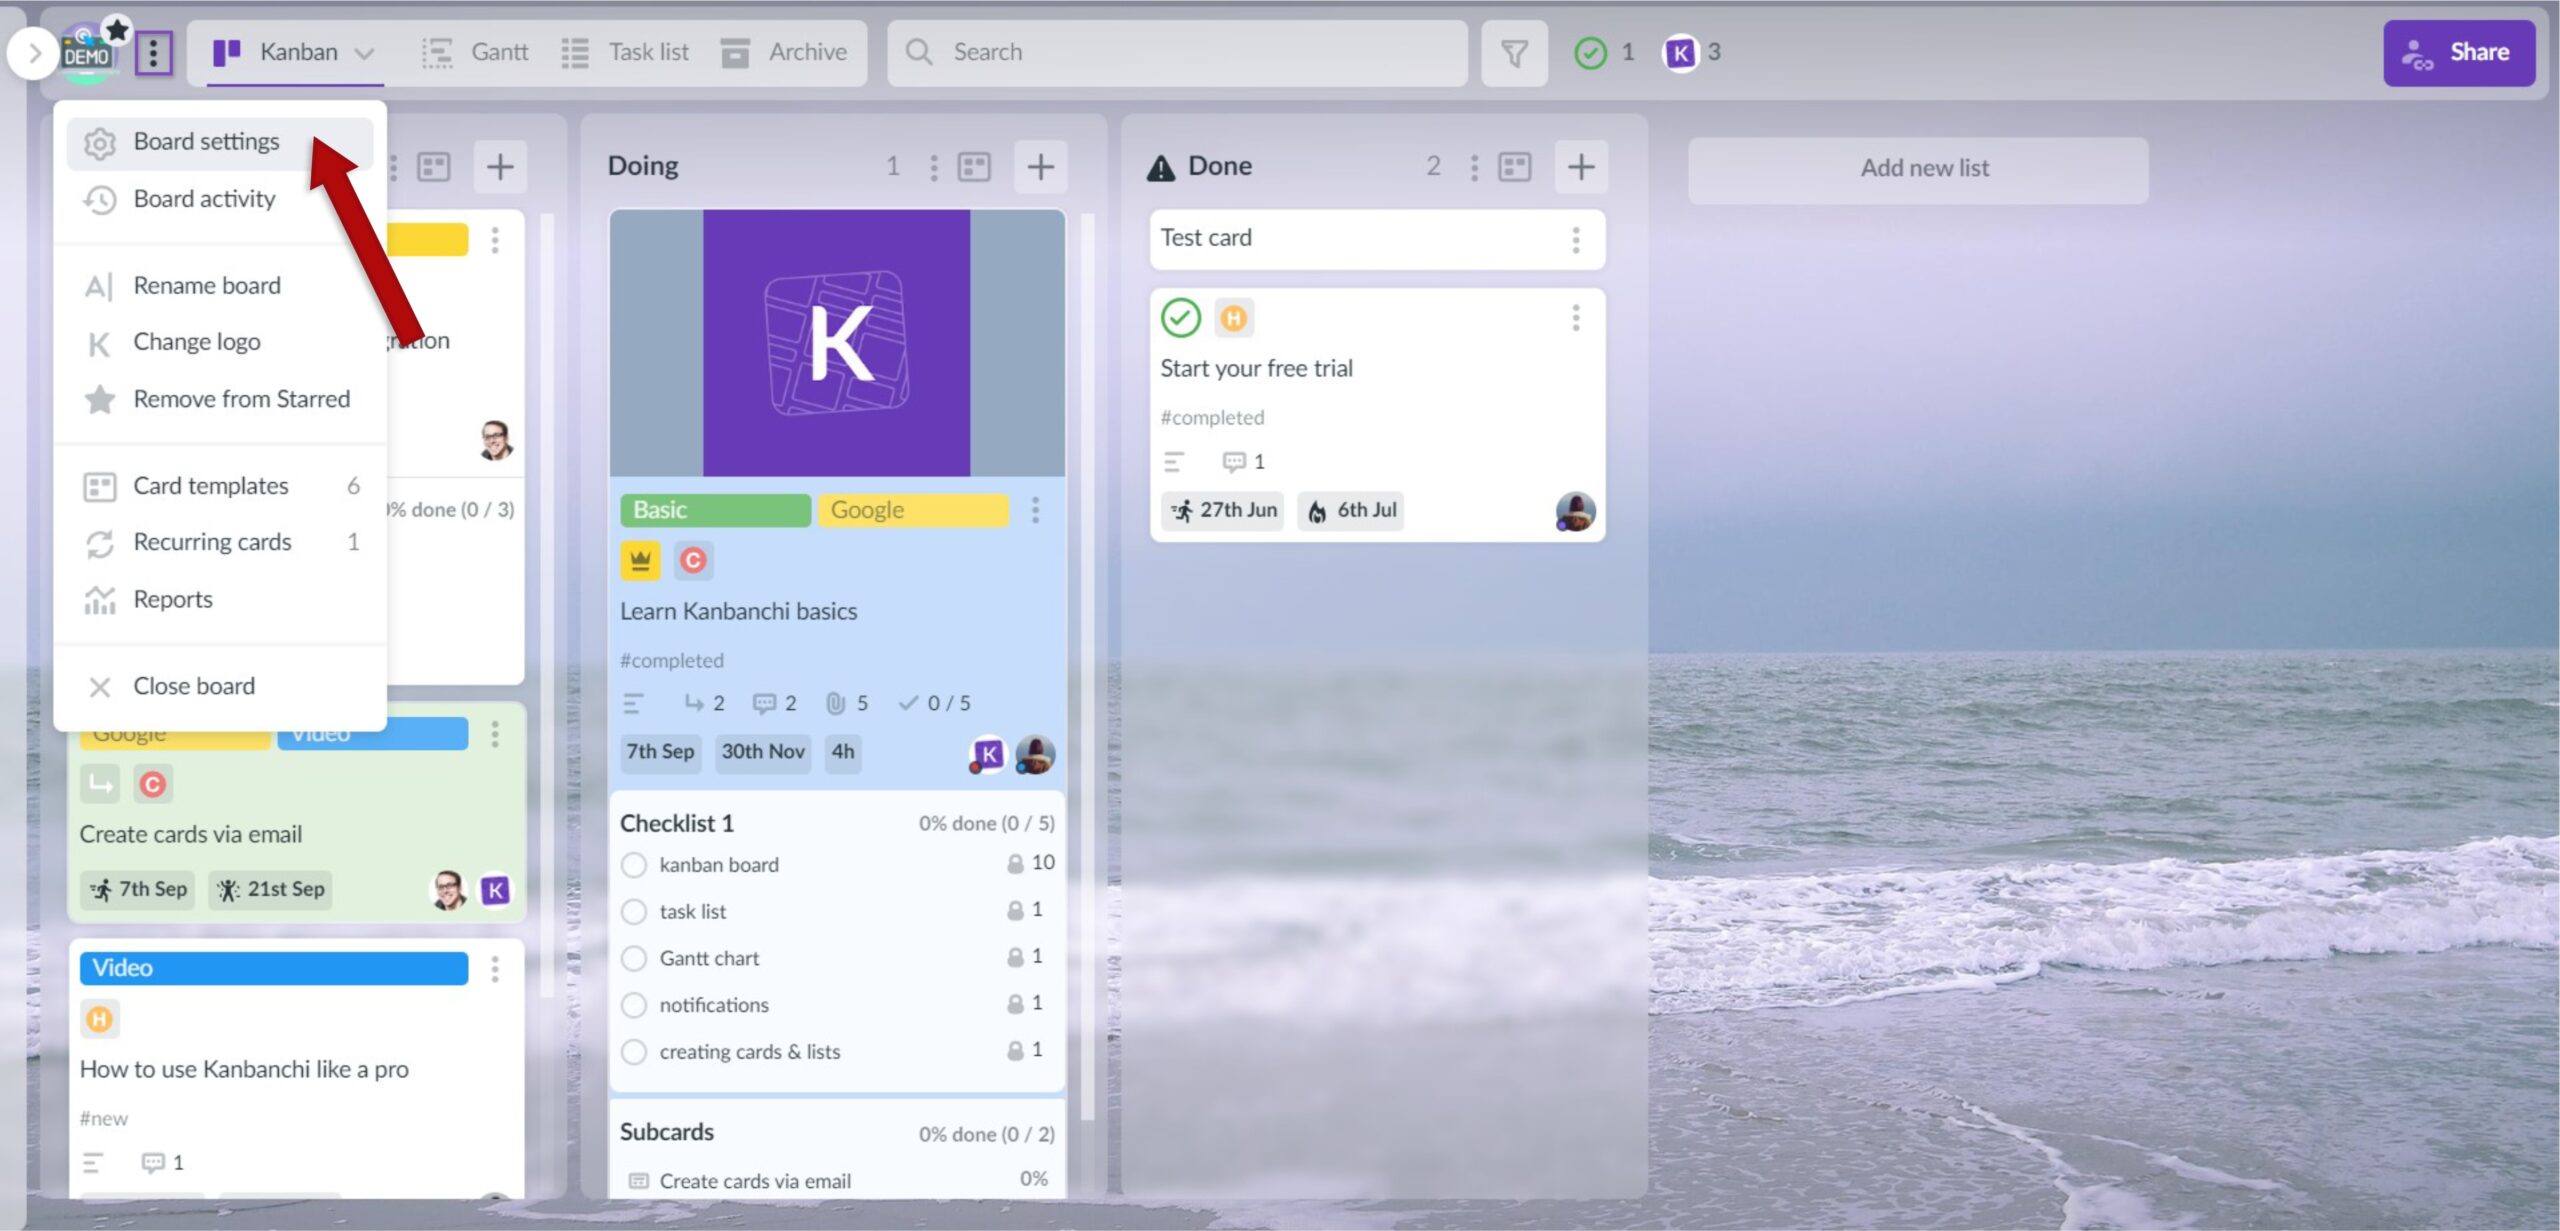
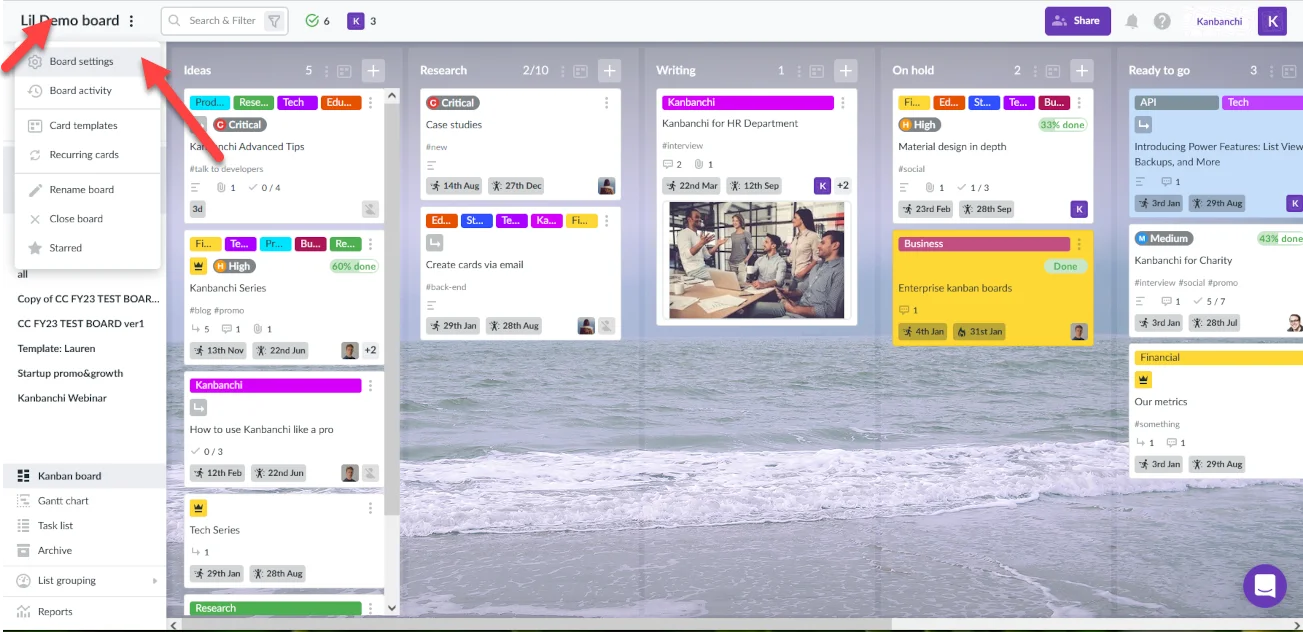
Go to the board settings by clicking on the board’s name in the upper left corner of the screen and choosing Board settings in the drop-down menu.

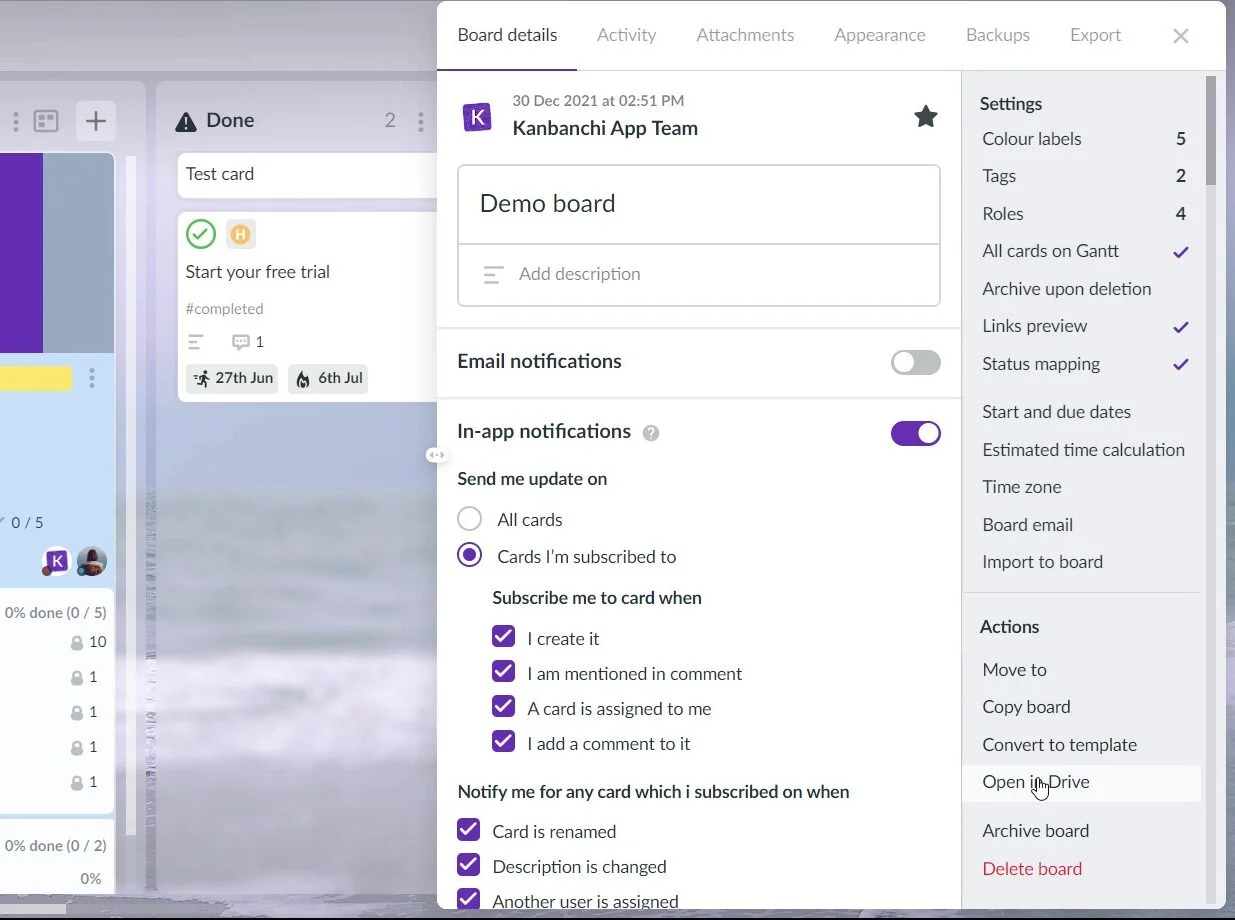
The panel on the right of your screen will open. Find the Actions section in the lower right corner of the panel and click Convert to template.
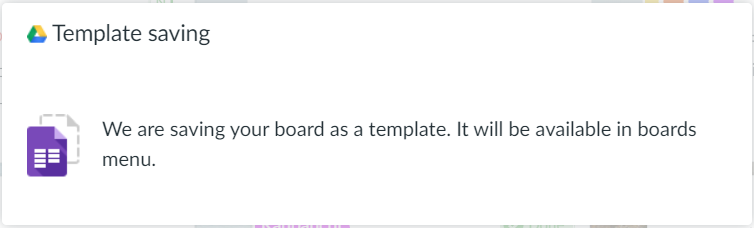
You will see a pop-up window saying that a template is being created.

You will see the templated opened as a new board. You may make edits and they will be saved automatically.
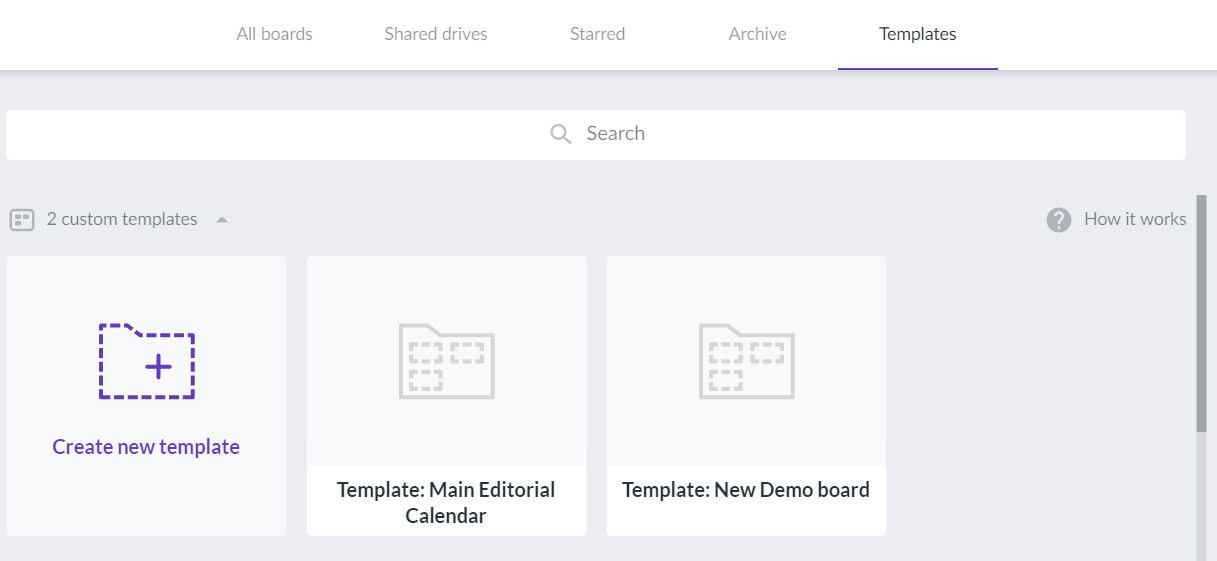
Whenever you need to create a board from this template, you will be able to find it in the Templates tab.

More - 3. How do I switch from 24-hour clock to 12-hour clock?
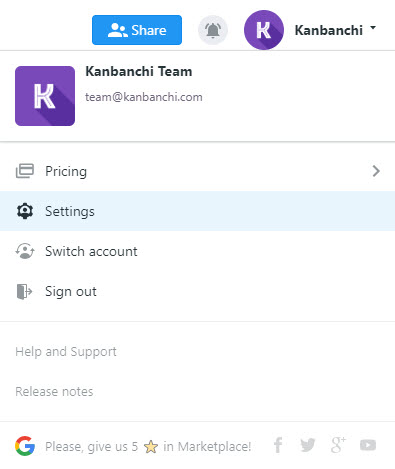
To switch from or to 12-hour clock, please, open your user settings

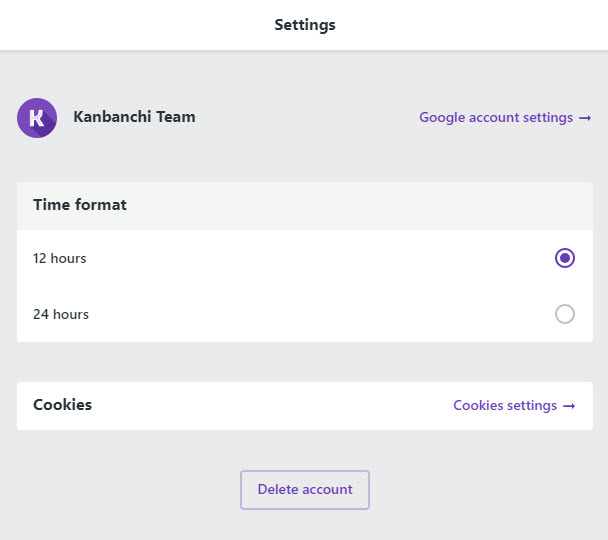
In the opened window, choose the desired time format
More - 4. Is there a way to change the owner of a board? Or can we have more than one owner of a board?
There can be only one owner of a board. The sharing settings in Kanbanchi are provided by Google Drive. Unfortunately, Google Drive does not allow more than one owner.
Within Google Workspace / G Suite domain, Google Workspace / G Suite Admin can move ownership of all files, including Kanbanchi boards, to other members of the organisation. This option is very useful when one user leaves, and another comes in his place.
The board owner can transfer ownership to another user by clicking Share in the app or within Google Drive.
Note: ownership can only be transferred to another user in the same domain as the current owner.
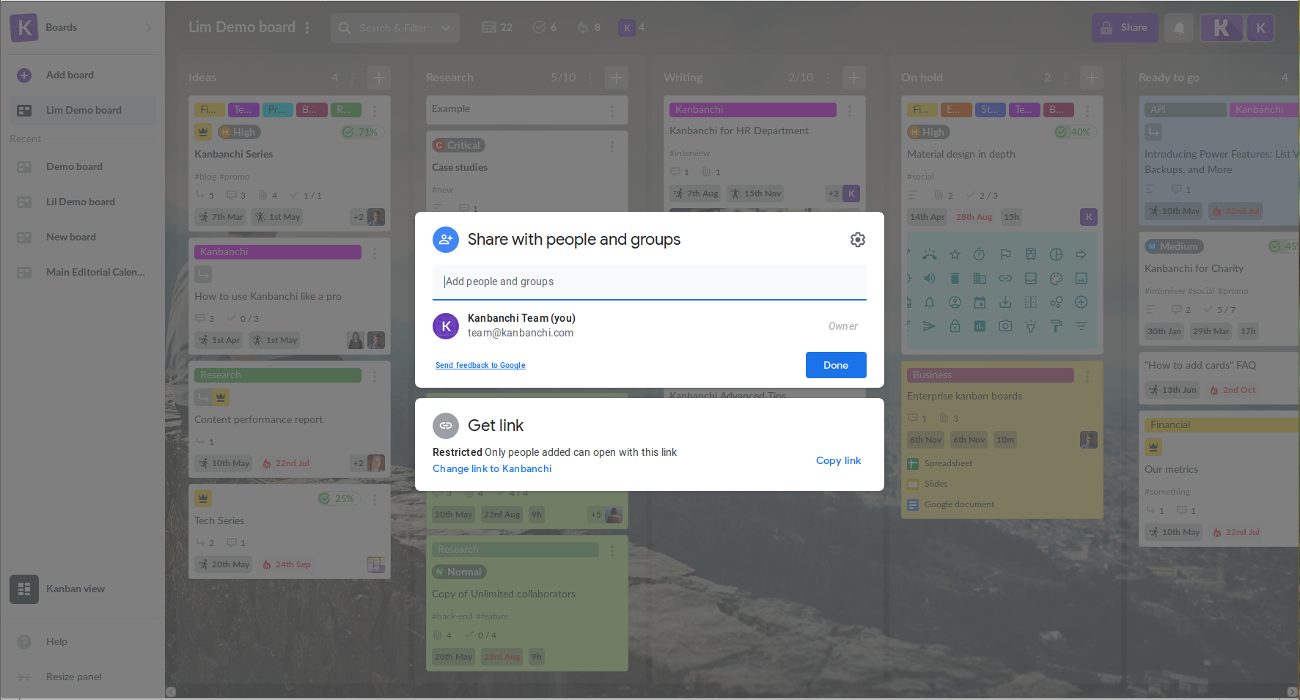
Click the Share button on the top panel on the right and the "Share with people and groups" window will appear.

Start entering the new owner’s email in the "Add people and groups" line. Then choose the email and click Send.

The user will appear in the list of those who have access to the board.

Click on "Editor" on the right from the new user and choose Make owner from the drop-down list.
Confirm the transferring by clicking Yes in the "Make this person the owner?" pop-up window and the owner will be changed.
In order to transfer ownership within Google Drive find the folder containing the board file. Click on it with the right mouse button. Choose Share in the pop-up window. Repeat the actions that are described above.
We advise waiting a couple of minutes (up to 10) to make sure the transfer is completed. You may also check if the transfer has been completed by visiting the board. Open the Board setting panel. The new owner's name should appear in Board details.
Personal users (gmail.com) cannot pass ownership of their boards to other users (unlike with Docs and Sheets). A quick workaround would be to share the board with a colleague, who you want to see as the owner. Then the colleague should сopy your board into his or her Google Drive, thus becoming the owner of this copied board. All settings will be copied, excluding comments, sharing settings, notifications and dates in Google Calendar. Permissions of attached files also must be checked, because original files belong to you and are placed in your Google Drive.
More - 5. How can I use Kanbanchi Add-on for Gmail?
Kanbanchi for Gmail Add-on makes your team’s collaboration even easier. It keeps your inbox and boards connected to boost your productivity. Users with the installed Add-on have an opportunity to convert emails into Kanbanchi cards.
How can I install Kanbanchi for Gmail add-on?
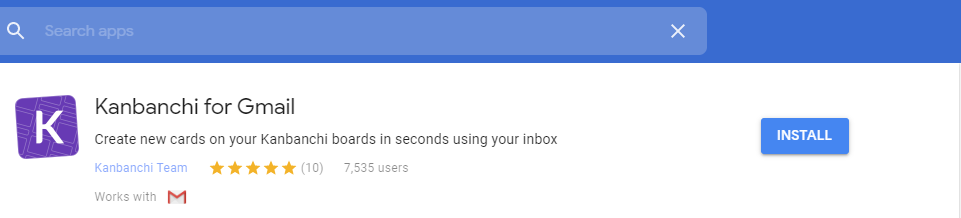
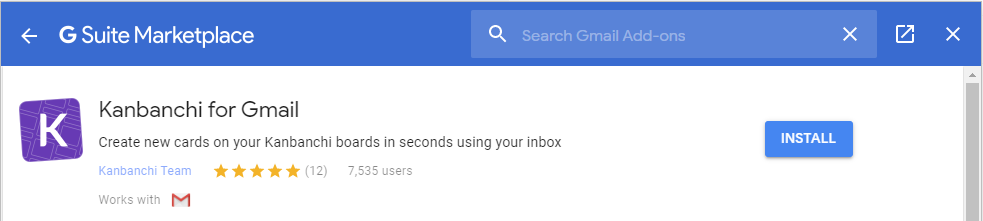
You may install Kanbanchi for Gmail from GSuite Marketplace.
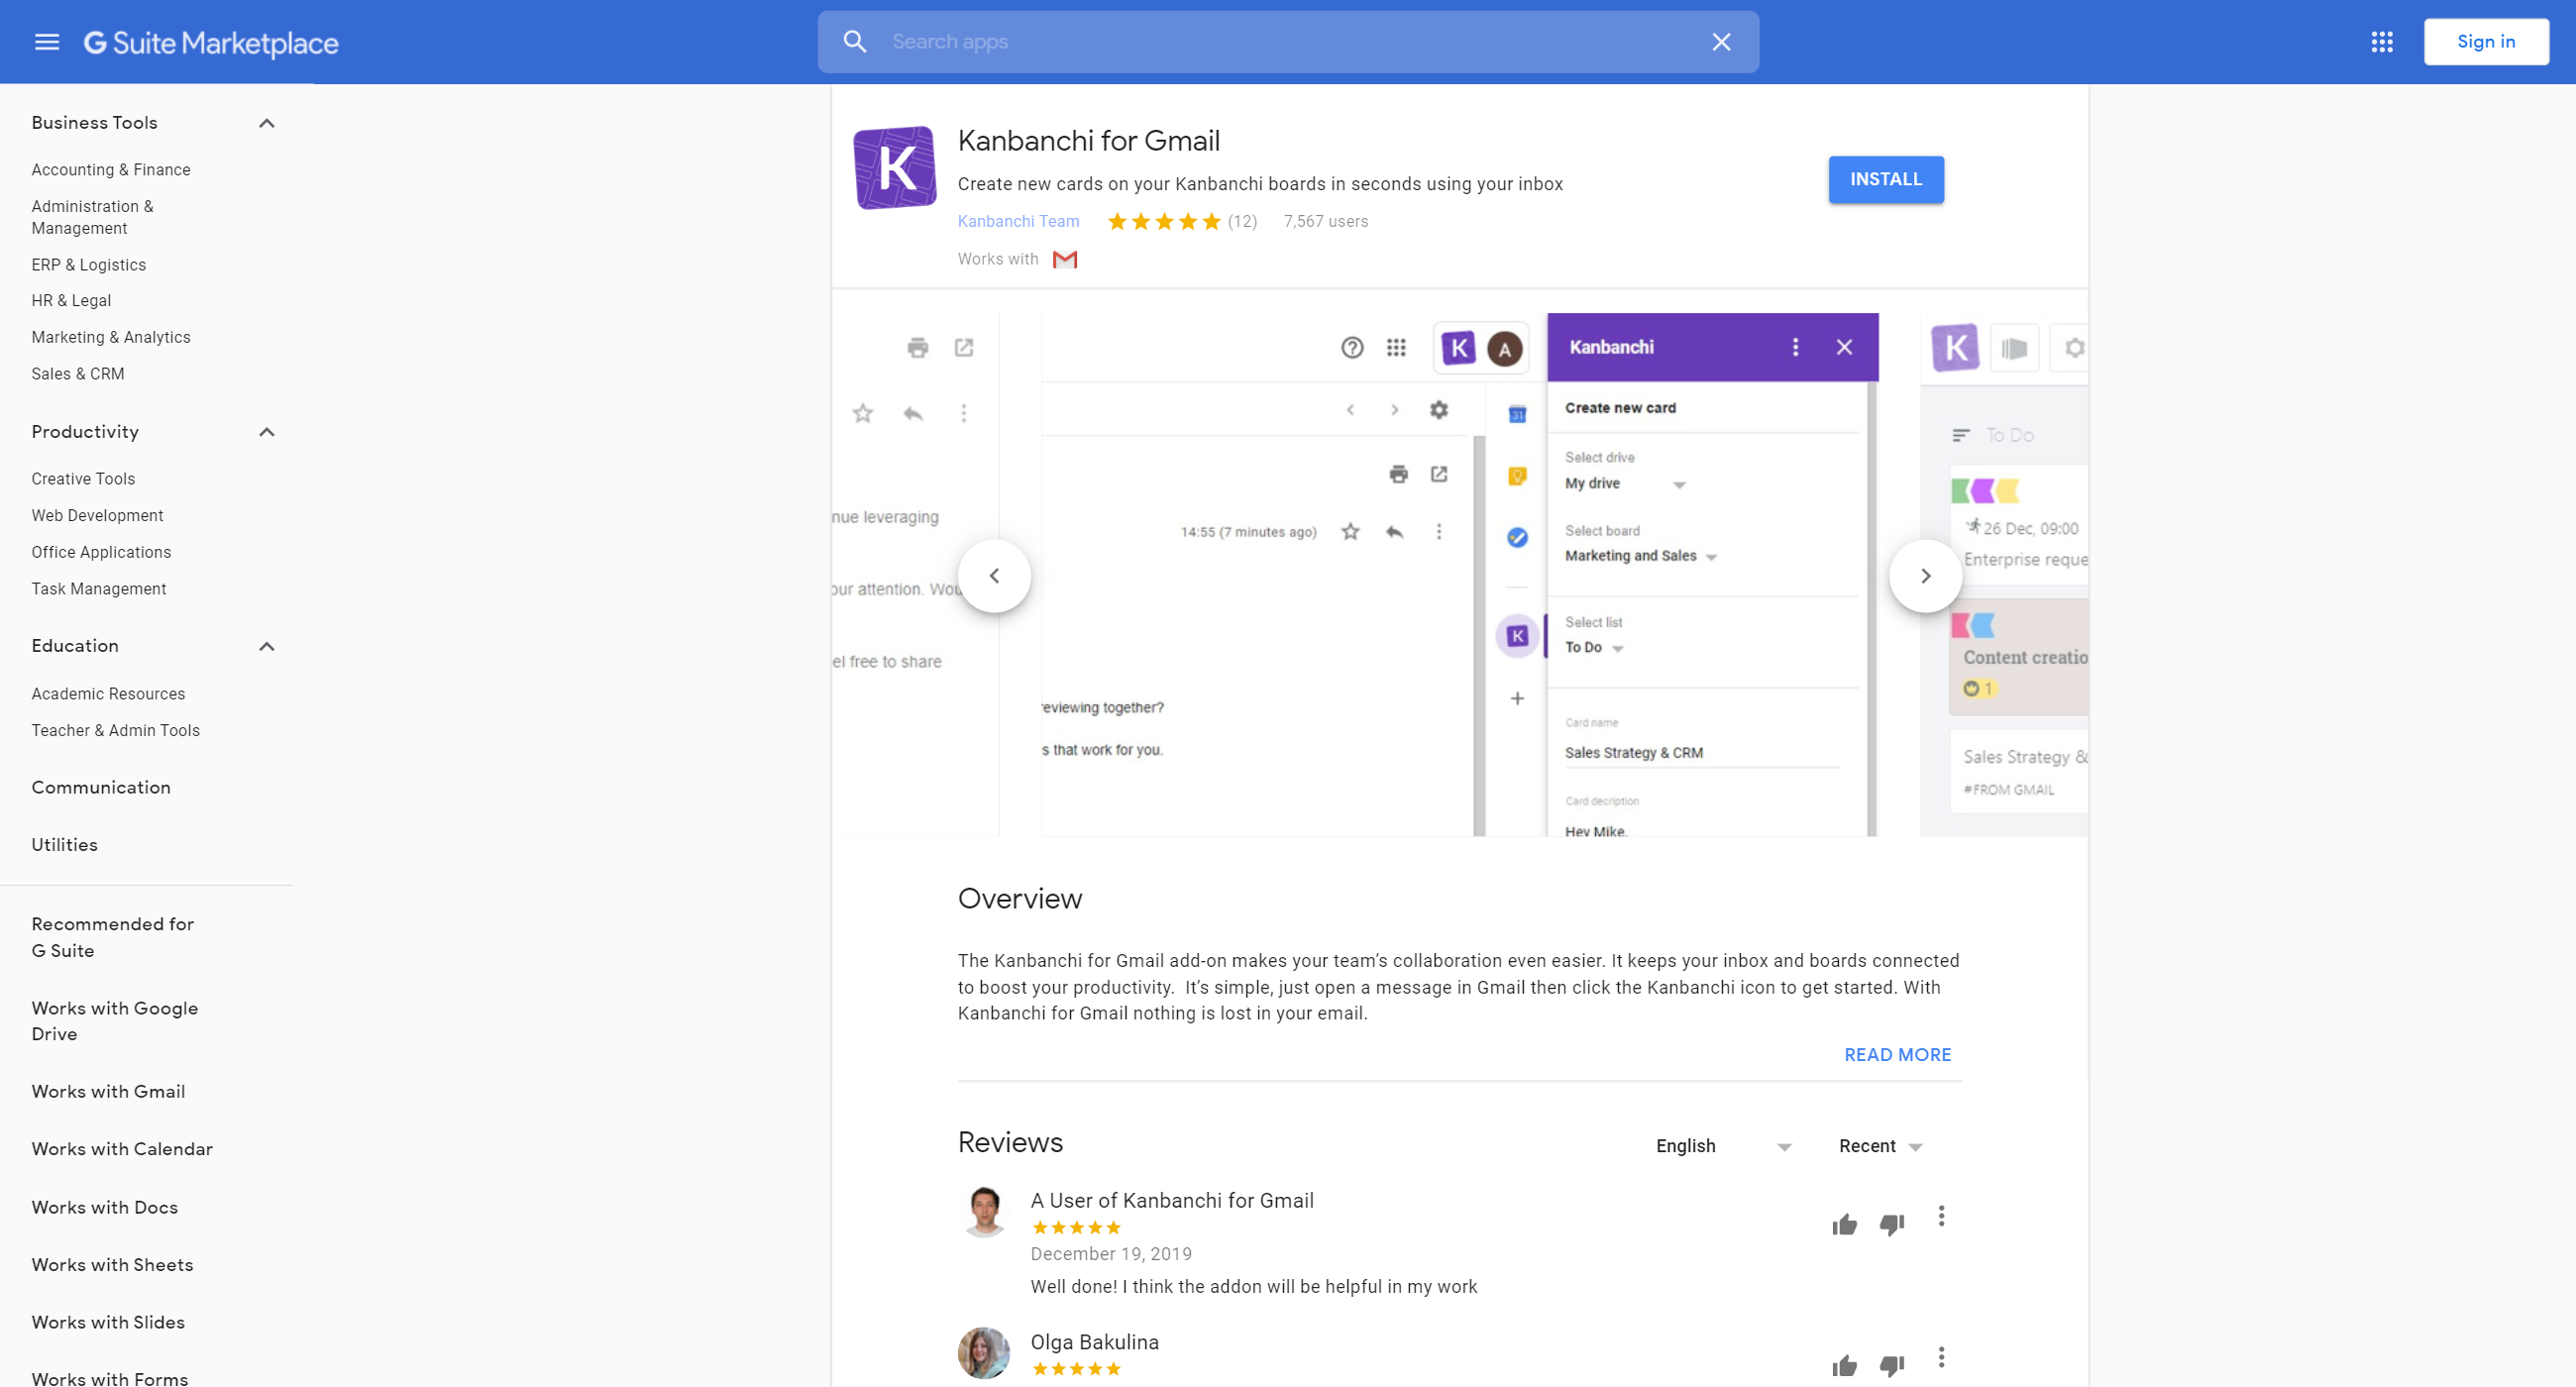
You should be logged in to your Google account to install the add-on. Click Install.

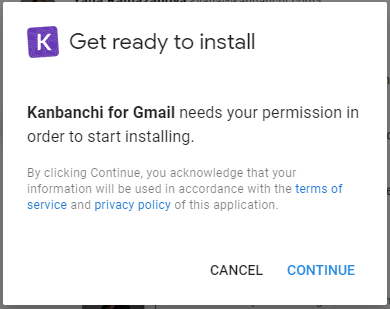
You will see the pop-up window. Click Continue.

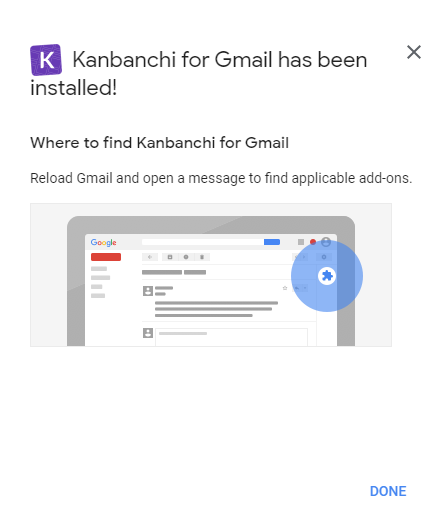
When the Add-on is installed you will see the confirmation message. Click Done.

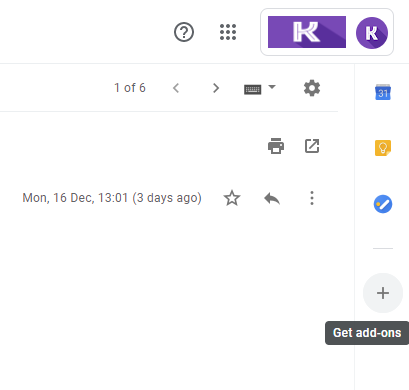
Also, it is possible to install the addon directly from your inbox. Click the Plus icon on the right-side panel.

Find Kanbanchi for Gmail in the list of GSuite Marketplace add-ons. Choose Kanbanchi and click Install. You will be taken through the same steps described above.

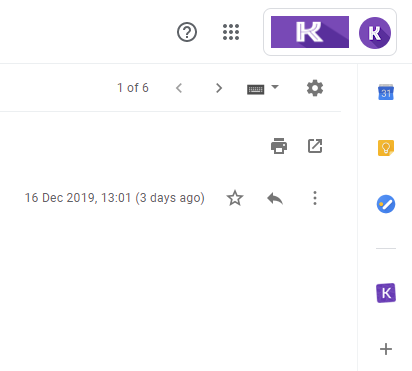
Once the Add-on is installed, Kanbanchi icon will appear in the right-side panel.

How can I create cards from Gmail with Kanbanchi for Gmail add-on?
Once the Add-on is installed, you may start using it.
Open an email. Click Kanbanchi icon on the right-side panel.
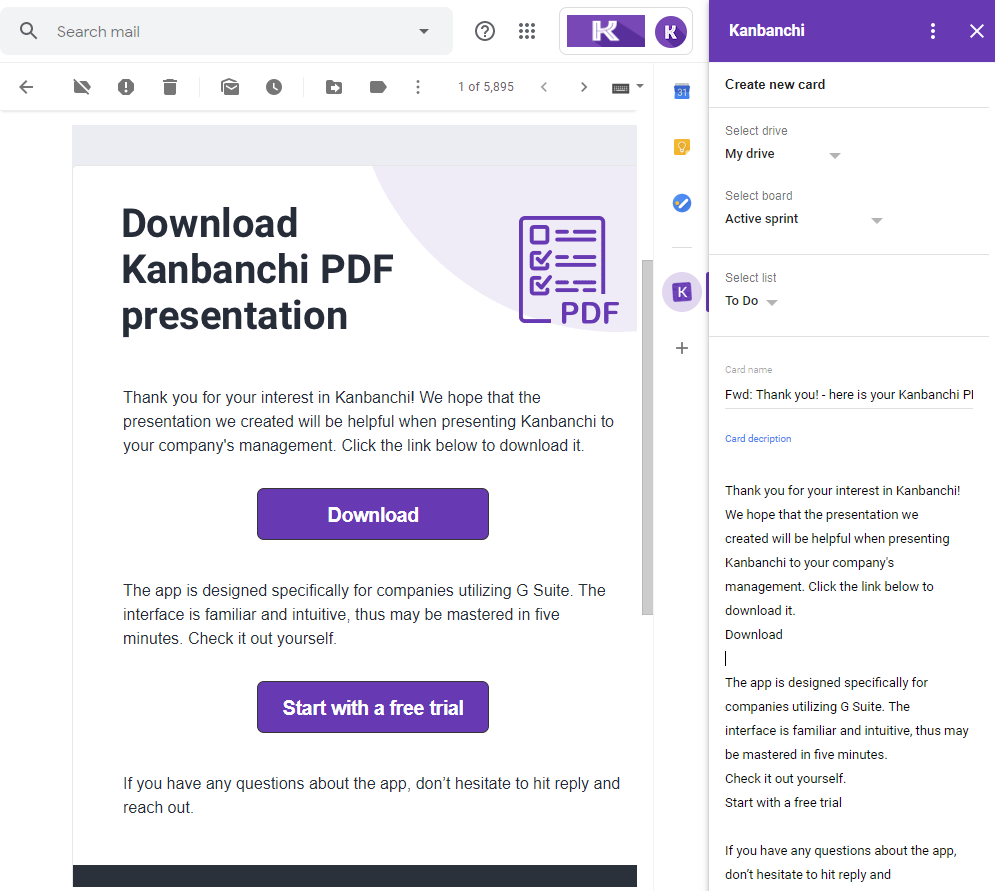

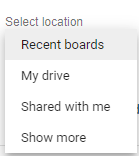
Select board location. Selecting Recent boards you will see the same list of boards you see in the Recent board section in Kanbanchi.

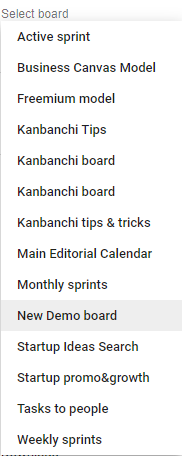
Select board (templates, archive and Read-only boards won't show).

Select list.


Edit the content if needed.
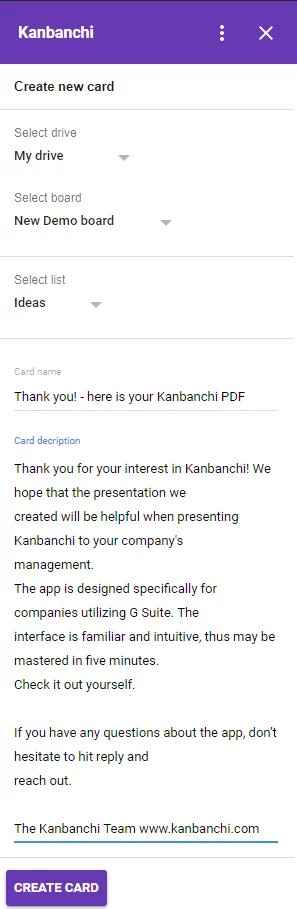

Click Create card.

The subject will be displayed as the card title and the email body will be added as the card description automatically. You may edit the content if needed.
What will happen if I install the addon without having Kanbanchi account?
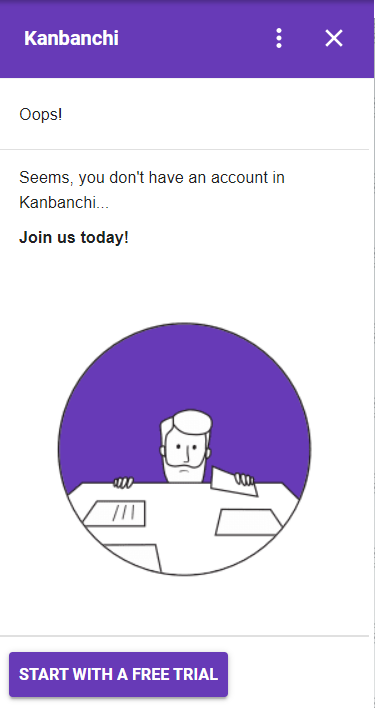
While trying to create a card from Gmail you will be informed that no Kanbanchi account has been found for the email. You may start using Kanbanchi app by just clicking Start with a free trial.

Known issues
“Content not available for this message.”
The issue occurs on Google’s side. Unfortunately, there is no walkaround that the developer can apply.
“Add-on error. Something went wrong when executing the Add-on.”
Please, contact us if you’ve met the issue.
How can I uninstall the Add-on?
In case you don’t need the Add-on anymore you may uninstall it. Go to Manage Apps in the G Suite Marketplace, click on the three-dotted menu and click "Remove". Also, you may uninstall the Add-on in the Gmail settings. Click the nut icon and choose Setting in the drop-down menu. Open the Add-ons tab. You will see Kanbanchi in the list of installed add-ons. Click Manage. You will see the Add-on in GSuite Marketplace. Click Uninstall.
More - 6. How can I create boards within Shared Drives?
It is possible to create boards not only in My Drive but in Shared drives to organize the workflow of your team and make it even easier.
Click Browse boards, and choose Shared drives. You will be asked to give permissions to integrate Kanbanchi with your Shared Drives and create boards in any of them (once).


You’ll see the list of Shared Drives available for you.
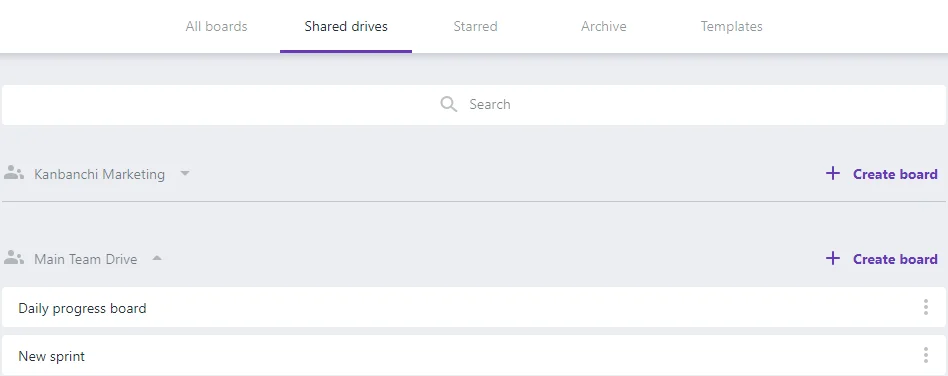

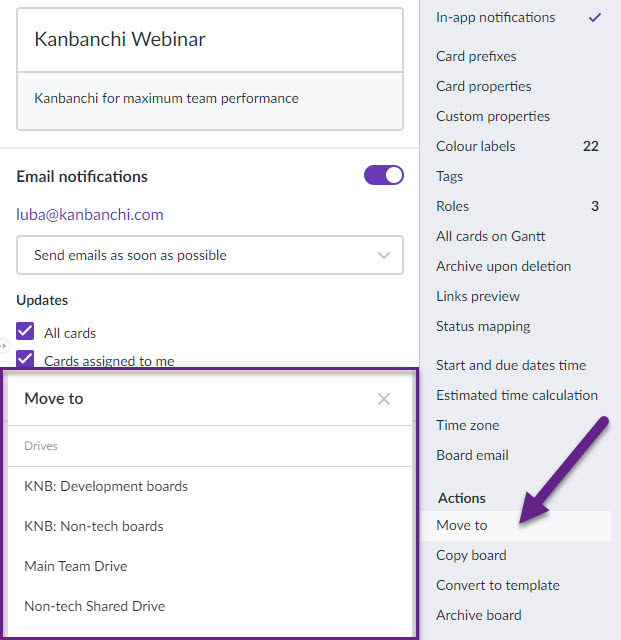
You may create boards in any of the Shared Drives, also you may delete the boards by clicking the Trash bin icon and move boards to My Drive or other Shared Drives by clicking the Arrow button.


Alternatively, you may open board settings, choose Move to in Actions and choose the Drive you'd like the board to be relocated to.

Please note that the board’s Time Zone is inherited by the creator’s Time Zone by default.
More - 7. How can I save filter presets?
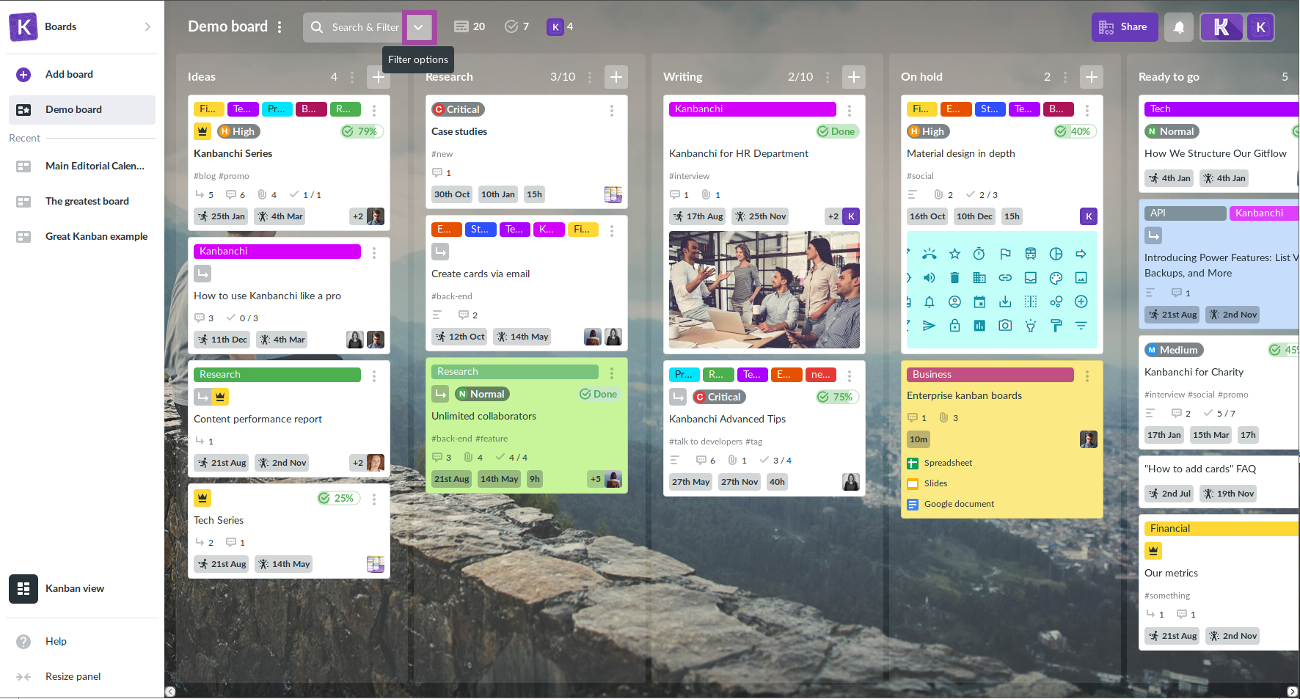
Sets of applied filters may be saved as presets when you filter cards on the board.
- press the Filter options button on the top panel near the board’s title;
- click "Add new filter" and type the name for the preset;

- apply filters you need;
- hit Enter. The preset will appear in the list of saved filters.
You can Select one or more presets from the list to apply them to the view.
You can also reset the filter settings using the check on the right.
Additionally, you can rename the preset or delete it:
- go to the list of saved filters;
- click the pencil icon  ;
;
- type new filter name and hit Enter.
If you click the bin icon  , the preset will be deleted.
More - 8. How can GSuite Admin install and remove Add-on for Gmail for domain?
Domain administrators can install, authorize and remove add-ons for users in their domain. You can install Kanbanchi for Gmail in your organization's domain from within the Google Admin console, or from the Marketplace website. When you get to the add-on's description page:
- Click Install, then Continue.
- Review the terms of service, specify if you want to make the add-on available to your whole domain or to a specific team or department, check the agreement box and click Accept.
After you install the add-on to your domain, it's listed under Marketplace Apps in your Admin console.
- From the Admin console Home page, go to Apps
 Marketplace apps.
- Click Kanbanchi for Gmail to access settings.
Note: domain installation may require time for the add-on icon to appear for the domain users.
As an admin, you can remove add-on for Gmail from your organization's G Suite account. When you delete it, none of your users can access it.
- From the Admin console Home page, go to AppsMarketplace apps.
- Click Kanbanchi for Gmail.
- In the upper right of the Settings page, click 
 .
.
- Click Remove App.
More - 10. How to create recurring tasks (cards) in Kanbanchi?
If you have tasks that repeat regularly, you can automate the process of creating cards for these tasks. Such cards that will be re-created according to the rule you set are called recurring cards. To create a recurring card, open the card with the task you want to repeat regularly. Click the three dots in the actions menu, then choose Make recurring. Then select the date it should start repeating, and set the repeating rule.

To view the list of all recurring cards, edit or delete them, click on the board title (or three dots next to the title), and choose Recurring cards.

You will see a panel with all your recurring cards, and you will be able to create them from scratch - just set the rules and give your recurring tasks names.

More - 12. How can I import data to Kanbanchi?
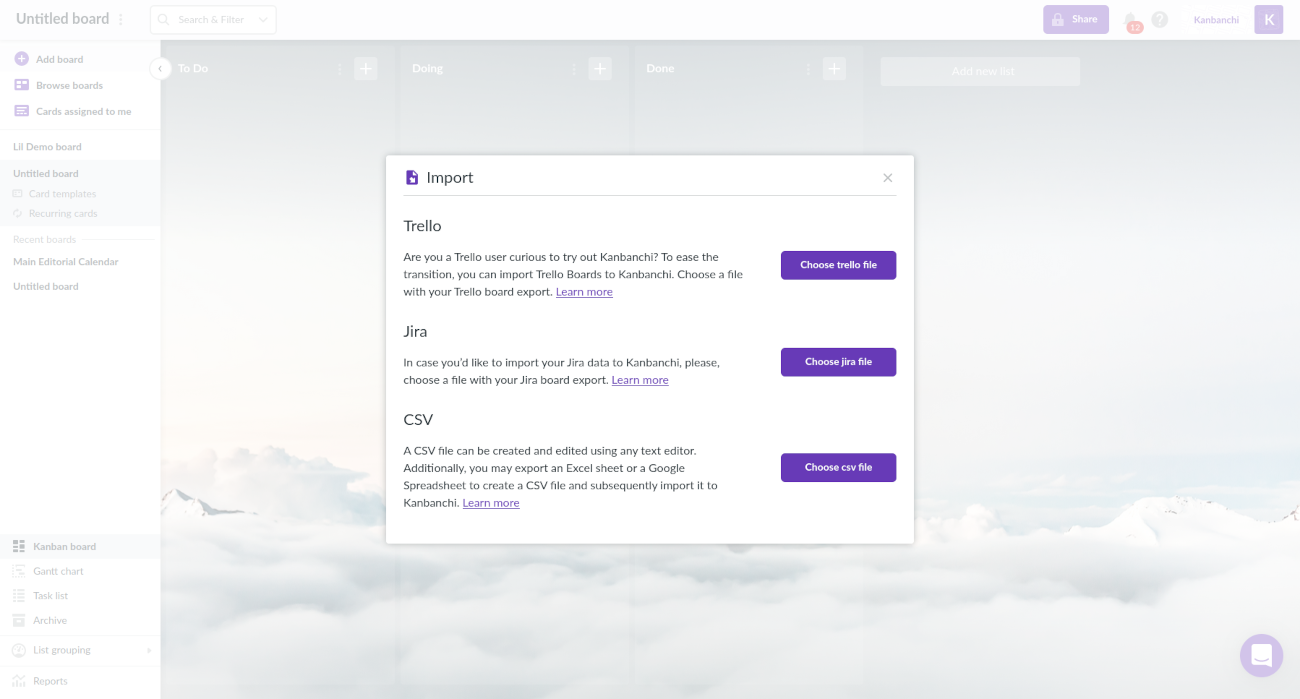
Kanbanchi has several import options. You may import a CSV file to Kanbanchi or upload data from such tools as Trello and Jira.

You may find out details about each option in these help articles:
How can I import my Trello boards to Kanbanchi?
How can I import my Jira data to Kanbanchi?
More - 13. How can I import my Jira data to Kanbanchi?
In case you'd like to import your Jira data to Kanbanchi, please, follow the steps below.
Step 1. Export your Jira data
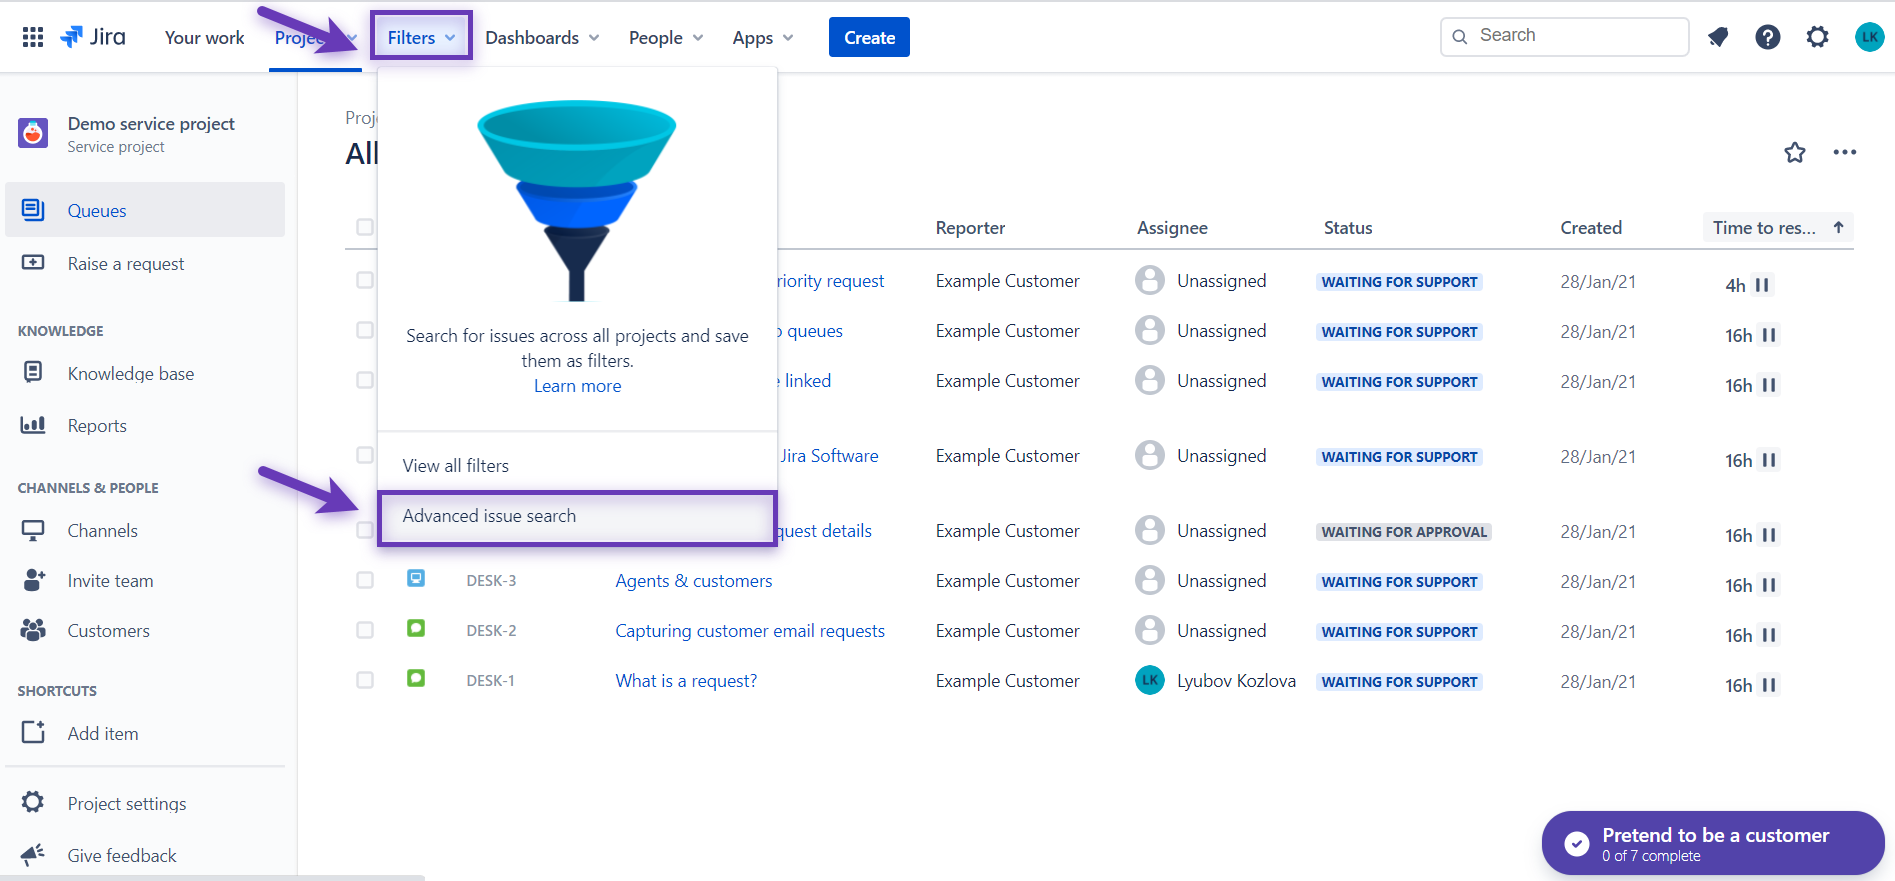
Log into Jira and open the project you'd like to export. Click Filters and choose Advanced issue search.

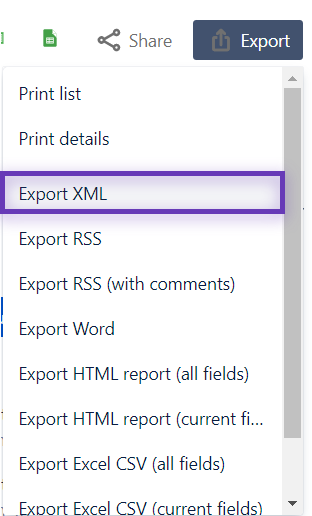
You will be redirected to the Search. Click Export.


Choose Export XML.

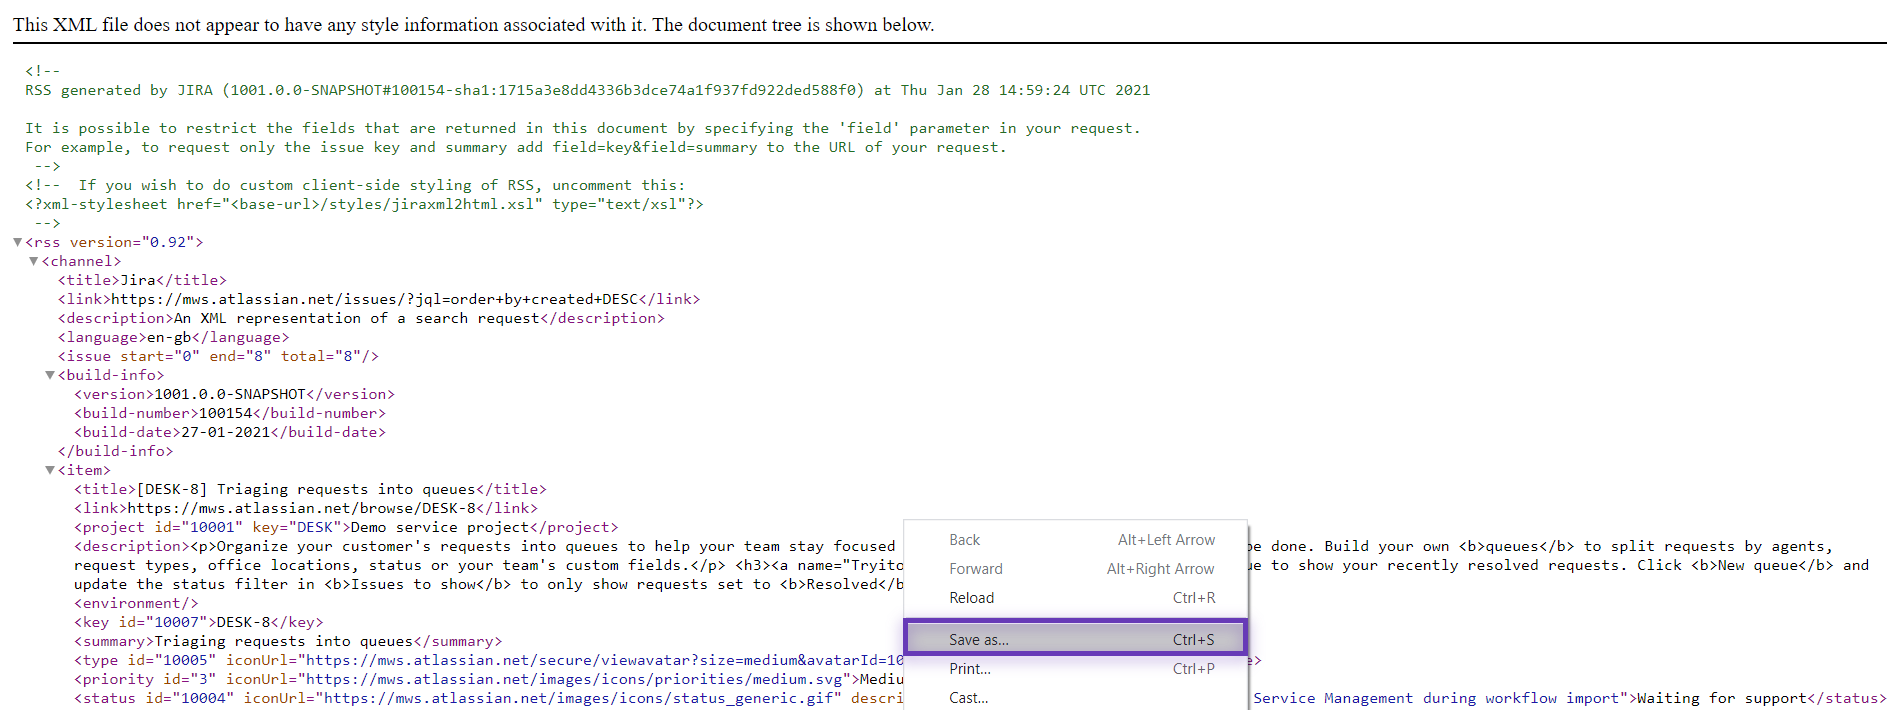
The data will be opened in a separate browser in the XML format. Click with the right button of your mouse and choose Save as... in the menu. Save the file to your computer.

There is another very slightly different export procedure for very complex boards. After you have chosen Export XML and the data opened in a separate browser in the XML format click with the right button of your mouse and first select View page source.

And only after that use Save as... to save the file to your computer.
Step 2. Import Jira data to Kanbanchi
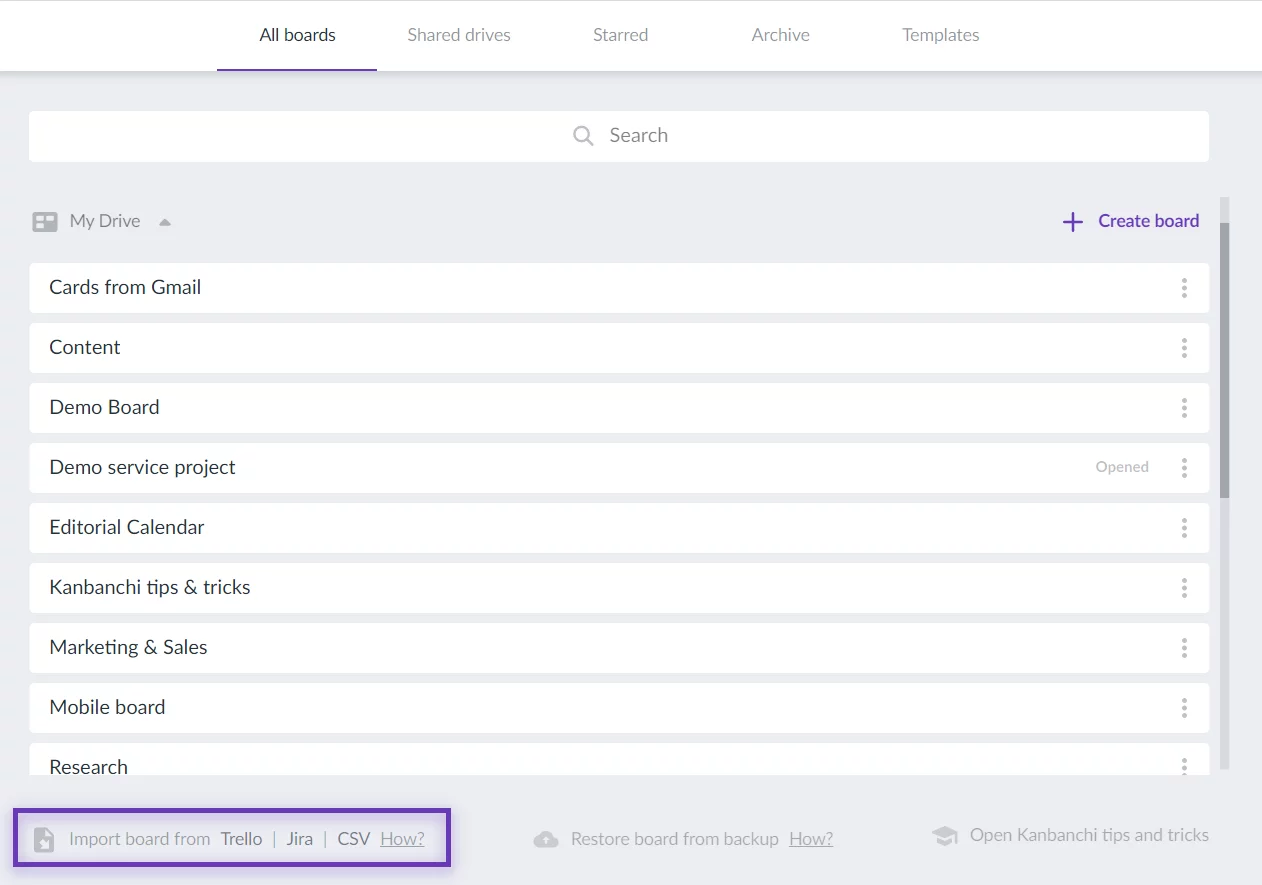
Open the list of your Kanbanchi boards. You will see the Import board from option at the bottom of the page. Please, click Jira and upload the file.
Kanbanchi will create a new board using imported data.

More - 14. How can I import a CSV file to Kanbanchi?
Step 1. Prepare a CSV file
A CSV file can be created and edited using any text editor. Additionally, you may export an Excel sheet or a Google Spreadsheet to create a CSV file and subsequently import it to Kanbanchi. You may use this spreadsheet as a template
Step 2. Import the file to Kanbanchi
Open the list of your Kanbanchi boards. You will see the Import board from option at the bottom of the page. Please, click CSV and upload the file.
Kanbanchi will create a new board using imported data.
Please, note: only UTF-8 encoding is supported.
You may find out details about the other import options in this FAQ article:
More - 15. How do I create new Kanbanchi board?
You may create as many boards in Kanbanchi as you need. To create a new board click "Add board" in the top left corner.

Then choose "Create new board" from the drop-down list.

And you will get a standard Kanbanchi board ready to be customized.
You can also use board templates in Kanbanchi. Just click "Add board" in the top left corner, choose "Create board from template" and find the template most suitable for your needs.

Also, you can import Trello, Jira, and CSV files to Kanbanchi and Kanbanchi will create a new board using imported data. Just choose "Import board" and follow the detailed instructions.
More - 16. May I have multiple boards in Kanbanchi?
You may create and use as many Kanbanchi boards as you need. The number of boards is not limited. You may learn how to create a new Kanbanchi board in the following article.
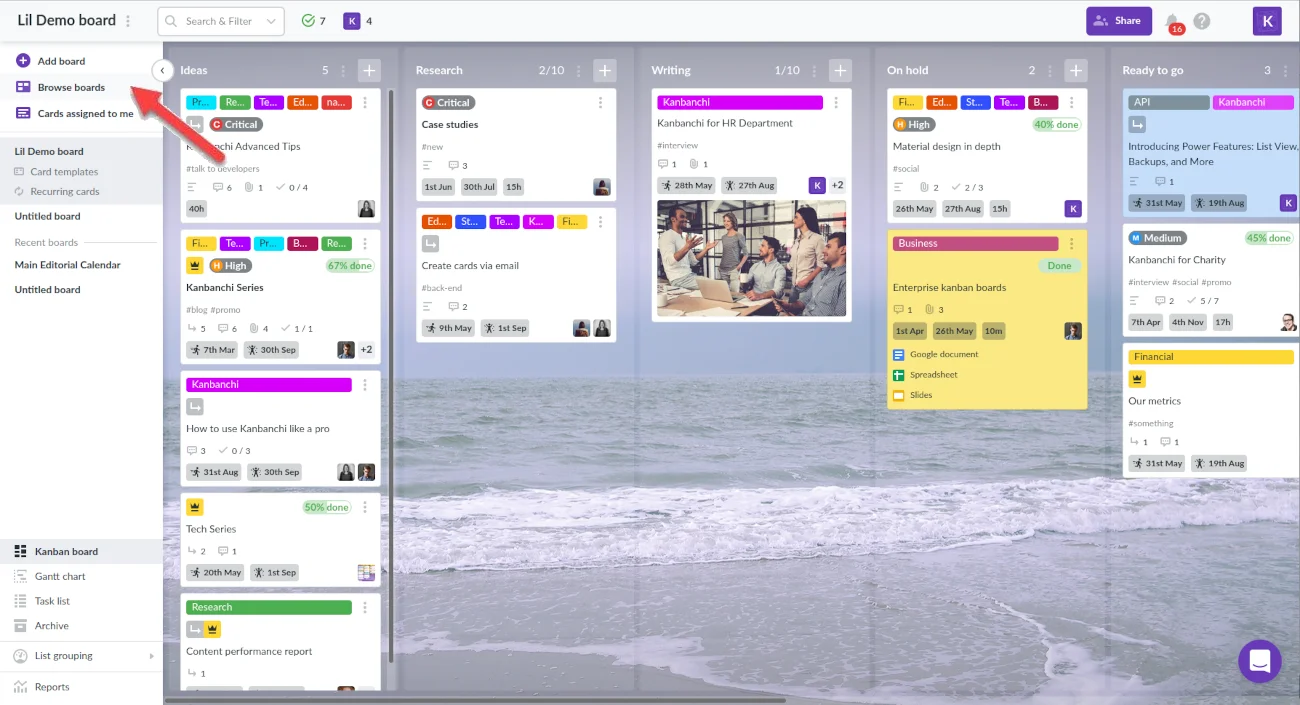
To open an already existing board you just need to click the "Browse boards" button at the top left panel and choose the board from the board manager.

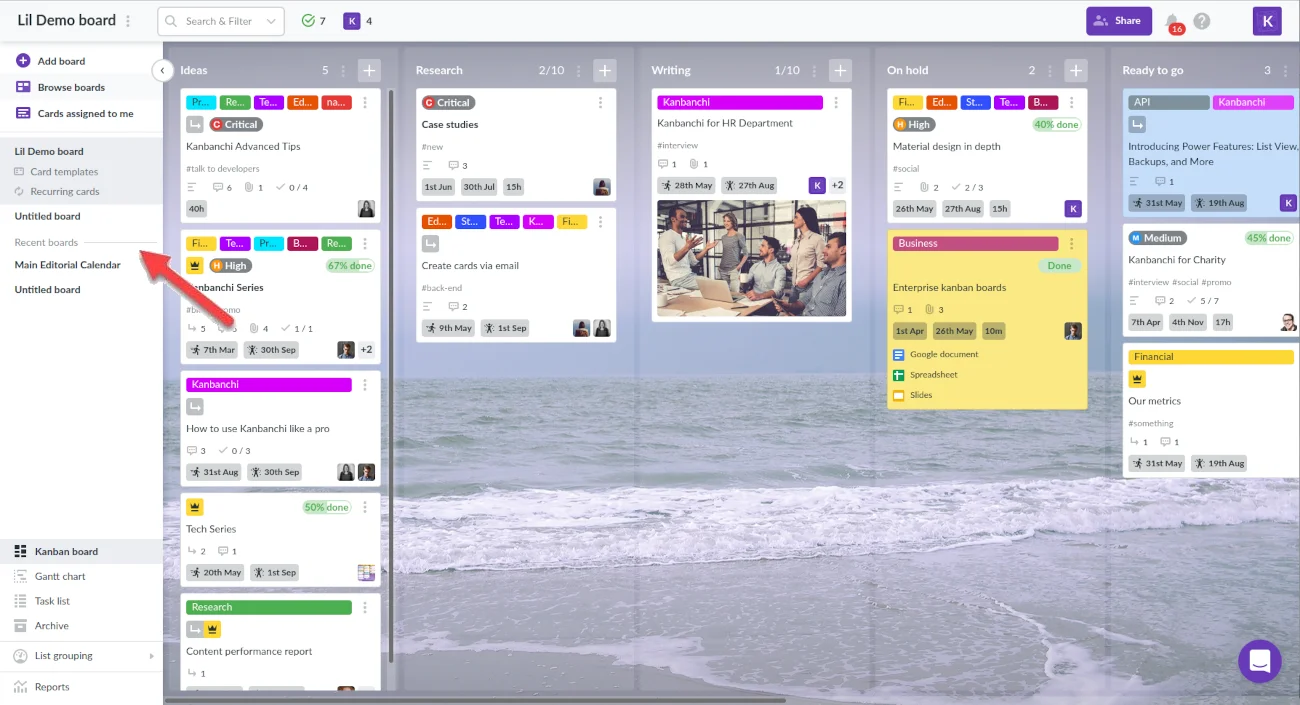
You can also open your boards from your Drive. Opening of often used boards is even easier as you can see all recently opened boards on the left.
More - 17. Where can I find all attachments from the board?
To find the attachments, navigate to the board setting and choose the Attachments tab.

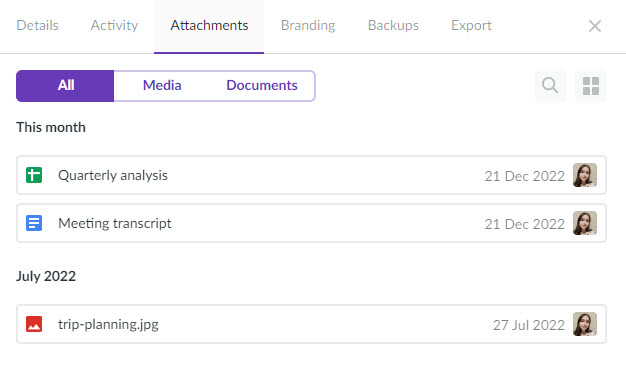

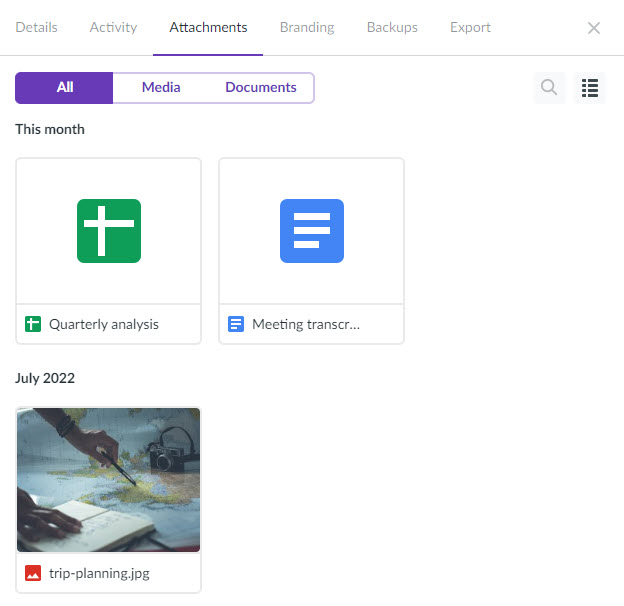
The files are shown by the month. Also, there are three groups: All, Media, and Documents.
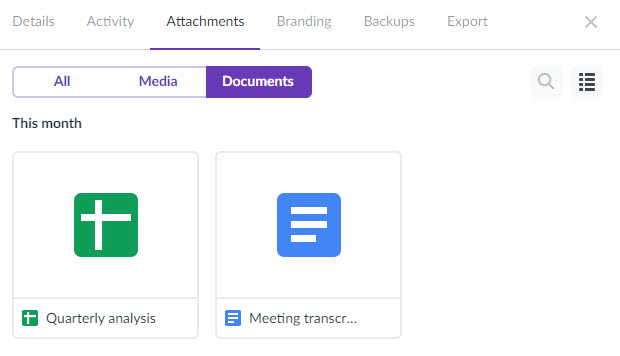

Moreover, you may choose how the files are displayed: Grid view or List view.

More - 18. How can I export my board data to a Google Sheet?
To export data from a board, click on the board's title on the top panel (or the three dots menu on the right of the title) and choose Board settings from the drop-down list. Board Details will open. Choose the Export tab at the top of the right panel. Choose the type of export you need:
- All Active Data. This will provide you with all the data that you have on cards from this board, excluding archived cards. Alternatively, you can choose to include the archived data when you come to the export settings.
- Time Tracker data. This will only export the time logged by collaborators on your board. Learn more about this export type here.
- Card titles and descriptions. This will pull out only card titles and descriptions of all cards on your board, including archived cards. This export will be made in the form of a Kanban board (columns and rows).

Additionally, you can choose your export settings for the active data. Click the gear icon, then select the settings you need based on what you want to see in your exported spreadsheet. Right after initiating the export, you will see a visual progress indicator. Please keep this tab open in your browser - the export will take some time.
When the export is complete, we'll send you an email with a link to a new spreadsheet containing the exported data. You can also open it from your Google Drive. The file will be created in the folder for your board, inside the Kanbanchi folder in your Google Drive, with the board name and export date in the title. Depending on your board location, it may be a folder inside the Shared Drive.
More - 19. How can I export my board data to Microsoft Excel?
To export data from a Kanbanchi board, click on its title in the top panel or use the three-dot menu next to the title. Then, select Board settings from the drop-down list.
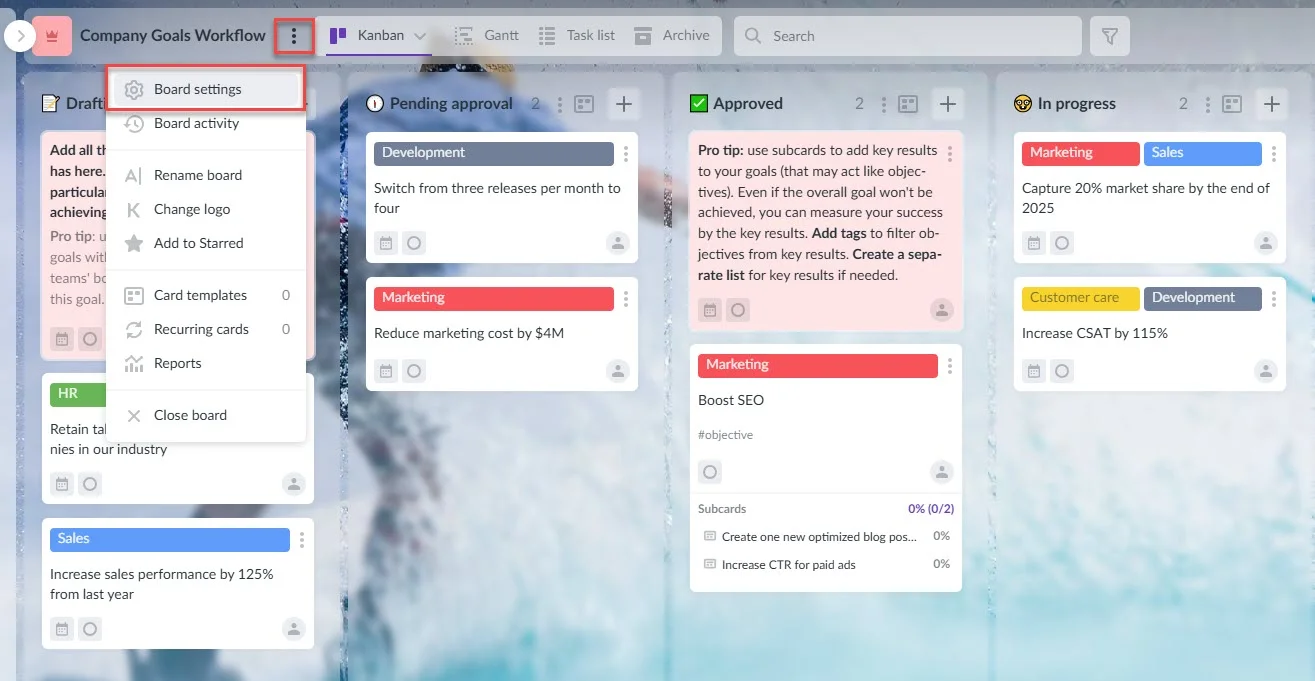

The Board Details window will open. Navigate to the Export tab at the top of the right panel.
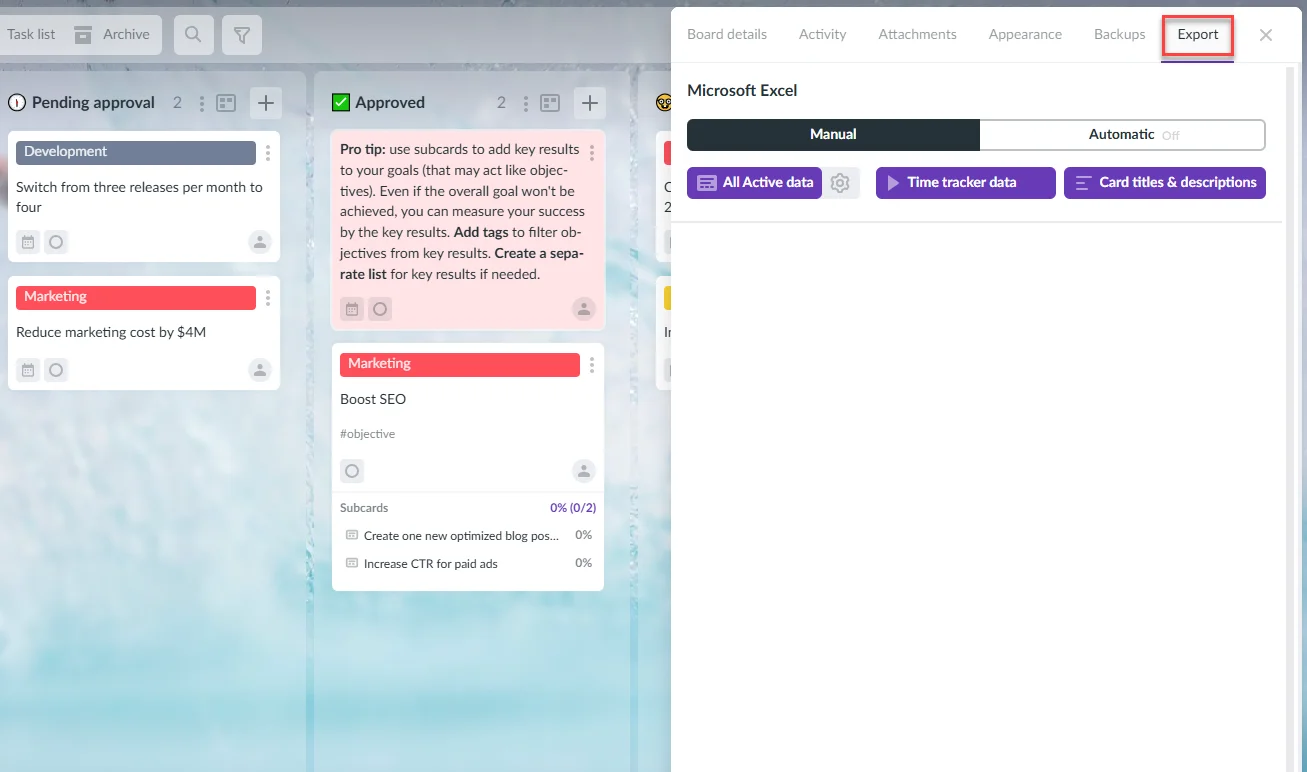

Select the type of export you need:
- All Active Data – Exports all information from active cards on your board, excluding archived ones.
- Time Tracker Data – Exports only the logged time entries from collaborators on your board.
- Card titles & description – This option exports only the titles and descriptions of all cards on your board, including archived ones. The data will be structured in a Kanban board format (columns and rows).
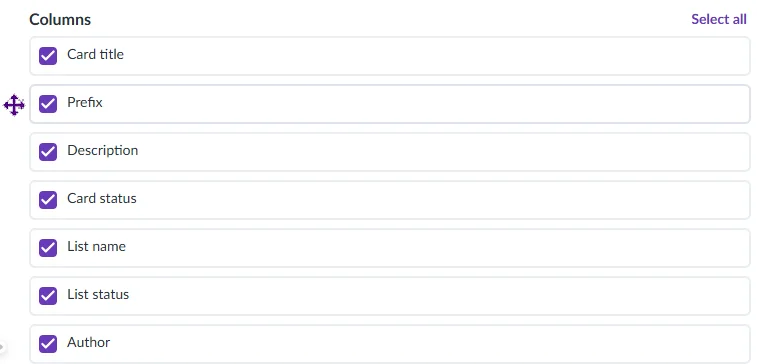
You can also customize the date and time format and select which columns should be included in the file. The order of the columns can be adjusted using drag-and-drop.

Once you start the export, a progress indicator will appear. Please keep this browser tab open, as the process may take some time.
When the export is complete, you’ll receive an email with a link to the new spreadsheet containing the exported data. You can also access the file from your OneDrive. It will be stored in the Kanbanchi folder within OneDrive, inside a subfolder named after your board.
More - 20. Can I create card from email?
You can create new cards on your boards by email. First, decide what board you want to send cards to by email. Click its title on the top panel to access Board settings.
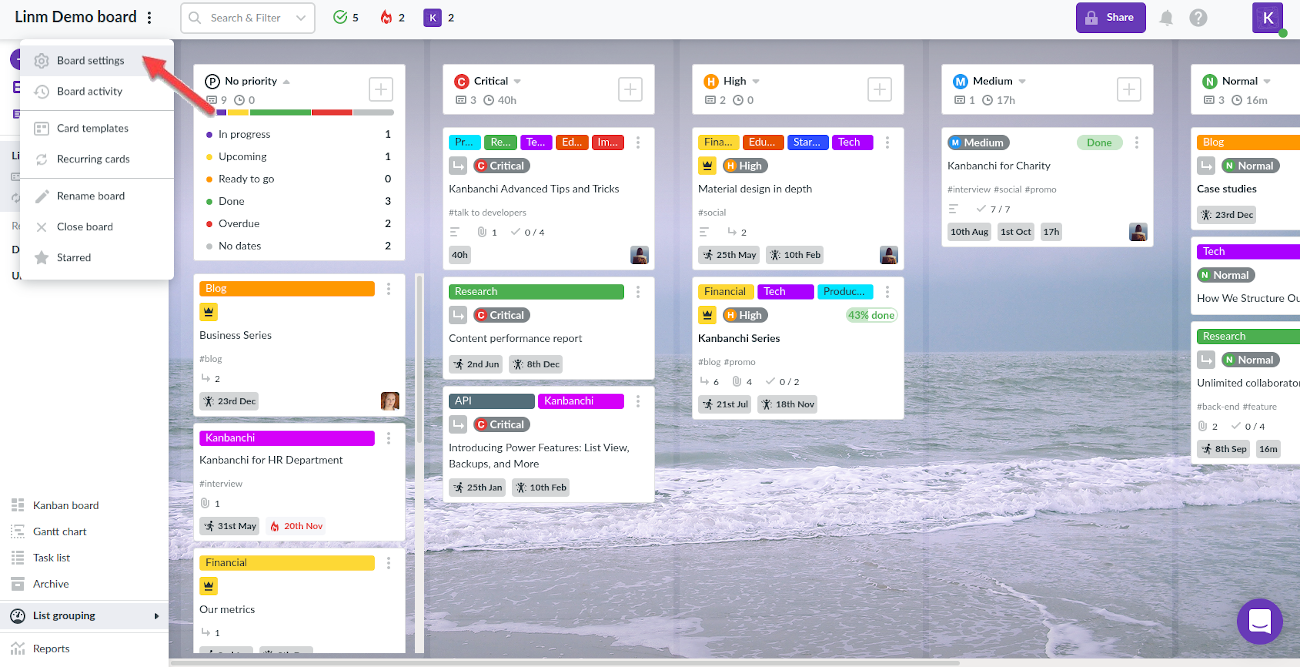

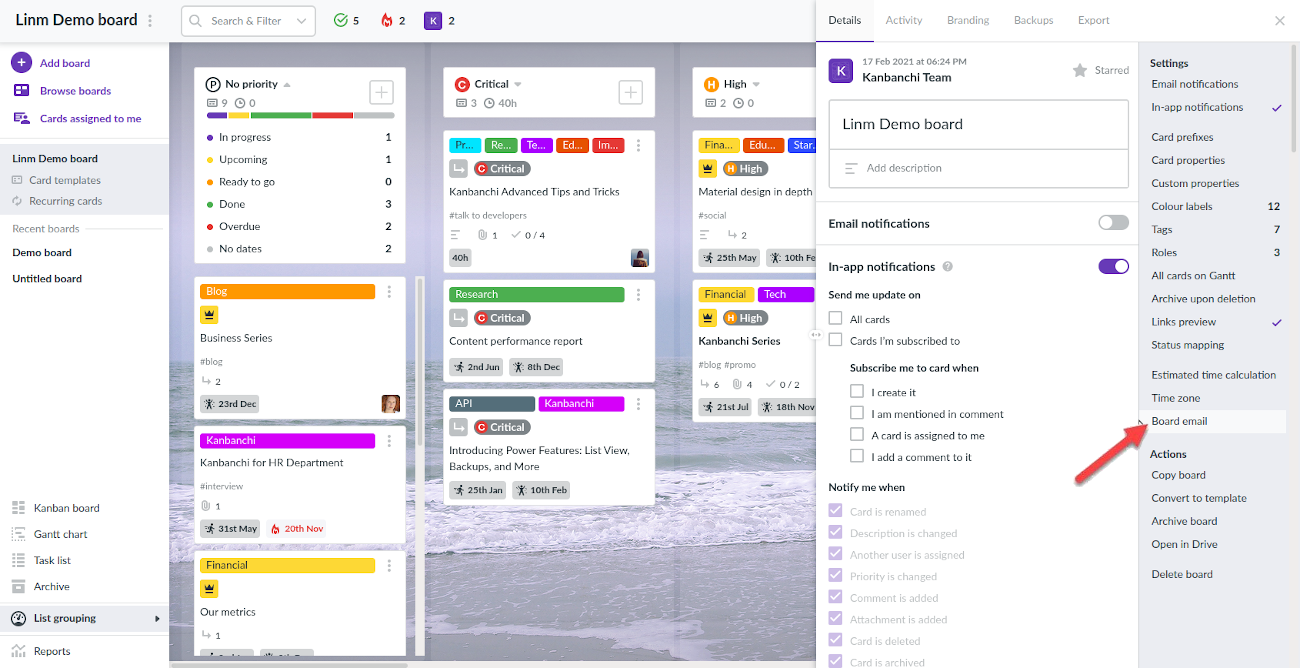
Once there, find and click Board email on the right panel.

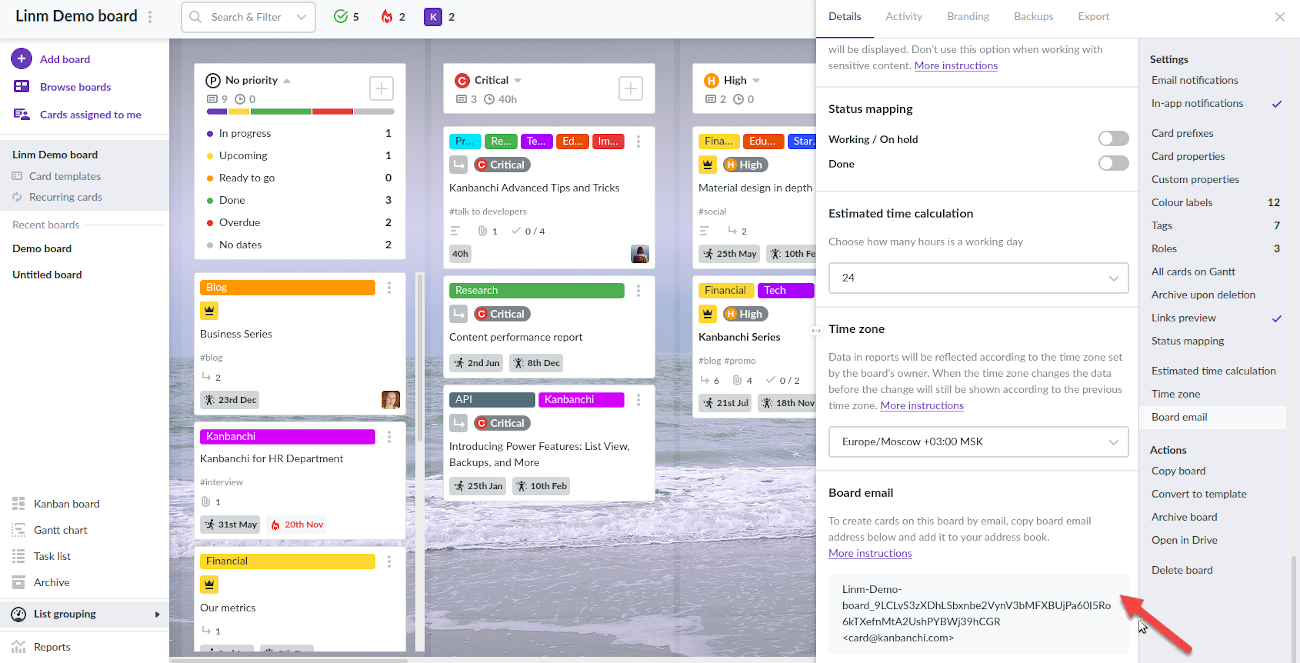
Copy the email address associated with this particular board.
Note: It’s a unique email address for your account, so when you create cards by email, they appear on the board as created by you. Keep it secret and don’t share it with others!

When you send a message using the copied email address, a new card will be created with card title being the subject of your message, and card description – the body of your message. You may add tags to the card placing tag names in the square brackets in the subject of the message and attach files to the message.
Card, that was sent to the board by email will have a tag “from email”.


Saving board's email address as a contact
If you're going to use this feature frequently, we recommend saving the board's email address as a contact in Gmail.
Add the first part as a name, and card@kanbanchi.com as an email address.
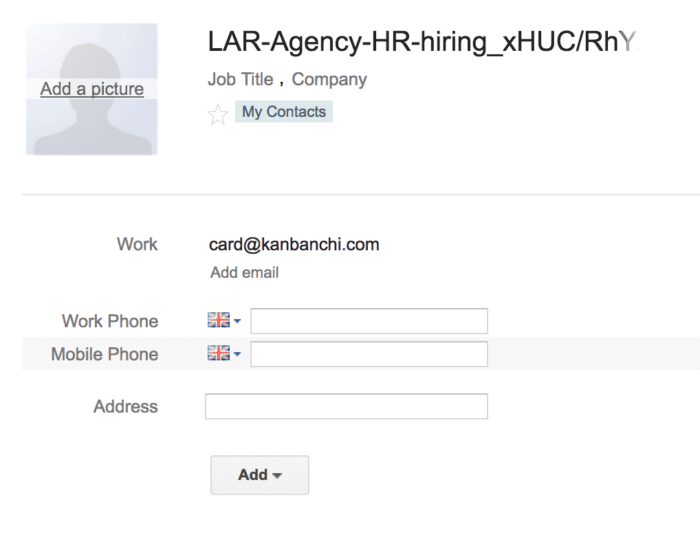

It shouldn't be any problem, as you can still star such contact and find it in the search field by typing the name of your board.
Please note: some email clients, e.g., Outlook, don't let save contacts with the same email address. These contacts are detected as duplicates. Saving multiple board emails as contacts in Outlook will lead to incorrect card creation.
You may also use Kanbanchi Add-on for Gmail to create cards from the inbox.
More - 21. How do I rename a board or change other board settings?
To make changes on a board, click on board's title on the top panel and choose Board settings from the drop-down list.

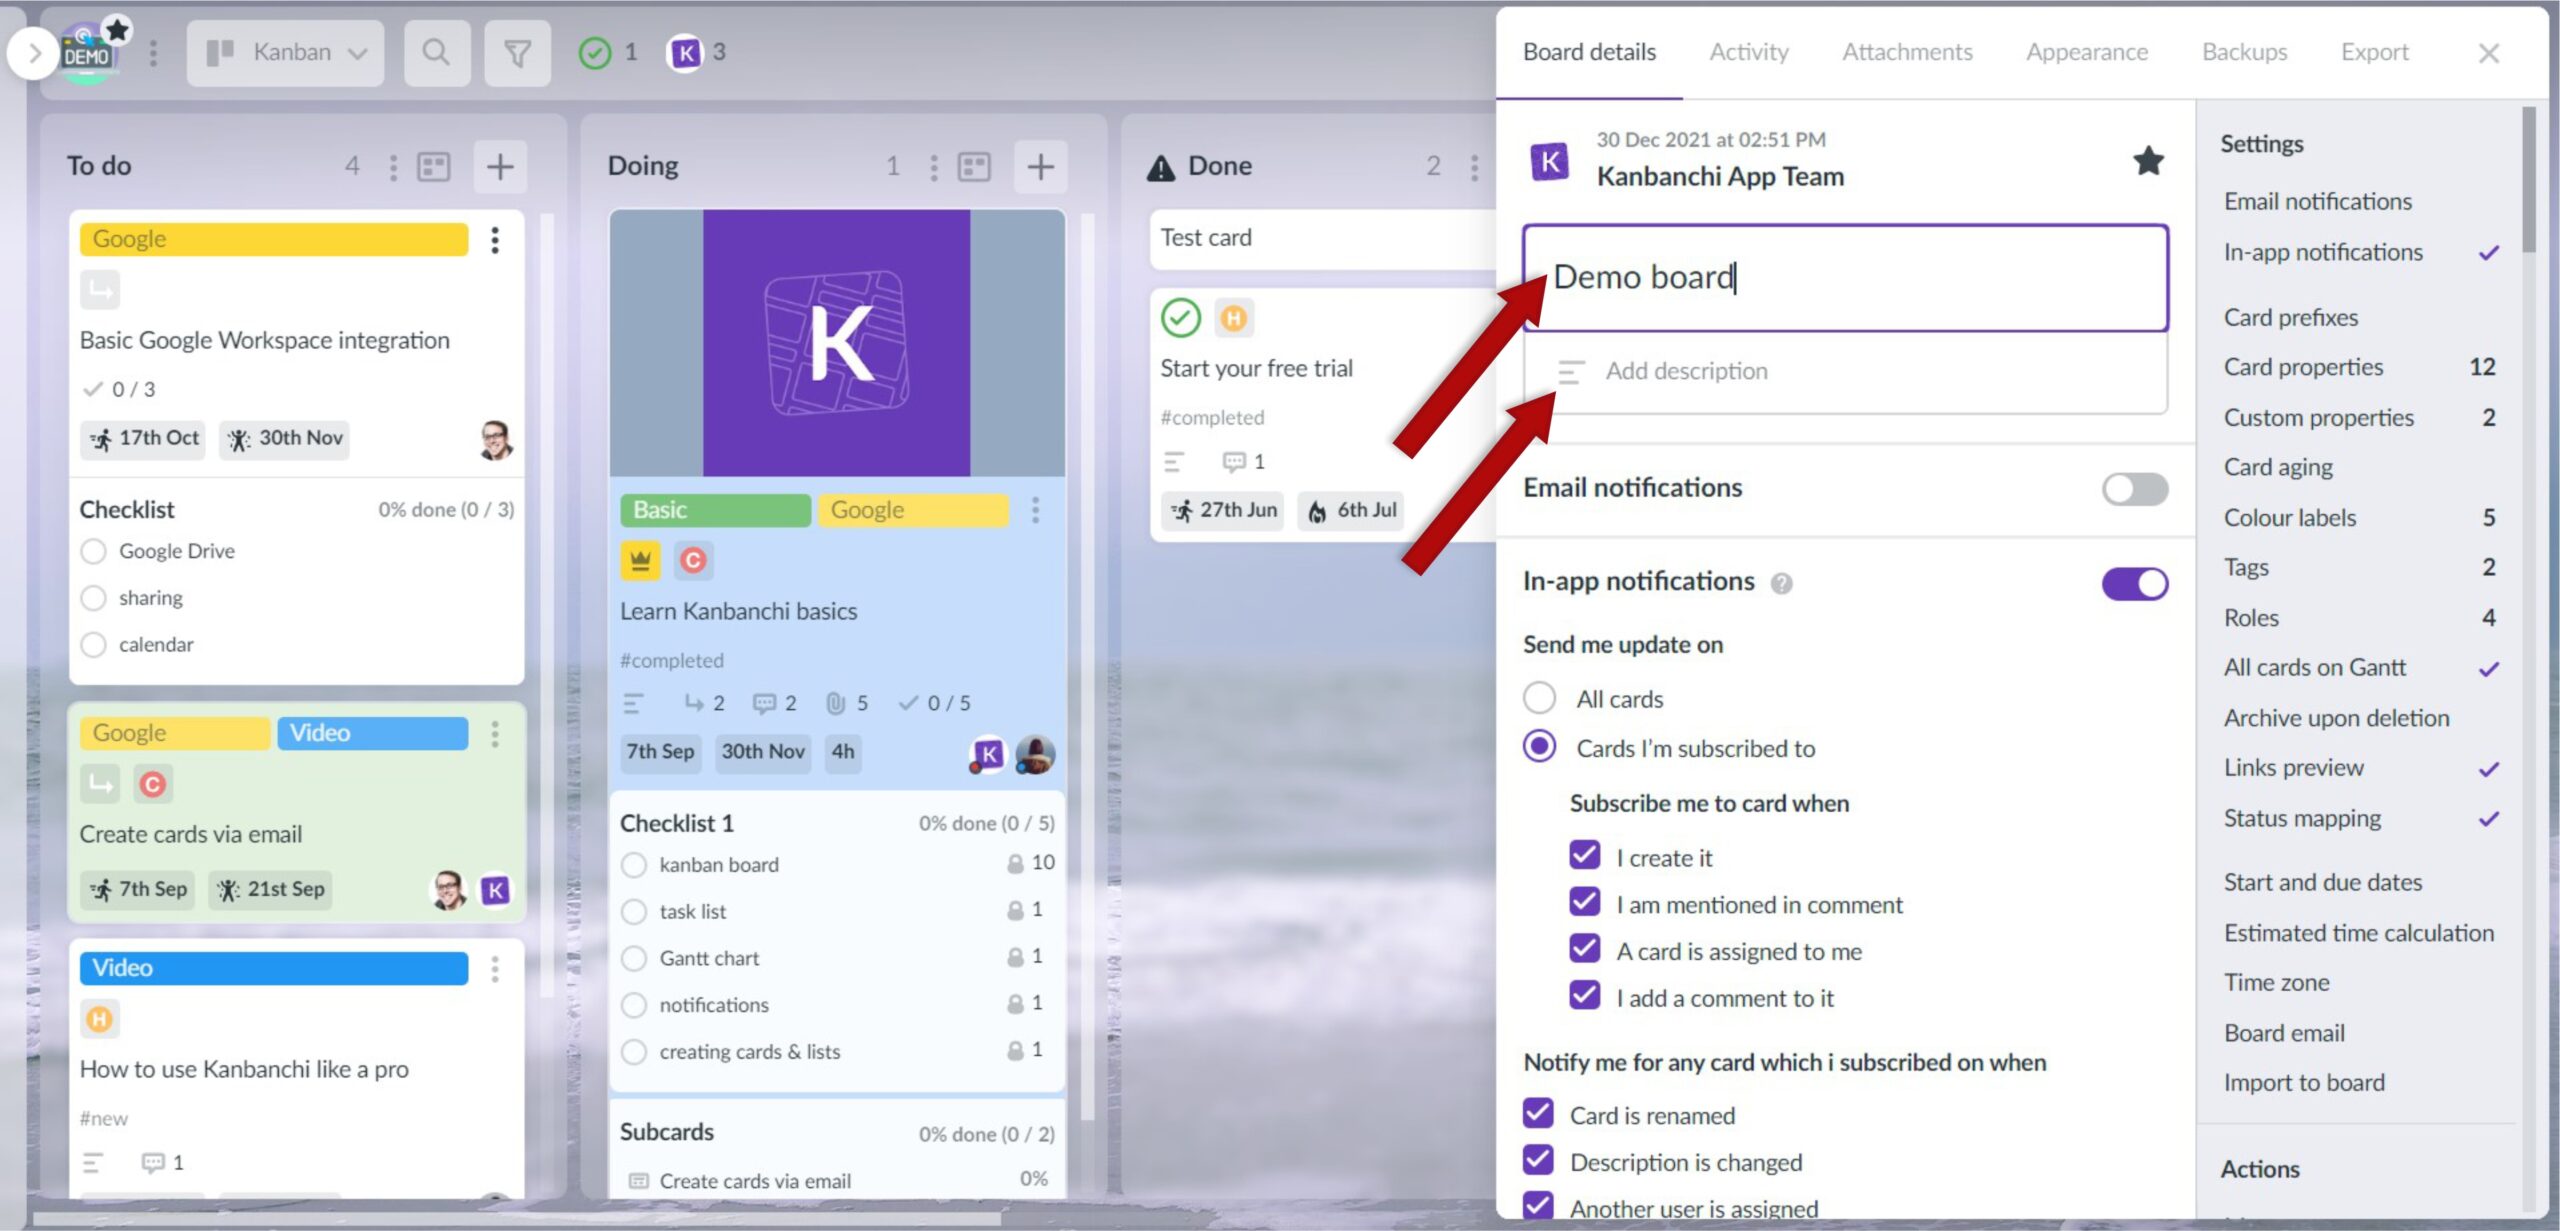
A popover window will appear for editing the board. Change the name of the board in the name field of Board Details and then click Enter. To add a description, click on Board Description under the board name field, type your text, and click Save changes.

In the same menu, you can make additional types of changes such as:
- creating a board copy;
- deleting a board;
- editing color labels for cards;
- setting up email notifications;
- enabling card prefixes;
- changing time zone;
- exporting board information (CSV, Google Spreadsheet).
More - 22. How do I remove a board?
Kanbanchi boards may be removed in two ways: within the app and within Google Drive.
Within the app
You will need to view the details of an open board to remove it from Kanbanchi. Click on the board’s name at the top of the screen or on its tab at the bottom of the screen to open Dashboard Details.
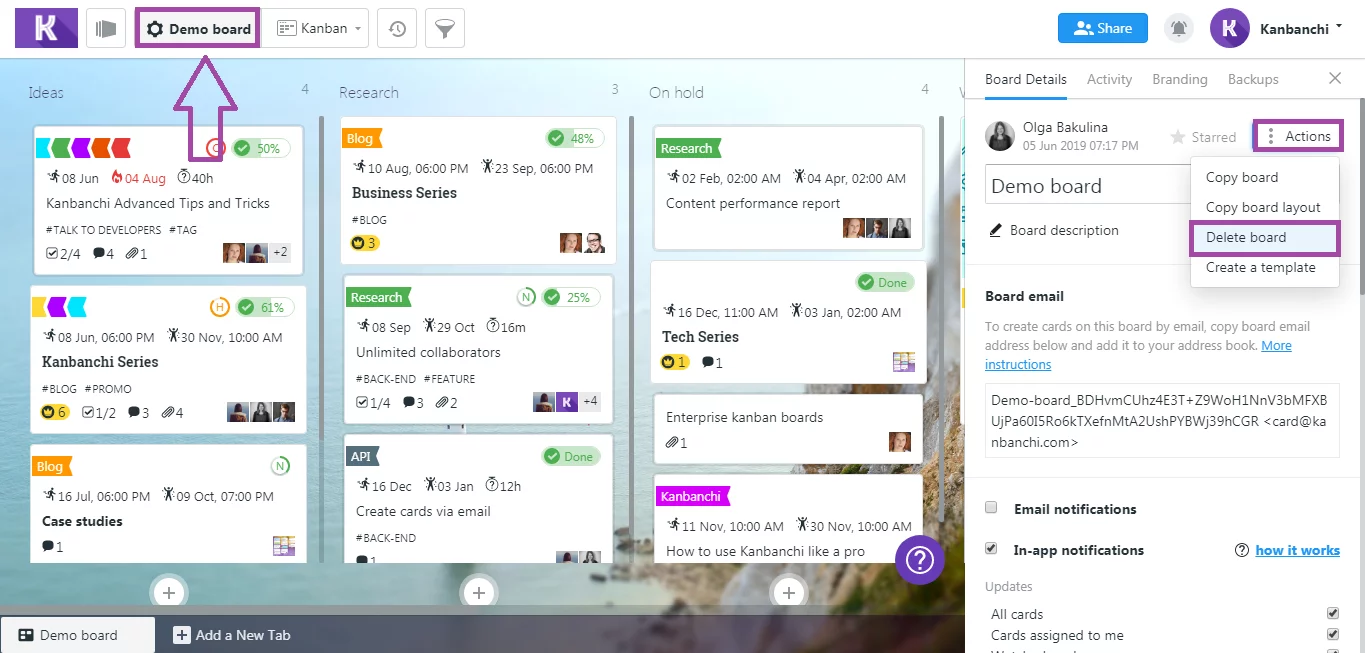
Click on Actions located at the upper right corner of the Dashboard Details and choose Delete Dashboard from the drop-down menu. When a confirmation window appears, click on Delete to finish removing the board from Kanbanchi.
Within Google Drive
Select a board in your Google Drive and then click on the Remove Icon (Trash Symbol) 
 or hit Delete on your keyboard to move your board into Trash.
In both instances, the removed board will be moved into the Trash Folder of your Google Drive.
More - 23. How can I make a copy of a board?
In Kanbanchi you can easily make a copy of a board. To do it click on the board's title on the top panel and choose Board settings from the drop-down list.
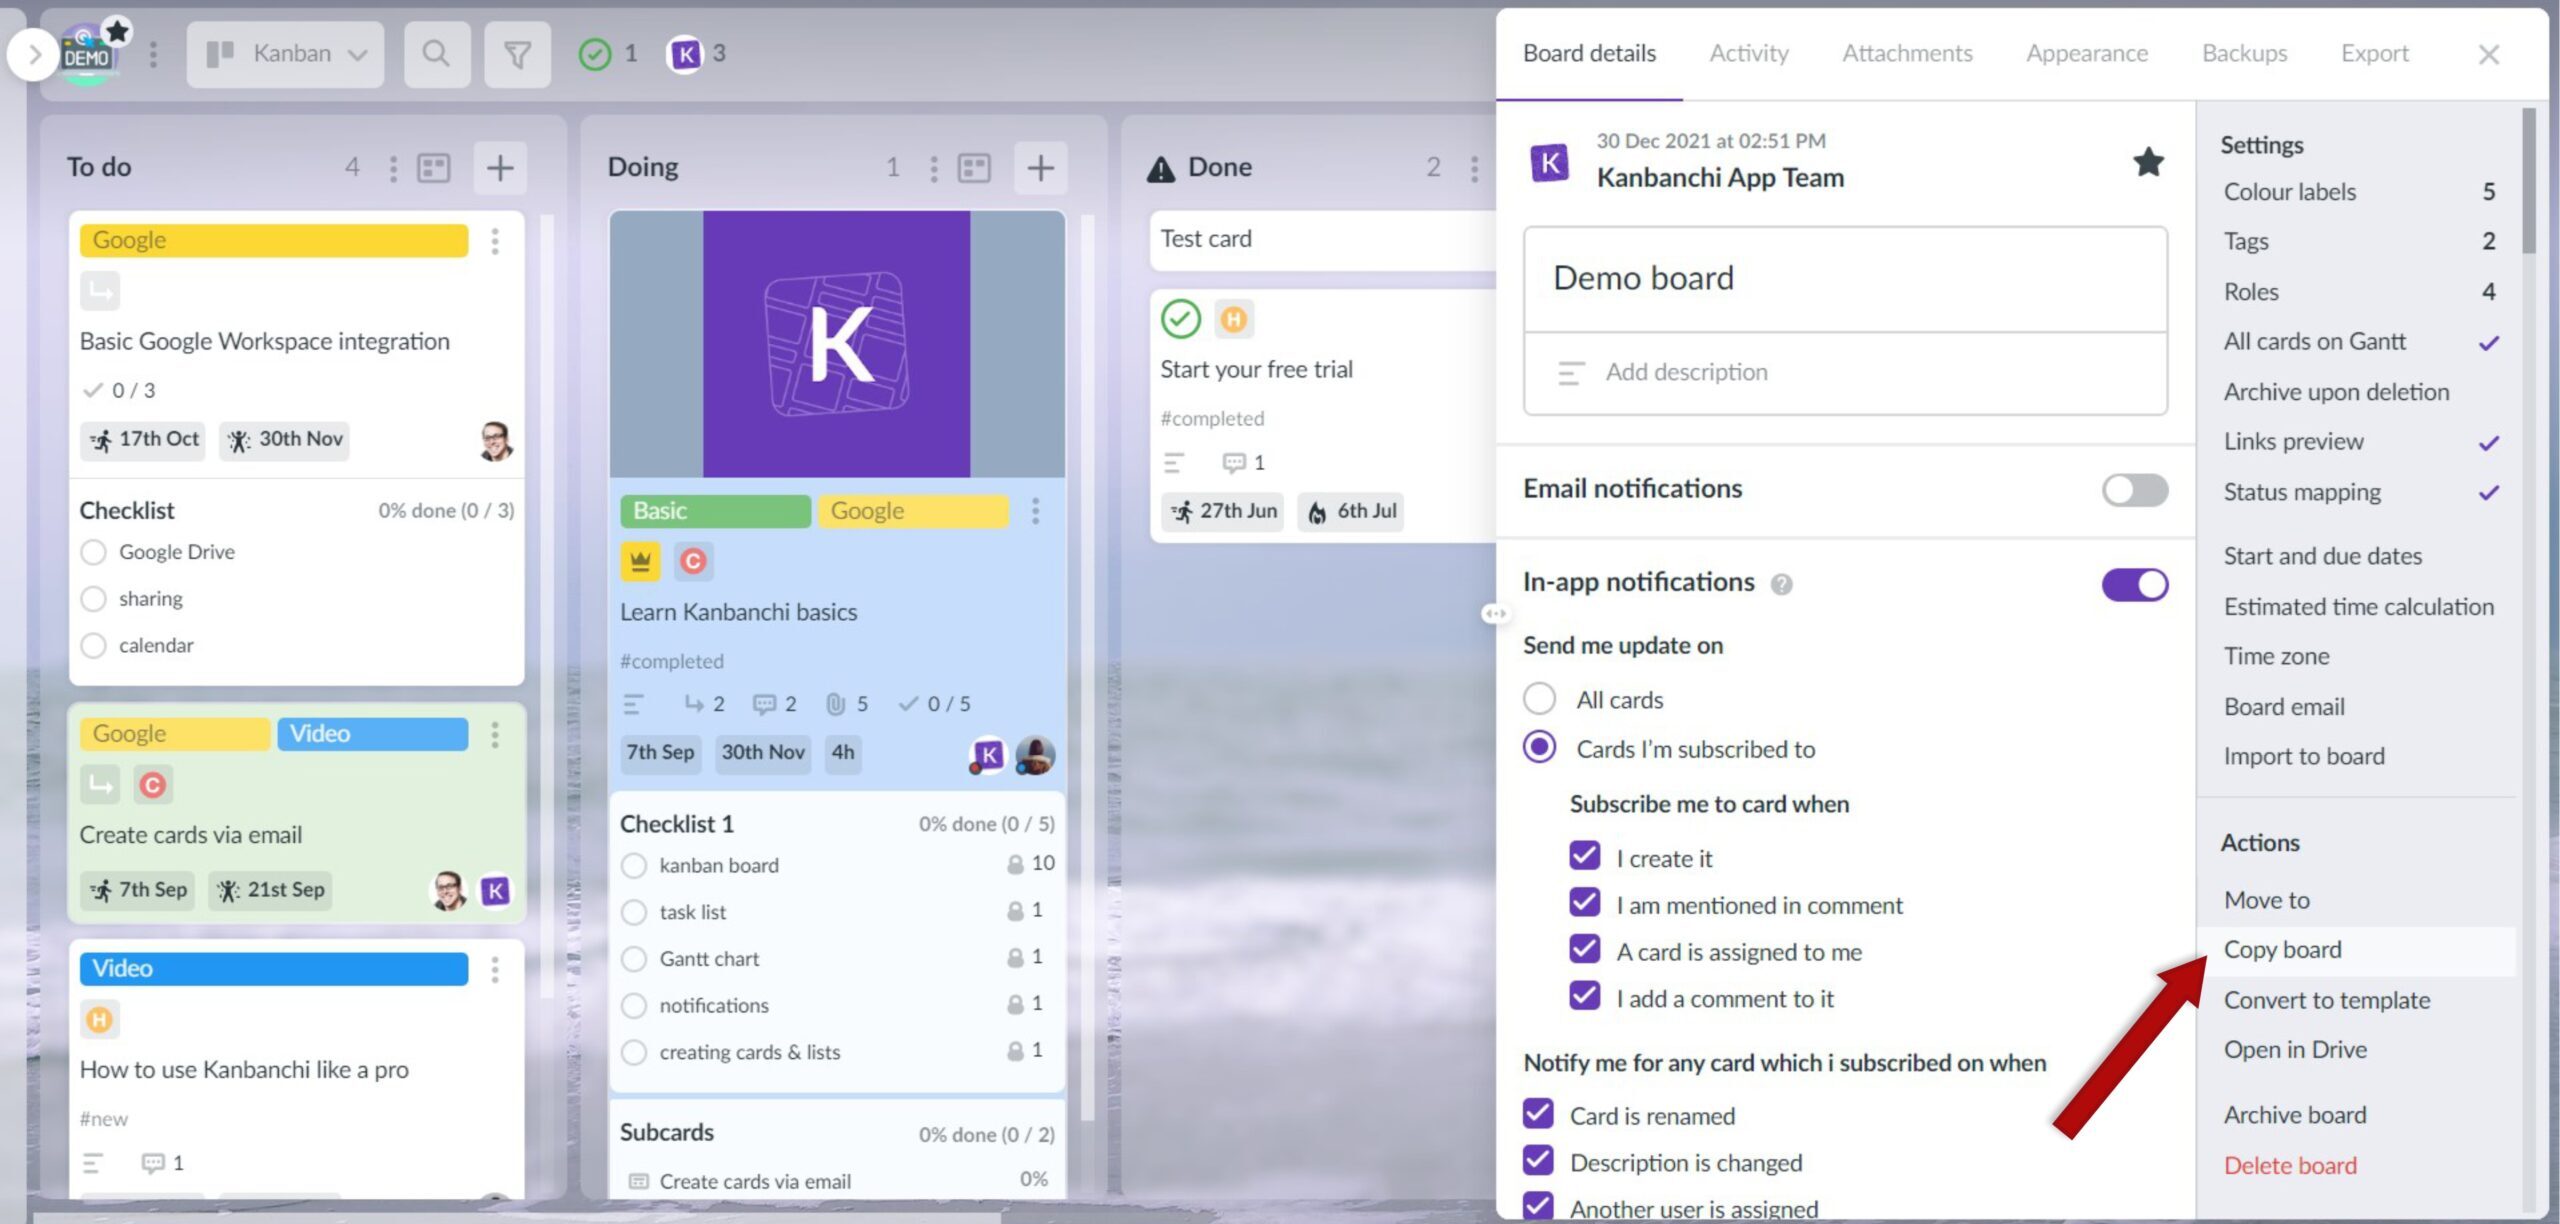
Then just choose "Copy board" among Actions on the right.

A copy of the board with all cards will appear in the main folder of your Google Drive. It will also be opened next to the original board with the prefix "Copy of". All settings will be copied, excluding comments, sharing settings, notifications, and dates in Google Calendar. We also advise you to check Permissions of attached files, because the original files might belong to the owner and be placed in the owner's Google Drive.
If you choose the option "Copy board layout", no cards will be copied, but only the board layout (list names and board settings).
More - 24. How can I receive email notifications when my board is changed?
If you want to receive email notifications when changes have been made to your board you need to enable them in the Board Details. To do this, first click on the board’s title in the top panel, then select Board Settings from the drop-down menu.


After that, turn on email notifications.

Then you can choose from the drop-down list how often the App will send you emails:
- as soon as possible,
- once an hour,
- once a day.

You also need to choose which cards on the board you want to receive notifications for:
- all cards,
- cards assigned to me,
- watched cards.
You can tick all the variants.

Kanbanchi will notify you when:
– a card has been assigned to you
– a new card has been created
– a card has been deleted
– a new comment appears
– a card’s name has been changed
– a card’s description has been added or changed
– a file has been attached
– a card’s due date passed
– a card has been moved to another list
– a card’s priority has been changed
Note, that notifications will be sent only if you are not the only member on this board and changes are made by other people.
If you would like to complement email notifications with in-app notifications, learn how to activate in-app notifications. You may also receive browser notifications in Kanbanchi.
More - 26. How can I filter cards on the board?
To filter cards on the board, just press the Filter options button on the top panel near the board’s title.
More - 28. How can I set another background for a board and upload my company’s logo?
Open Board Settings panel by clicking on the board name and choosing Board settings in the drop-down menu.

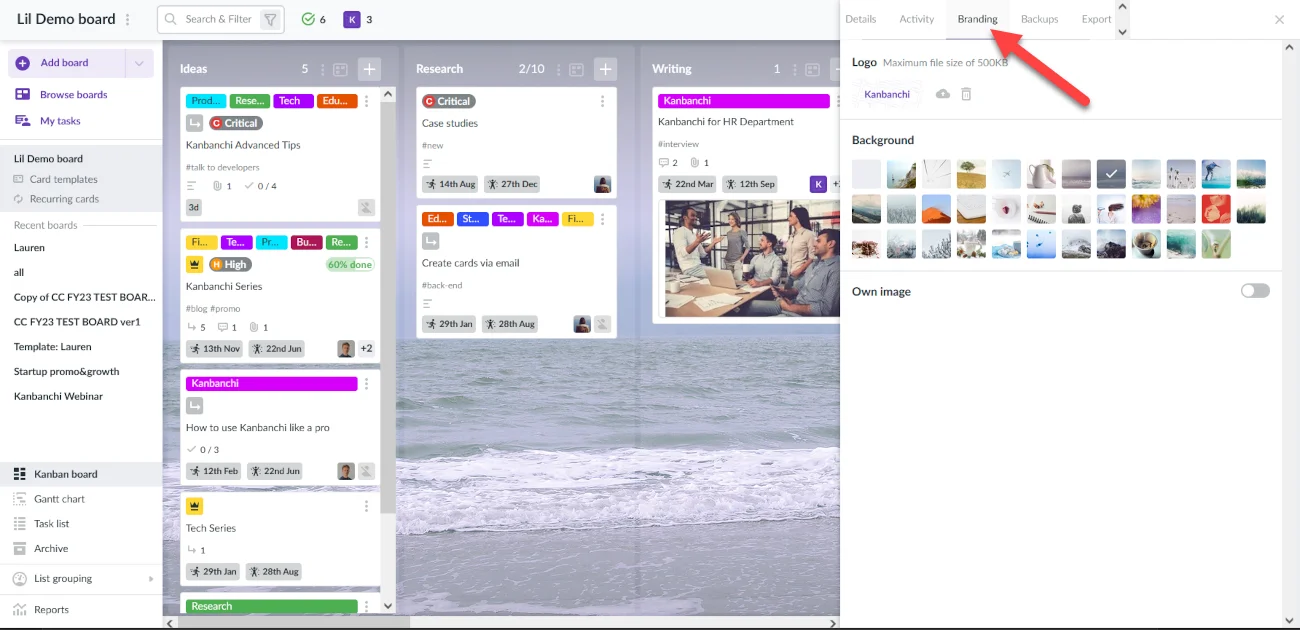
Choose the Branding tab located next to the Activity tab at the top of the popover window.

Background
To set an existing background, select it in the section titled Pick a premade theme. To browse your theme click on the Change background button in the Customize your own section. Then select a display mode for your background.
- Default - Use a default image size on background.
- Tile image - Image in the default size is used like a pattern for the background.
- Stretch to Full Screen - Image is enlarged proportionally to fit the screen width.
Tips:
- Maximum image size is 2MB.
- You can upload different images for different dashboards.
- Background will be displayed for every person who has an access to your dashboard.
Logo
To set a logo, click on the Change logo button within the Branding tab. Then choose Upload a new image and select a logo from your computer. If you want to get rid of an existing logo, click on Remove.
Tips:
- Maximum logo image size is 500KB.
- The uploaded logo is displayed on each dashboard of your account.
- Logo is displayed for every person who has an access to your dashboard.
Note: Only board owner can change board background and add logo.
More - 29. How can I find boards in Google Drive?
When you create a board it appears in Kanbanchi folder at the root of your Google Drive or on a Shared Drive depending on your Kanbanchi plan and choice. Inside the Kanbanchi folder you can find all boards, backups and attachments which you upload through Kanbanchi. You can organize boards within your Google Drive or on a Shared Drive as you like.
Also, you can use a special command "app:kanbanchi" to look for all boards in your Google Drive.


When your board is opened, you can easily go to the folder where this board is stored. To do it click on the board's title on the top panel and choose Board settings from the drop-down list.

Then just click on Open in Drive among Actions on the right.

More - 30. How to import my Trello boards to Kanbanchi?
Are you a Trello user curious to try out Kanbanchi? To ease the transition, you can import Trello Boards to Kanbanchi. Here’s a short set of instructions on how to do that.
Step 1: Export Your Trello Board
Log in to Trello and go to the board you’d like to export.

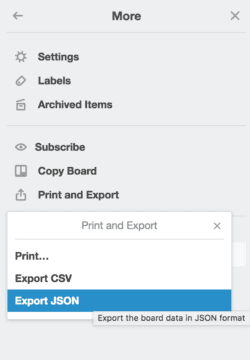
In the Board settings click Print and Export… and select Export JSON.

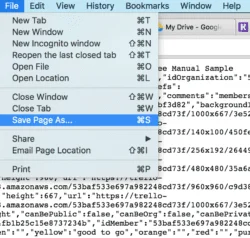
Don't be confused if you see the screen full of text. Click Save Page As... and the file in JSON format will be saved on your computer.

For further details, Trello provides a walkthrough for exporting.
Step 2: Import Your Trello Board to Kanbanchi
To import your Trello Board to Kanbanchi you need to sign in to the app. In the provided screen, сlick Import Your Trello Board.
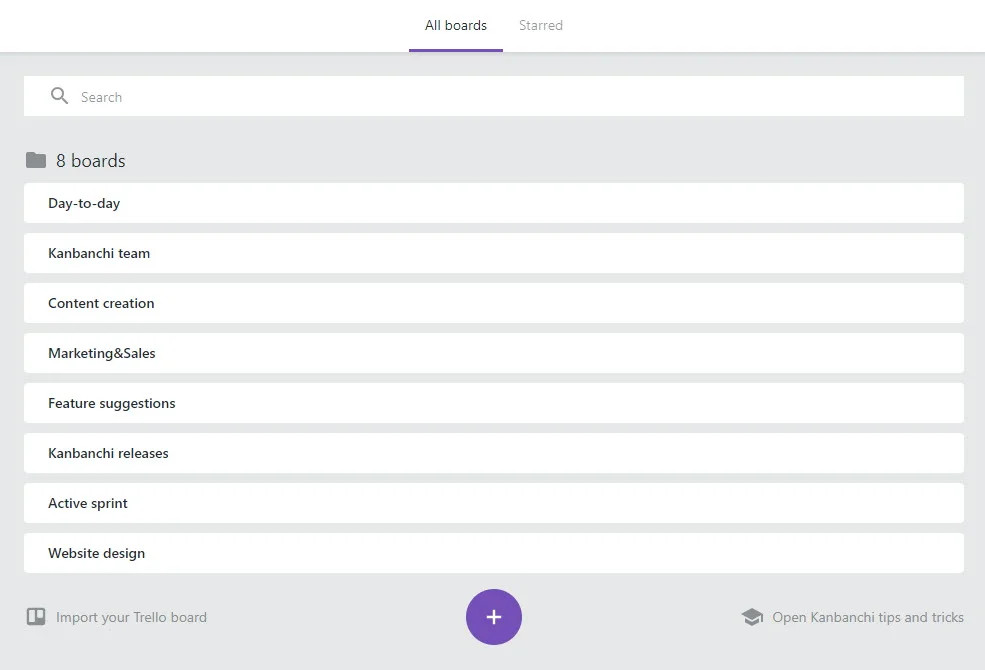

You can select a file from your computer or Google Drive. Kanbanchi will create a new board using your imported data.
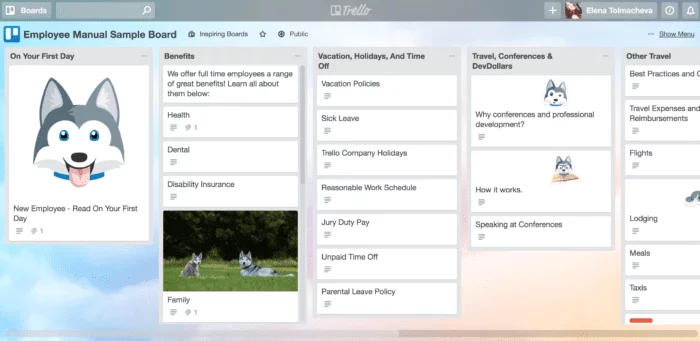
Here's the imported board!
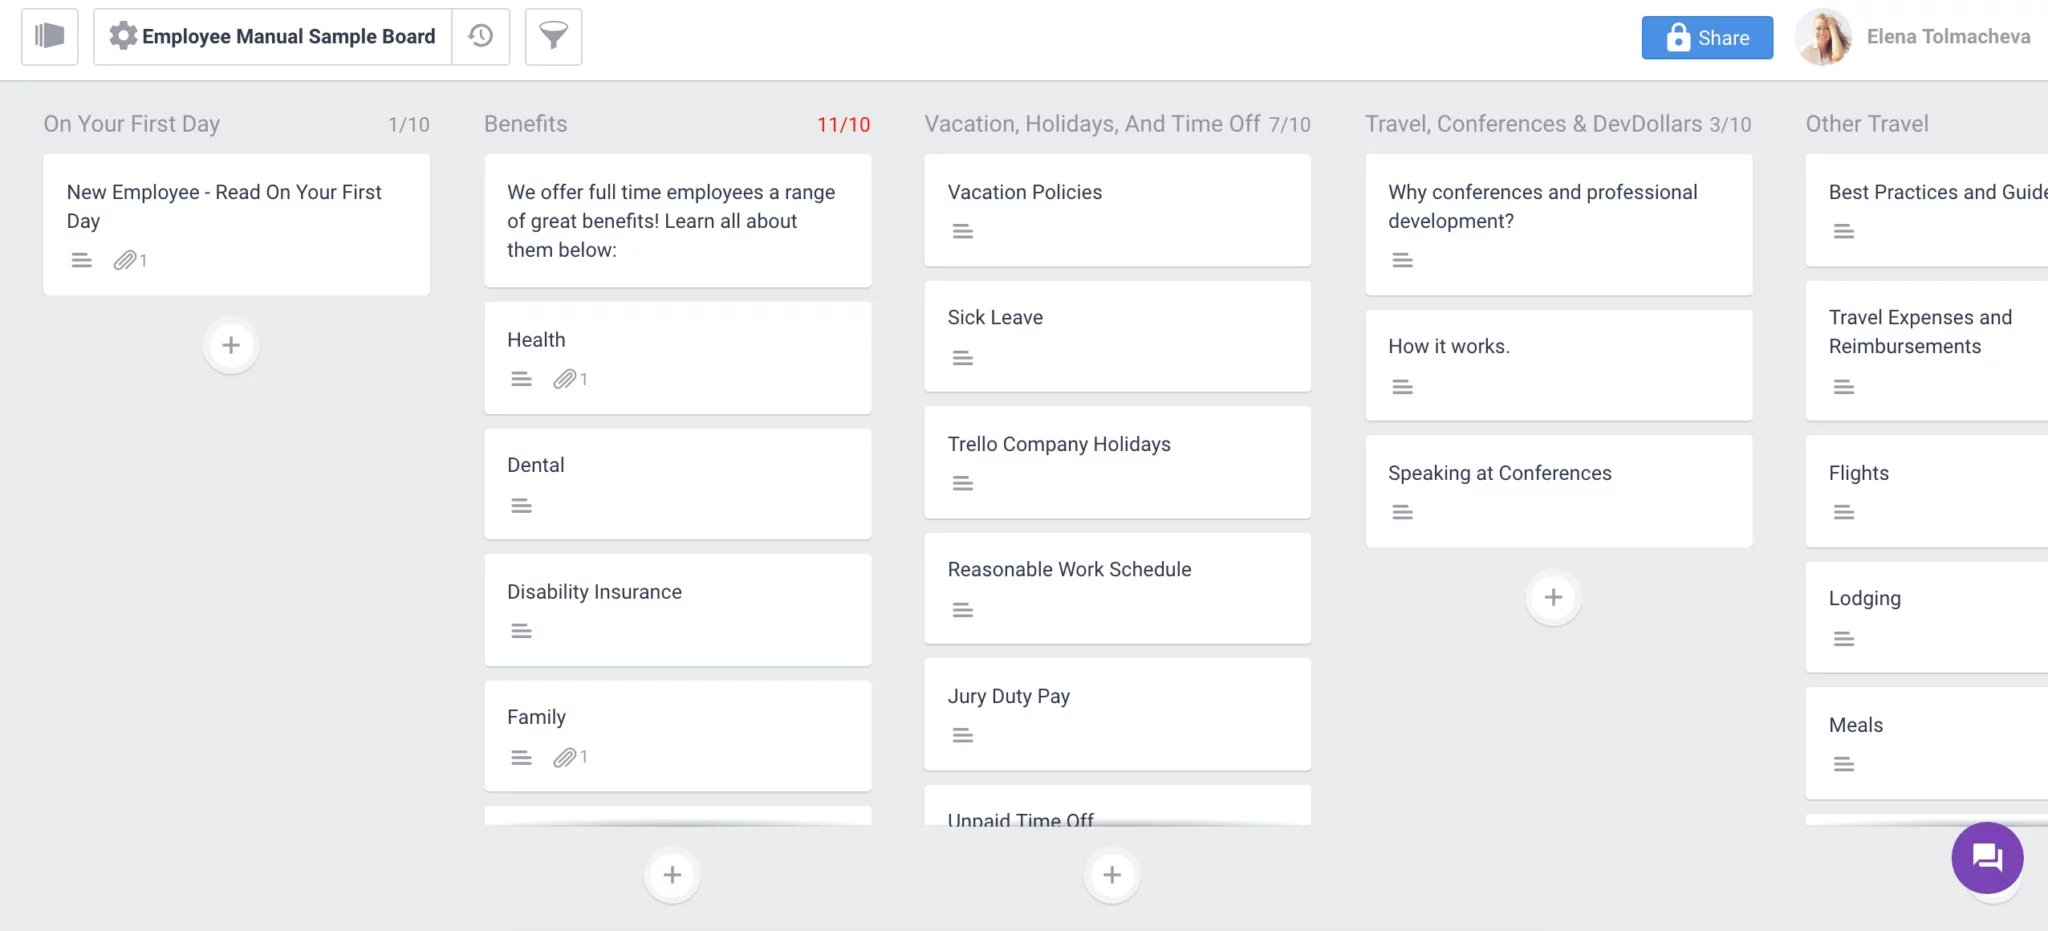

Now your cards from Trello are in Kanbanchi. Play around and see what functionality Kanbanchi offers. Enjoy! :)
Watch a short video tutorial:
If you need any help with import from Trello, just drop us a message. We'll be glad to help you out :)
More - 31. How to back up my board?
With board backups feature, dashboard owners who want to be on the safe side can back up their most important boards for easy recovery.
Creating a backup
To back up a board, first, open the board settings. To do that, click on the board’s name at the top of the screen and choose Board settings in the drop-down menu. In popover window on the right, click on Backups section. When you choose an option Create a new backup, a new line will appear on the list of available backups with the name of the board, date and time of the backup. The backup file will be saved in the backups folder of the board in your Google Drive.

Restoring your board from a backup
To restore an existing board from a backup, open board settings, select any backup on the list and click Restore when you mouse over it.

To restore a deleted board from a backup open the list of all boards and click Restore board from backup and choose a file from your Google Drive.

Video demonstration
More - 33. How to receive in-app notifications in Kanbanchi?
In-app notifications in Kanbanchi are updates about activity on Kanbanchi boards, which you receive in real-time in the app.
Enabling in-app notifications in Kanbanchi
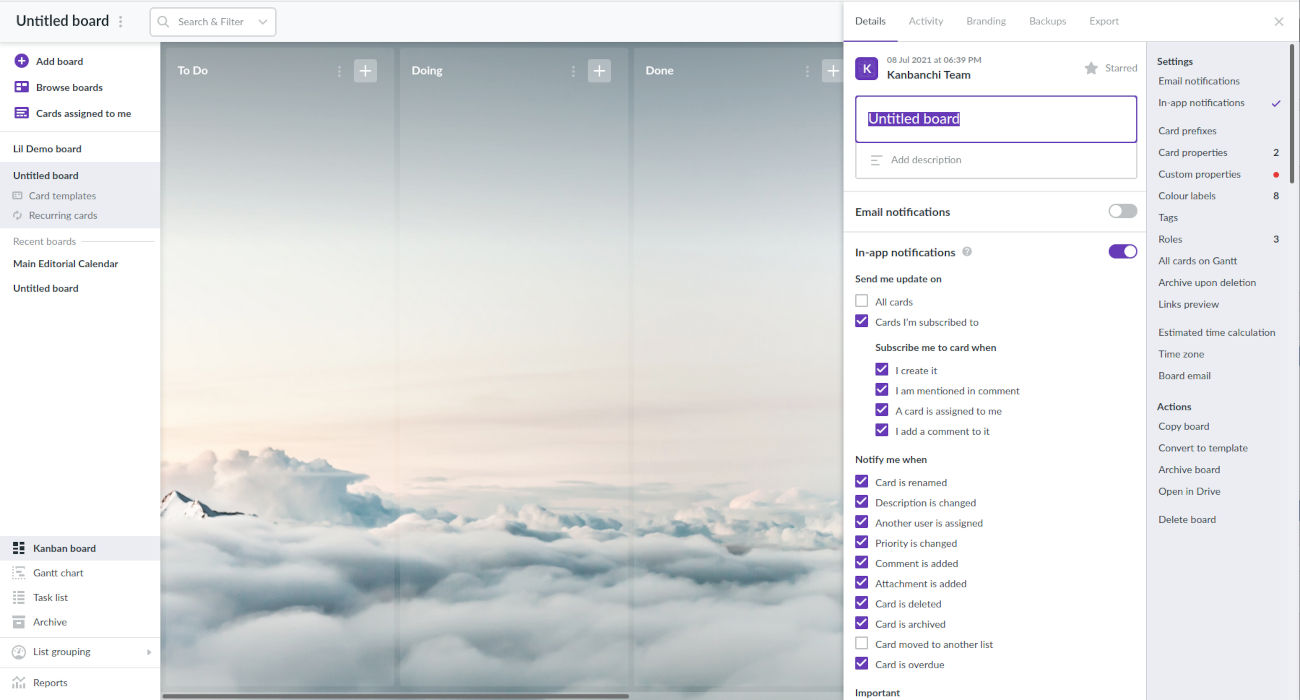
In-app notifications are turned on for all new boards that you create. However, they may be turned off for some boards if they have been created a while ago. To enable in-app notifications for a particular board, first, click on the board’s title on the top panel and then choose Board settings from the drop-down list.

Turn on the in-app notifications first and then configure what types of notifications you want to receive. You may receive notifications about the updates of cards and important activities (for example, when someone assigns cards to you or mentions you in a comment). Also, you may choose cards on the board you want to receive in-app notifications for (all cards, cards assigned to you or cards you are subscribed to).
Here are the default settings for in-app notifications for all new boards. Please, note, that for some old boards that you've created some time ago, you will need to manually reset in-app notifications.


Receiving in-app notifications in Kanbanchi
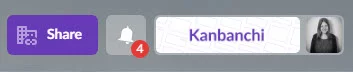
Notifications are located behind the bell-shaped button in the top right corner. When you have new notifications, the badge appears, which displays the unseen notifications count. Click on the notifications button to view your notifications.

The red badge displays the number of unseen notifications
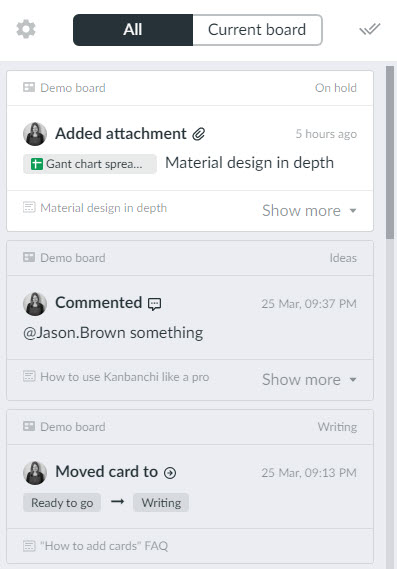
Notifications from all your Kanbanchi boards are gathered in one place. Looking at a new notification, you are able to see at a glance what board it belongs to, which card it is about and who performed the change. You can also use a filter to see notifications only from a current board or from all boards.

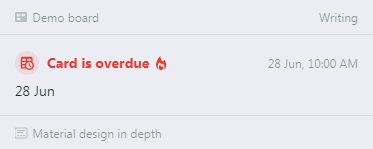
Due Date Notifications and Notifications before the Due Date
If you set a due date on a card, you will receive a notification in case it's overdue.

You may also set up notifications before the due date to be notified in advance. Consult this FAQ for the details.
Let us know if there're other types of notifications you would like to receive by dropping a message to Support. Also, learn more about an option to receive e-mail notifications and receive browser notifications in Kanbanchi.
More - 34. How do I add my board address to contacts list?
The structure of Kanbanchi board email address is a bit different from a usual one, due to security and uniqueness reasons. To be able to save it as a contact in Google Mail and any other email client, please, do the following:
- Add the first part as a contact name
- Add card@kanbanchi.com as an email address
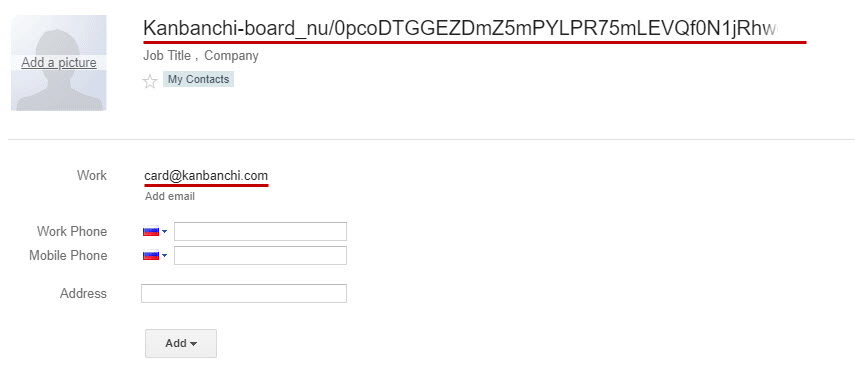
It shouldn't be any problem, as you can still star such contact and find it in the search field by typing the name of your board.
Example: board address is Kanbanchi-board_nu/0pcoDTGGEZDmZ5mPYLPR75mLEVQf0N1jRhwgKdgim9DcztBtXNT4zmg5MPp1K <card@kanbanchi.com>
First part: Kanbanchi-board_nu/0pcoDTGGEZDmZ5mPYLPR75mLEVQf0N1jRhwgKdgim9DcztBtXNT4zmg5MPp1K
Email: card@kanbanchi.com
The first part always starts with the name of your board.
More - 35. How can I apply a default template?
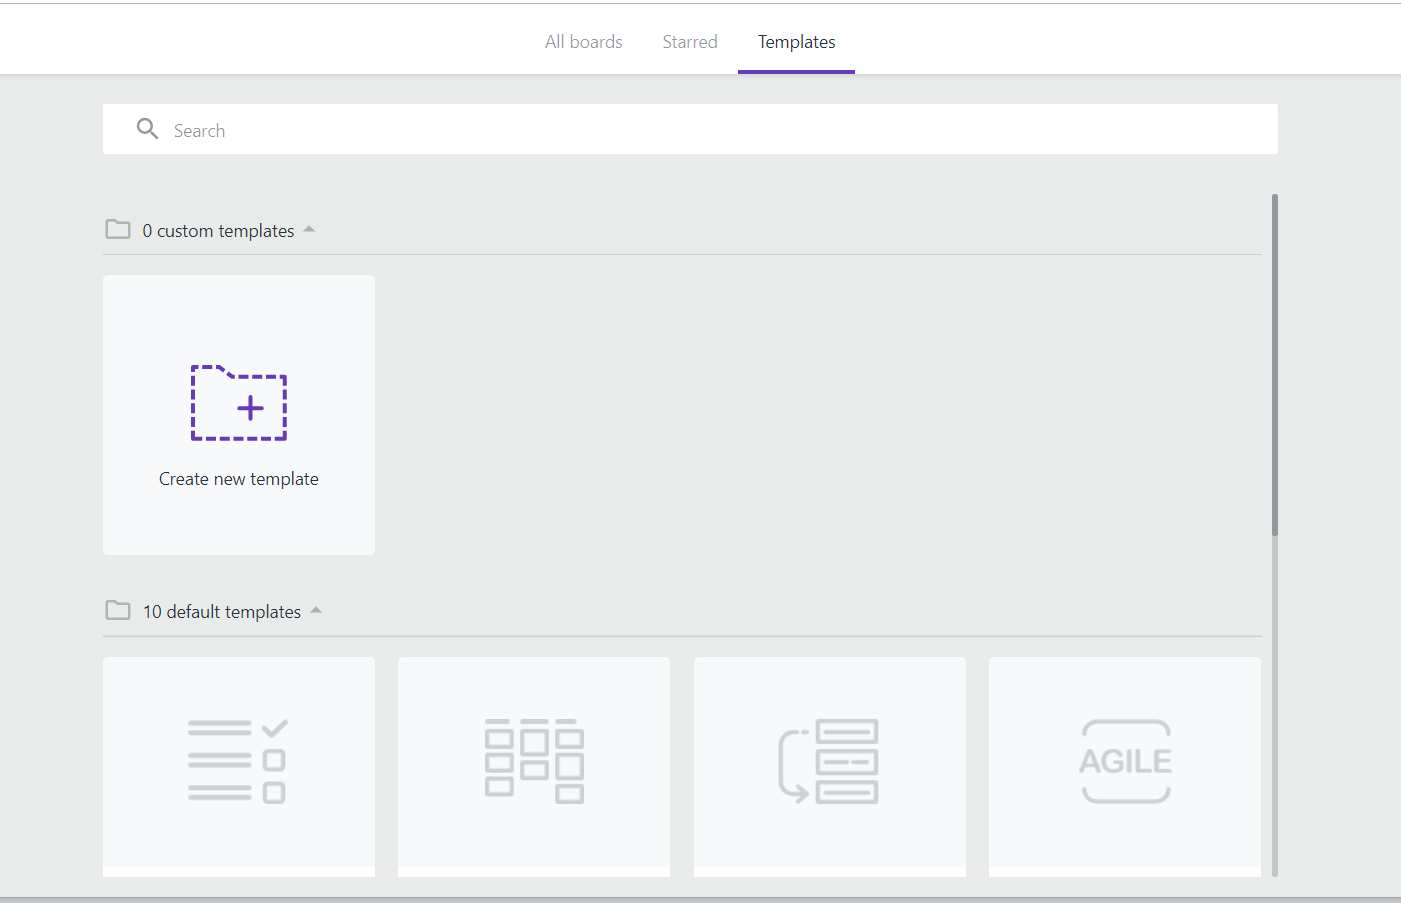
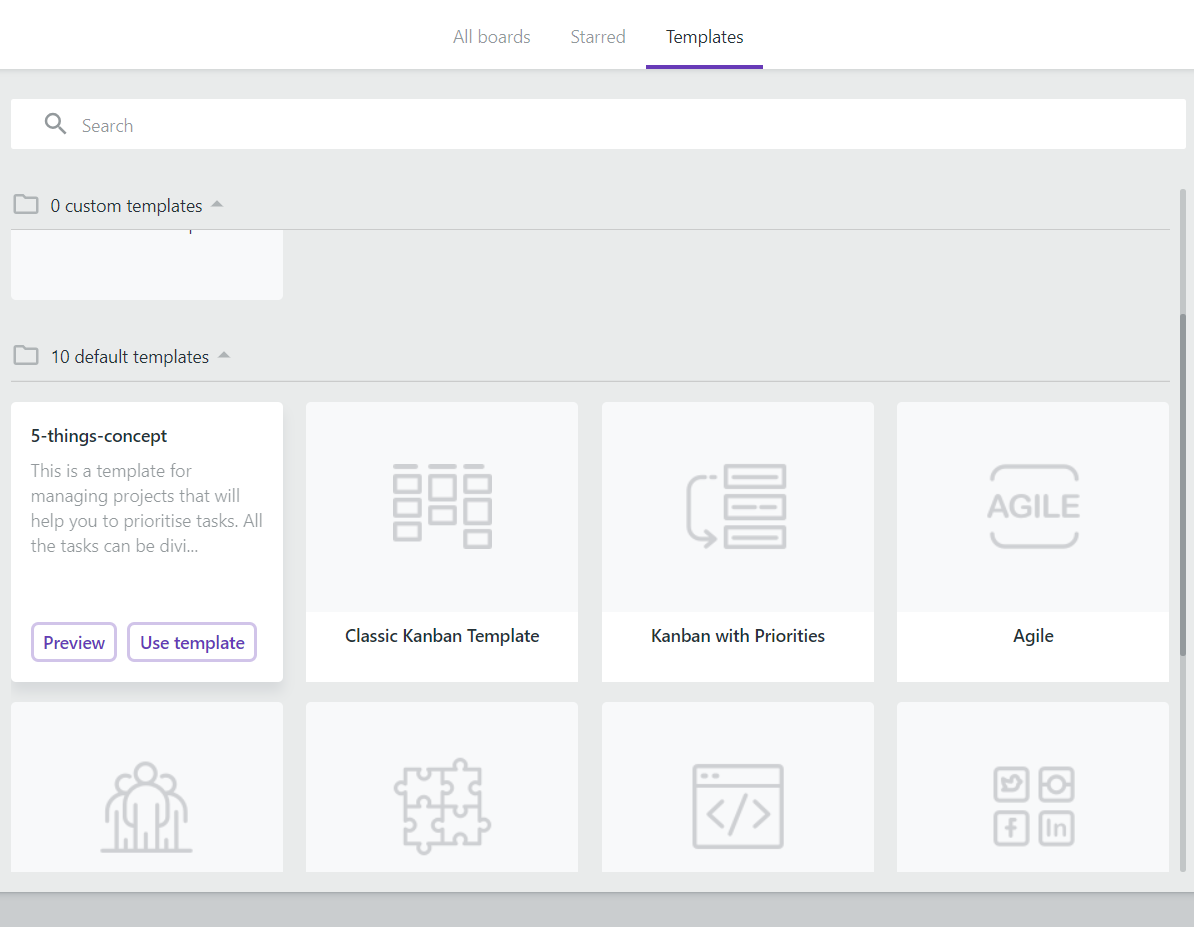
There are 11 default templates in the app. You can find them in the Template tab on the start screen.

By hovering a mouse cursor on a template you may see its title, partly the description and 2 buttons: Preview and Use template.

To read the description click Preview.
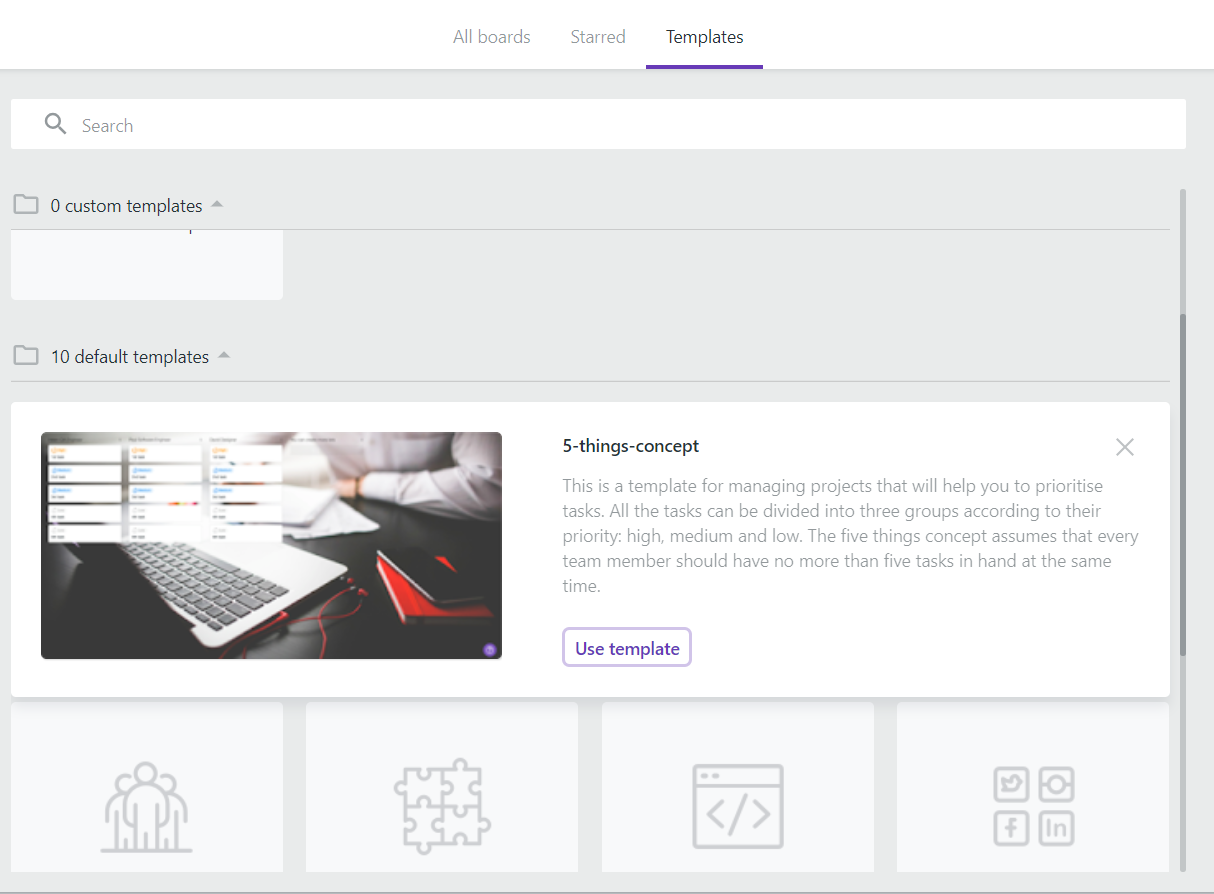

You may click Use template in the pop-up window. The board from the template is created.
More - 36. How to create a custom template?
You may create your custom templates that will suit your personal needs.
Click Templates on the start screen.
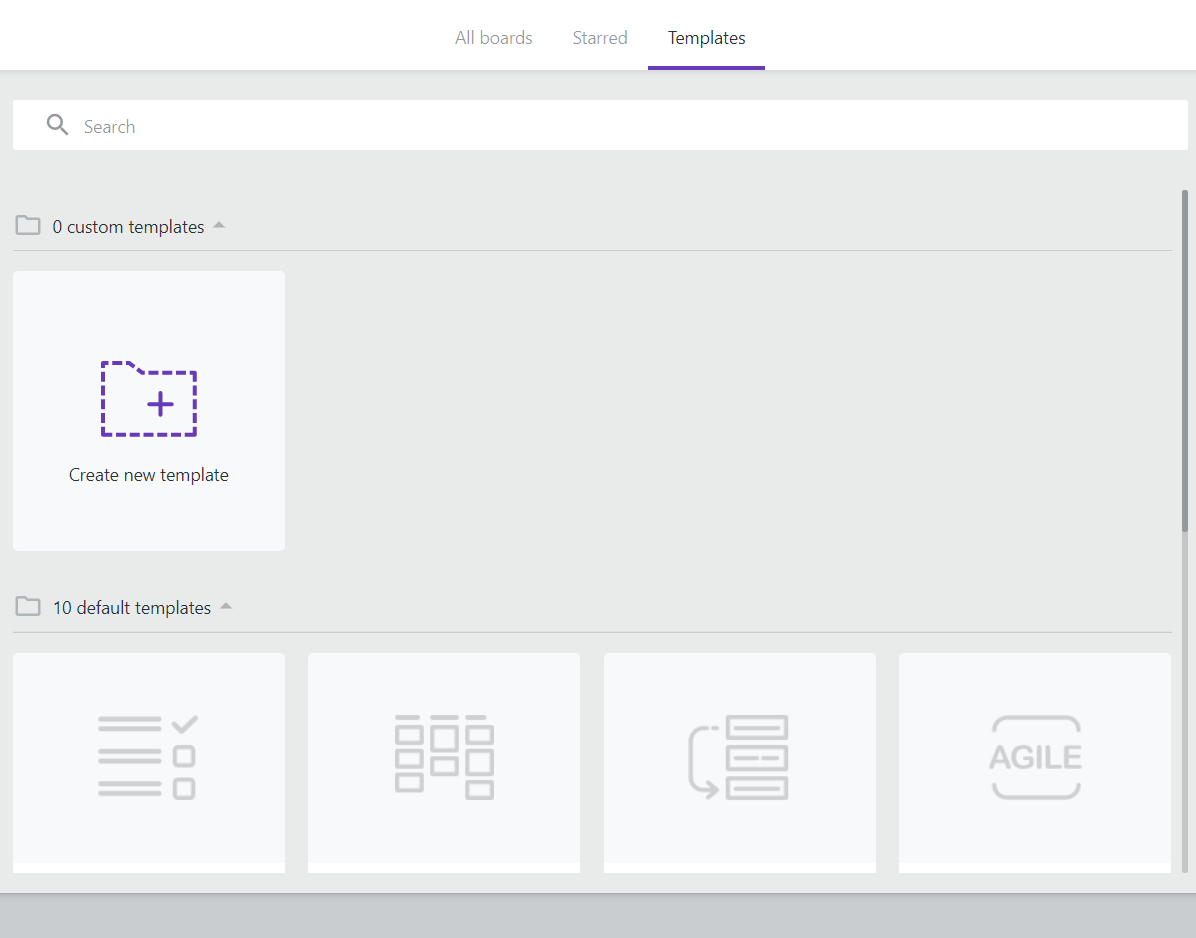
Click Create new template.
The board for the new template creation is opened.
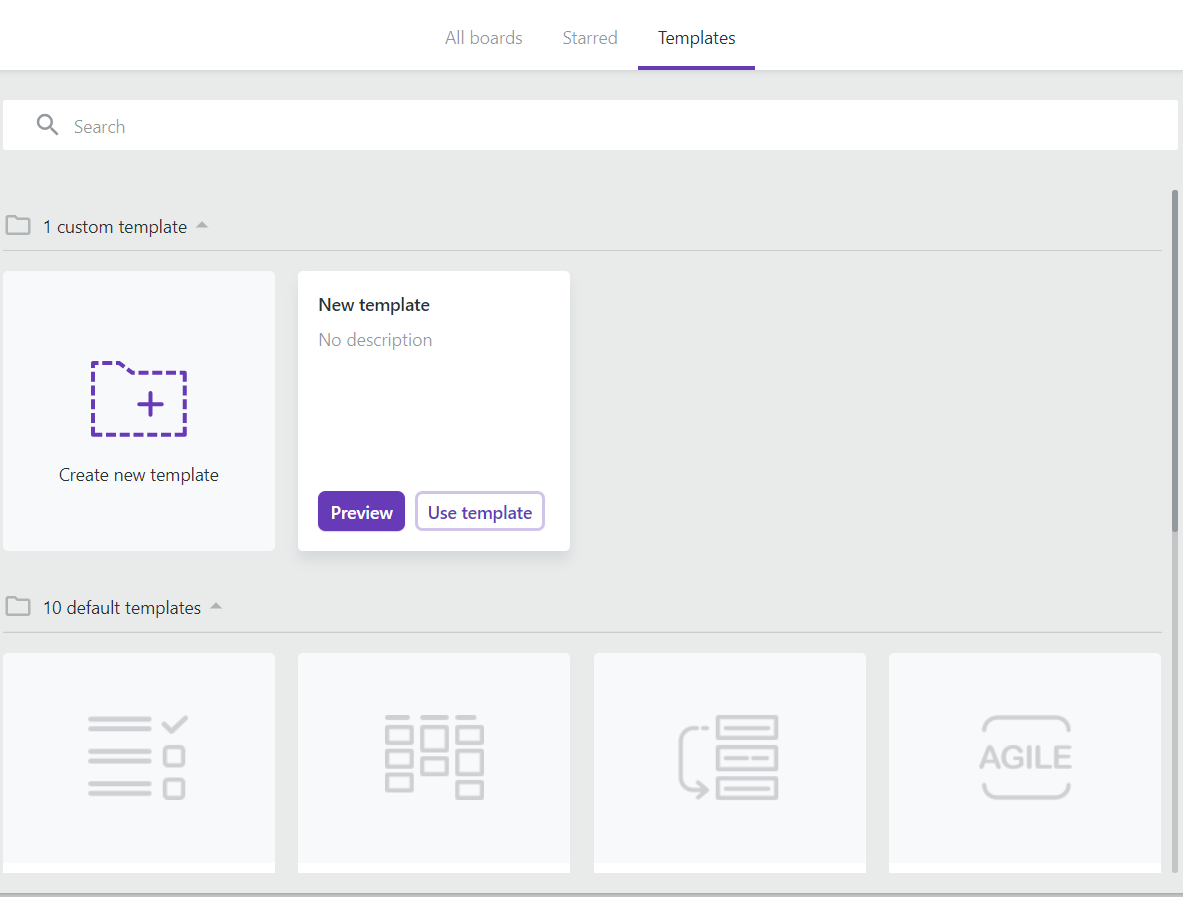
More - 37. How can I delete my custom template?
You can delete your custom templates.
Hover the mouse cursor on the custom template you want to delete.
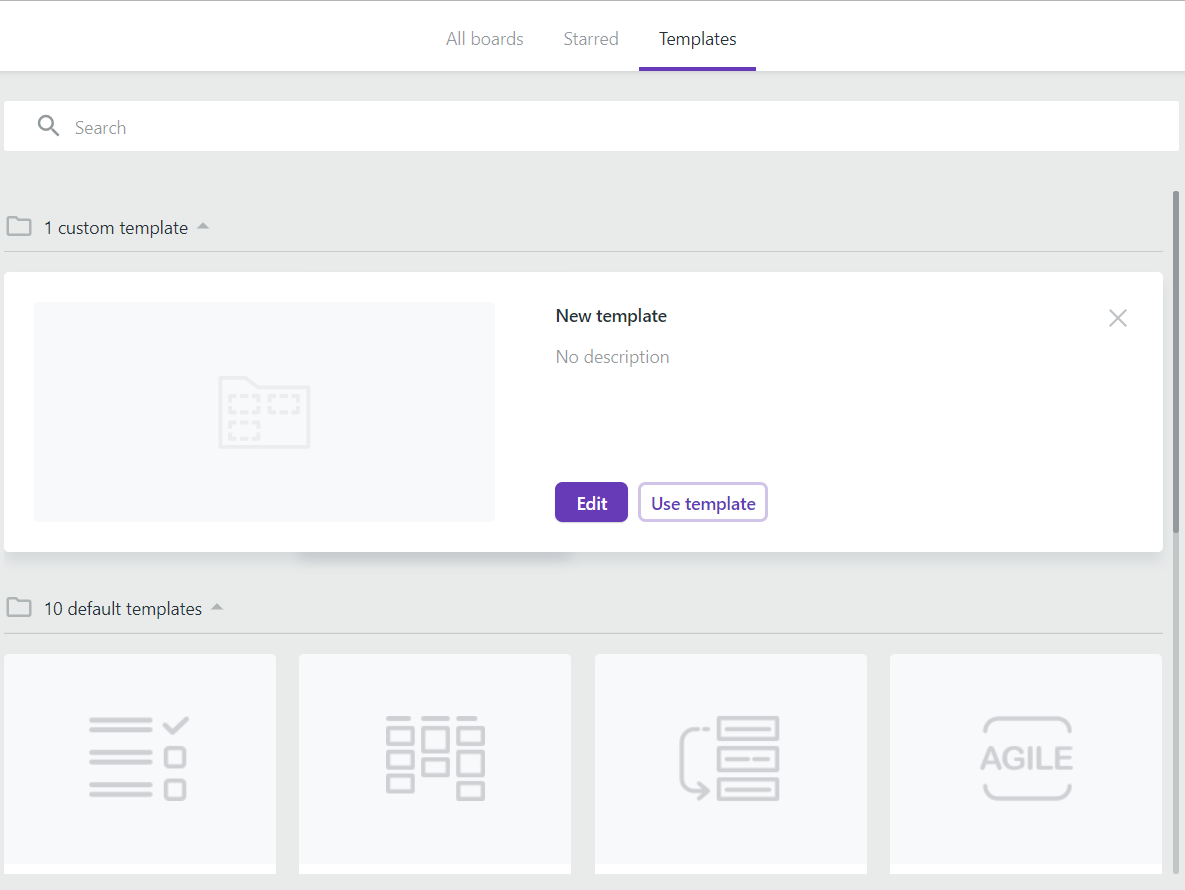
Click Preview.
Click Edit in the opened window.
Click Ok in the pop-up window.
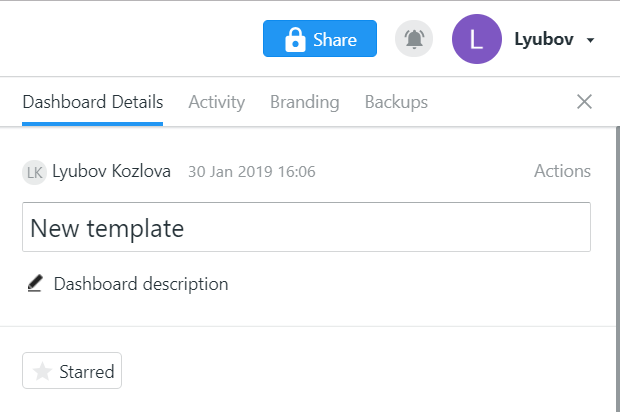
Go to board settings by clicking on the board’s name in the upper left corner of the screen.
Click Actions in the right panel.
Click Delete dashboard.
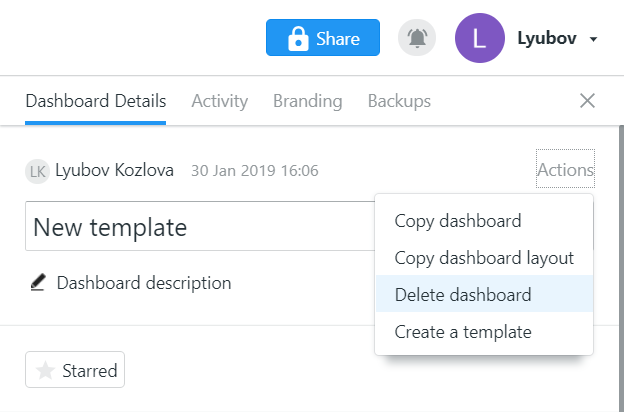
Confirm the deletion by clicking Delete.


The custom template is deleted.
More
- Boards
- 1. How do you make a Kanban board?More
Kanban is a popular, easy to use lean management system. Its help in visualizing a team’s workflow difficult to overestimate. Thus, a Kanban board may help your team to improve general task efficiency and show better results as a team. To make a Kanban board, first, you need to choose a tool.
Initially, the kanban board was a physical tool. However, lately, the typical workplace has changed greatly: remote work grows more popular and teams might be spread not only between cities but even between continents. The main advantage of digital boards is that you can work with them anywhere with a Wi-Fi connection. It makes them an ideal solution essential for remote teams.
There are quite a lot of digital kanban boards nowadays, which makes it much more difficult to choose the right one. However, we advise you not to waste time and opt for Kanbanchi. Kanbanchi is not just a kanban board, it is a complete project manager app fully integrated with Google Workspace. So you need only to sign in with your Google account and accept permission requests the App asks for on the Google Authorization screen. At first, your board will look like this:
Now it's time for the fun part: you just need to map your workflow process. Think it over to configure properly. The Kanban method assumes that lists on your board should reflect the stages of your workflow. Your working process can include as many stages, as you need.
When you are done with it, start to fill up your board with cards. Each card on the Kanban board represents a task. You can use colour-code to identify the types of your tasks depending on the type of work you do. You may also use other card features for easy visibility.
Start your free trial - 2. How to make my board a template?More
You can create templates from any of your existing boards.
Go to the board settings by clicking on the board’s name in the upper left corner of the screen and choosing Board settings in the drop-down menu.
The panel on the right of your screen will open. Find the Actions section in the lower right corner of the panel and click Convert to template.
You will see a pop-up window saying that a template is being created.
You will see the templated opened as a new board. You may make edits and they will be saved automatically.
Whenever you need to create a board from this template, you will be able to find it in the Templates tab.
- 3. How do I switch from 24-hour clock to 12-hour clock?More
To switch from or to 12-hour clock, please, open your user settings
In the opened window, choose the desired time format
- 4. Is there a way to change the owner of a board? Or can we have more than one owner of a board?More
There can be only one owner of a board. The sharing settings in Kanbanchi are provided by Google Drive. Unfortunately, Google Drive does not allow more than one owner.
Within Google Workspace / G Suite domain, Google Workspace / G Suite Admin can move ownership of all files, including Kanbanchi boards, to other members of the organisation. This option is very useful when one user leaves, and another comes in his place.
The board owner can transfer ownership to another user by clicking Share in the app or within Google Drive.
Note: ownership can only be transferred to another user in the same domain as the current owner.
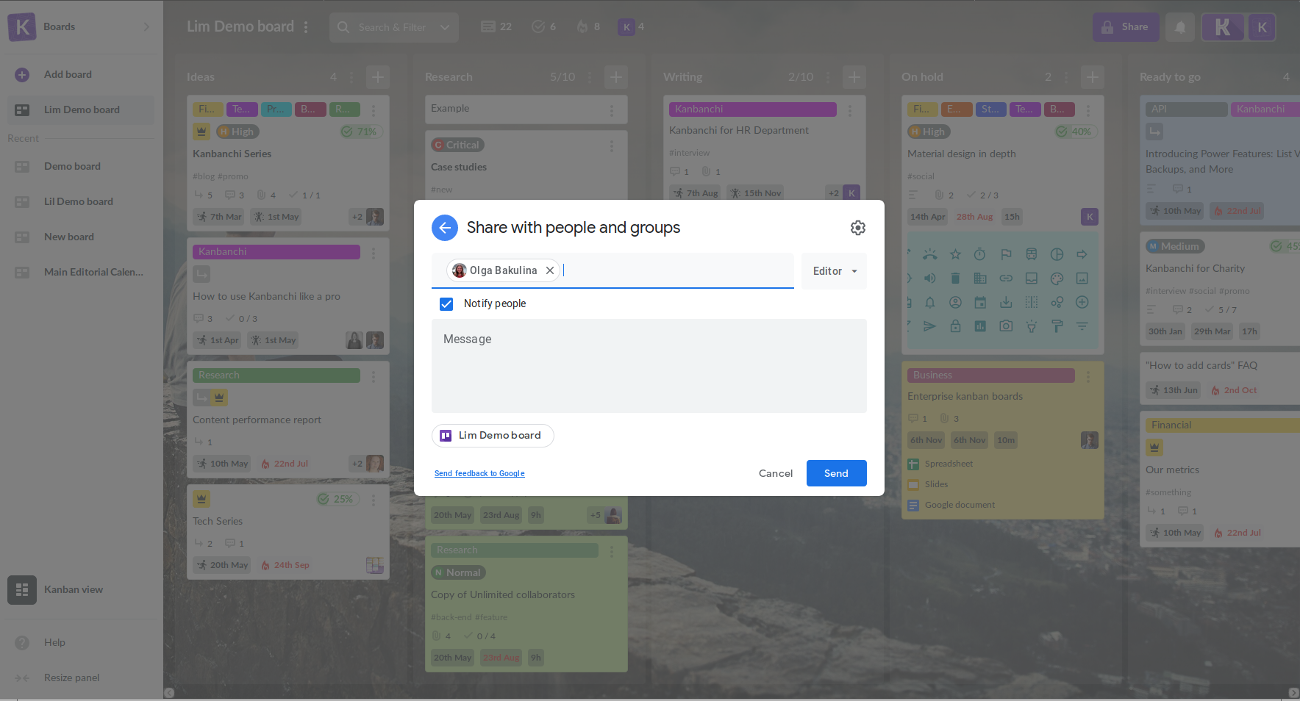
Click the Share button on the top panel on the right and the "Share with people and groups" window will appear.
Start entering the new owner’s email in the "Add people and groups" line. Then choose the email and click Send.
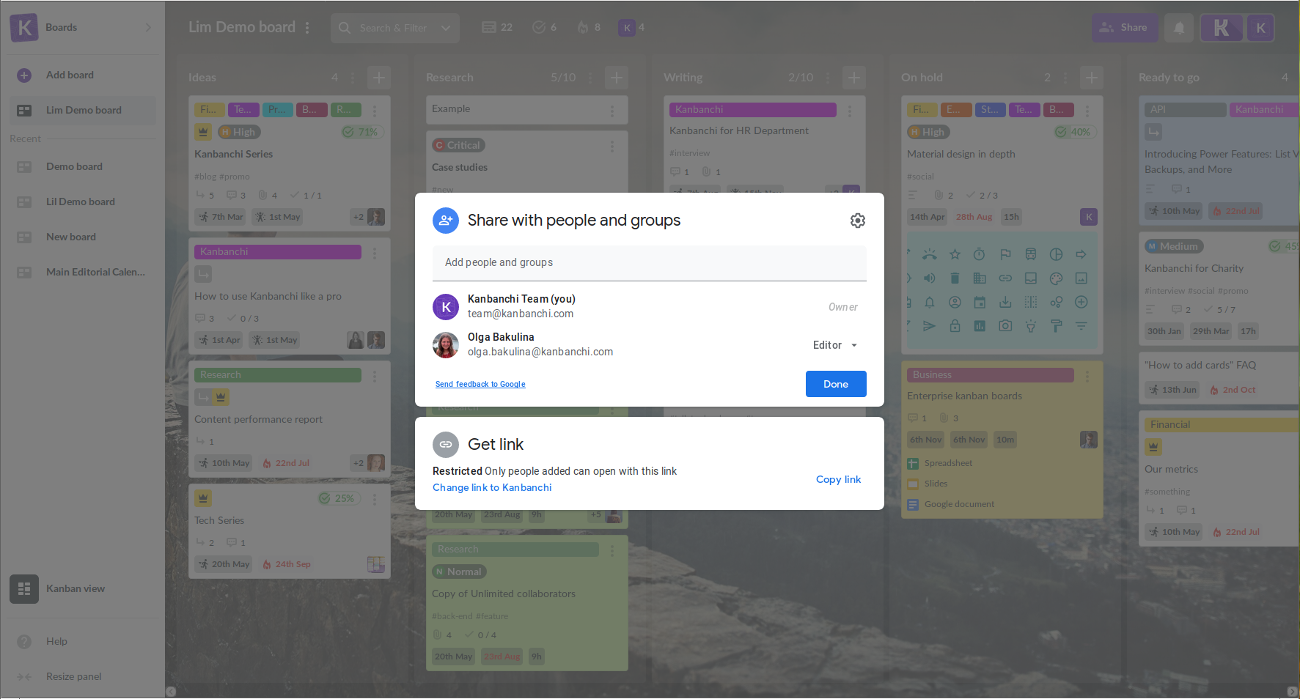
The user will appear in the list of those who have access to the board.
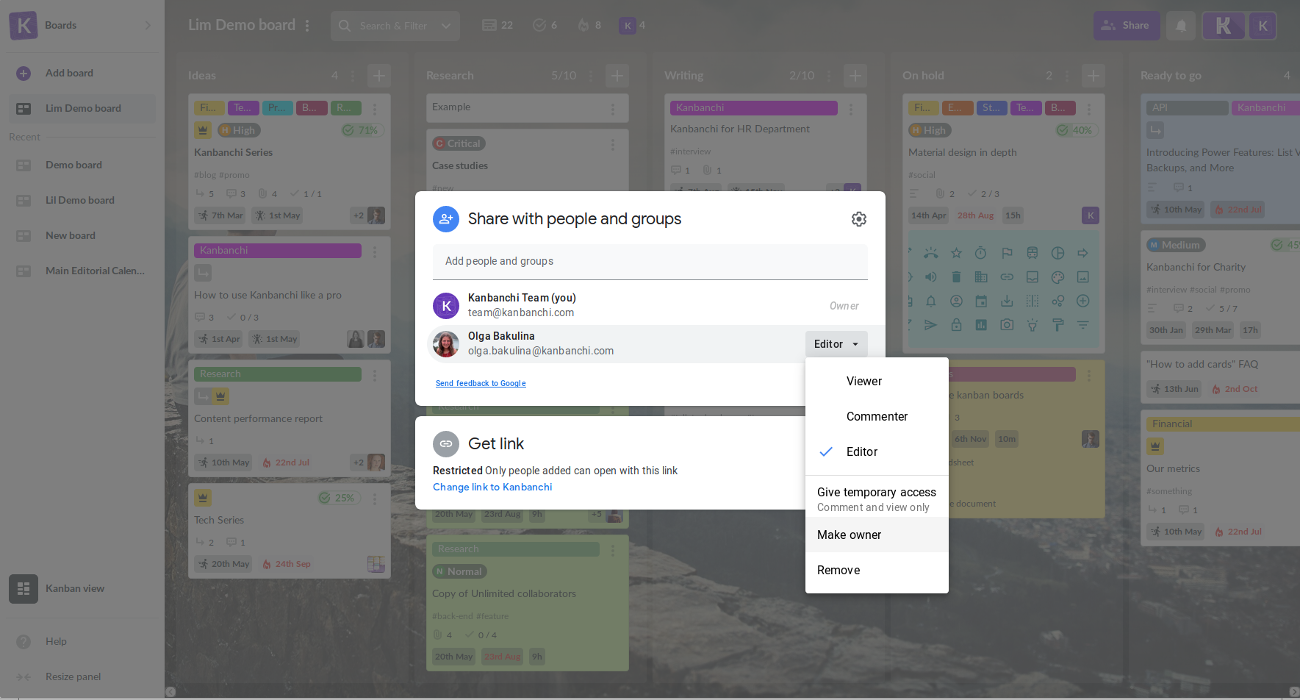
Click on "Editor" on the right from the new user and choose Make owner from the drop-down list.
Confirm the transferring by clicking Yes in the "Make this person the owner?" pop-up window and the owner will be changed.
In order to transfer ownership within Google Drive find the folder containing the board file. Click on it with the right mouse button. Choose Share in the pop-up window. Repeat the actions that are described above.
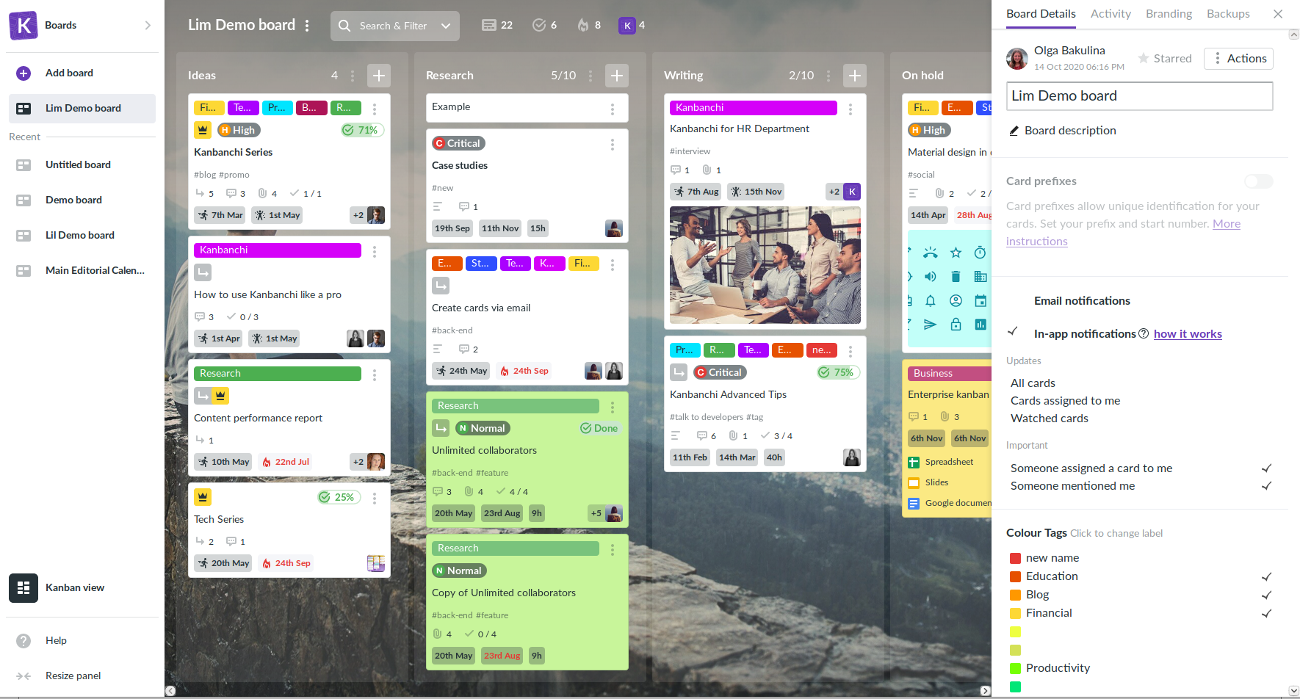
We advise waiting a couple of minutes (up to 10) to make sure the transfer is completed. You may also check if the transfer has been completed by visiting the board. Open the Board setting panel. The new owner's name should appear in Board details.
Personal users (gmail.com) cannot pass ownership of their boards to other users (unlike with Docs and Sheets). A quick workaround would be to share the board with a colleague, who you want to see as the owner. Then the colleague should сopy your board into his or her Google Drive, thus becoming the owner of this copied board. All settings will be copied, excluding comments, sharing settings, notifications and dates in Google Calendar. Permissions of attached files also must be checked, because original files belong to you and are placed in your Google Drive.
- 5. How can I use Kanbanchi Add-on for Gmail?More
Kanbanchi for Gmail Add-on makes your team’s collaboration even easier. It keeps your inbox and boards connected to boost your productivity. Users with the installed Add-on have an opportunity to convert emails into Kanbanchi cards.
How can I install Kanbanchi for Gmail add-on?
You may install Kanbanchi for Gmail from GSuite Marketplace.
You should be logged in to your Google account to install the add-on. Click Install.
You will see the pop-up window. Click Continue.
When the Add-on is installed you will see the confirmation message. Click Done.
Also, it is possible to install the addon directly from your inbox. Click the Plus icon on the right-side panel.
Find Kanbanchi for Gmail in the list of GSuite Marketplace add-ons. Choose Kanbanchi and click Install. You will be taken through the same steps described above.
Once the Add-on is installed, Kanbanchi icon will appear in the right-side panel.How can I create cards from Gmail with Kanbanchi for Gmail add-on?
Once the Add-on is installed, you may start using it.
Open an email. Click Kanbanchi icon on the right-side panel.Select board location. Selecting Recent boards you will see the same list of boards you see in the Recent board section in Kanbanchi.
Select board (templates, archive and Read-only boards won't show).
Select list.
Edit the content if needed.
Click Create card.
The subject will be displayed as the card title and the email body will be added as the card description automatically. You may edit the content if needed.
What will happen if I install the addon without having Kanbanchi account?
While trying to create a card from Gmail you will be informed that no Kanbanchi account has been found for the email. You may start using Kanbanchi app by just clicking Start with a free trial.Known issues
“Content not available for this message.”
The issue occurs on Google’s side. Unfortunately, there is no walkaround that the developer can apply.
“Add-on error. Something went wrong when executing the Add-on.”
Please, contact us if you’ve met the issue.How can I uninstall the Add-on?
In case you don’t need the Add-on anymore you may uninstall it. Go to Manage Apps in the G Suite Marketplace, click on the three-dotted menu and click "Remove". Also, you may uninstall the Add-on in the Gmail settings. Click the nut icon and choose Setting in the drop-down menu. Open the Add-ons tab. You will see Kanbanchi in the list of installed add-ons. Click Manage. You will see the Add-on in GSuite Marketplace. Click Uninstall. - 6. How can I create boards within Shared Drives?More
It is possible to create boards not only in My Drive but in Shared drives to organize the workflow of your team and make it even easier.
Click Browse boards, and choose Shared drives. You will be asked to give permissions to integrate Kanbanchi with your Shared Drives and create boards in any of them (once).
You’ll see the list of Shared Drives available for you.
You may create boards in any of the Shared Drives, also you may delete the boards by clicking the Trash bin icon and move boards to My Drive or other Shared Drives by clicking the Arrow button.
Alternatively, you may open board settings, choose Move to in Actions and choose the Drive you'd like the board to be relocated to.
Please note that the board’s Time Zone is inherited by the creator’s Time Zone by default.
- 7. How can I save filter presets?More
Sets of applied filters may be saved as presets when you filter cards on the board.
- press the Filter options button on the top panel near the board’s title;
- click "Add new filter" and type the name for the preset;
- apply filters you need;
- hit Enter. The preset will appear in the list of saved filters.
You can Select one or more presets from the list to apply them to the view.
You can also reset the filter settings using the check on the right.
Additionally, you can rename the preset or delete it:
- go to the list of saved filters;
- click the pencil icon
;- type new filter name and hit Enter.
If you click the bin icon
, the preset will be deleted. - 8. How can GSuite Admin install and remove Add-on for Gmail for domain?More
Domain administrators can install, authorize and remove add-ons for users in their domain. You can install Kanbanchi for Gmail in your organization's domain from within the Google Admin console, or from the Marketplace website. When you get to the add-on's description page:
- Click Install, then Continue.
- Review the terms of service, specify if you want to make the add-on available to your whole domain or to a specific team or department, check the agreement box and click Accept.
After you install the add-on to your domain, it's listed under Marketplace Apps in your Admin console.
- From the Admin console Home page, go to Apps
Marketplace apps.- Click Kanbanchi for Gmail to access settings.
Note: domain installation may require time for the add-on icon to appear for the domain users.
As an admin, you can remove add-on for Gmail from your organization's G Suite account. When you delete it, none of your users can access it.
- From the Admin console Home page, go to Apps
Marketplace apps.- Click Kanbanchi for Gmail.
- In the upper right of the Settings page, click
.- Click Remove App.
- 10. How to create recurring tasks (cards) in Kanbanchi?More
If you have tasks that repeat regularly, you can automate the process of creating cards for these tasks. Such cards that will be re-created according to the rule you set are called recurring cards. To create a recurring card, open the card with the task you want to repeat regularly. Click the three dots in the actions menu, then choose Make recurring. Then select the date it should start repeating, and set the repeating rule.
To view the list of all recurring cards, edit or delete them, click on the board title (or three dots next to the title), and choose Recurring cards.
You will see a panel with all your recurring cards, and you will be able to create them from scratch - just set the rules and give your recurring tasks names.
- 12. How can I import data to Kanbanchi?More
Kanbanchi has several import options. You may import a CSV file to Kanbanchi or upload data from such tools as Trello and Jira.
You may find out details about each option in these help articles:
How can I import my Trello boards to Kanbanchi?
How can I import my Jira data to Kanbanchi?
- 13. How can I import my Jira data to Kanbanchi?More
In case you'd like to import your Jira data to Kanbanchi, please, follow the steps below.
Step 1. Export your Jira data
Log into Jira and open the project you'd like to export. Click Filters and choose Advanced issue search.
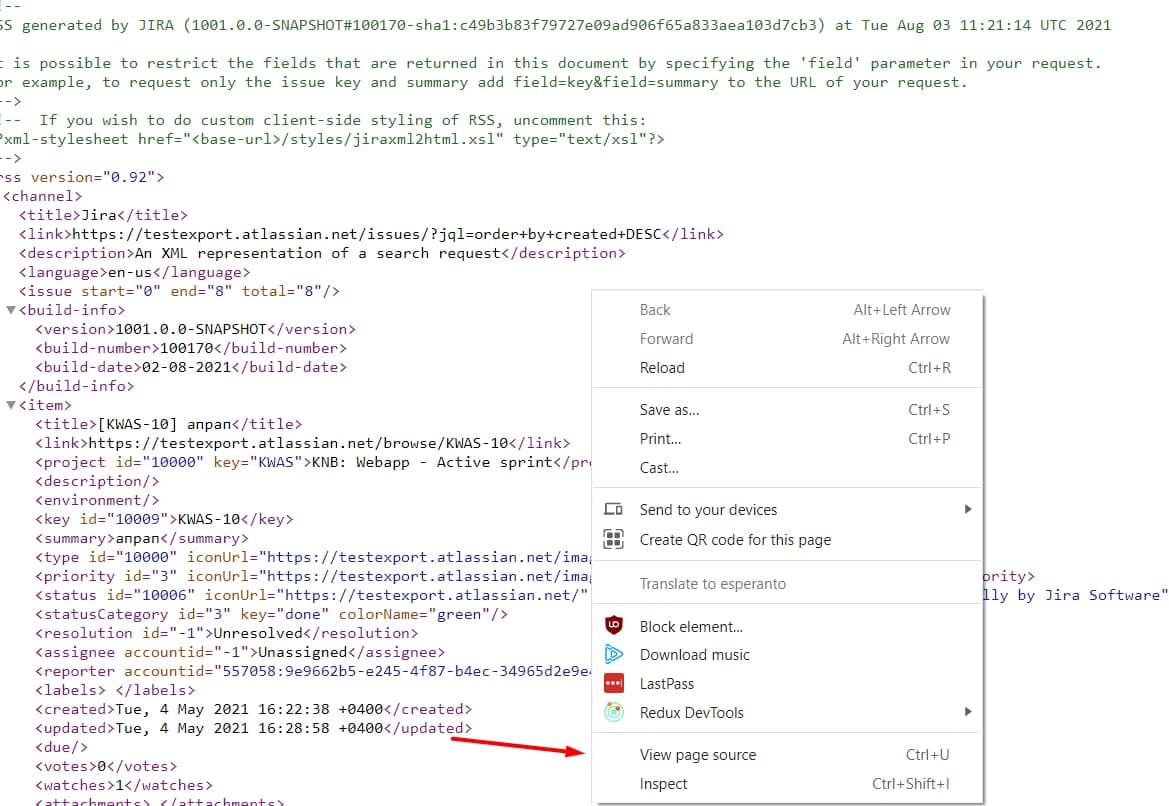
You will be redirected to the Search. Click Export.
Choose Export XML.
The data will be opened in a separate browser in the XML format. Click with the right button of your mouse and choose Save as... in the menu. Save the file to your computer.
There is another very slightly different export procedure for very complex boards. After you have chosen Export XML and the data opened in a separate browser in the XML format click with the right button of your mouse and first select View page source.
And only after that use Save as... to save the file to your computer.
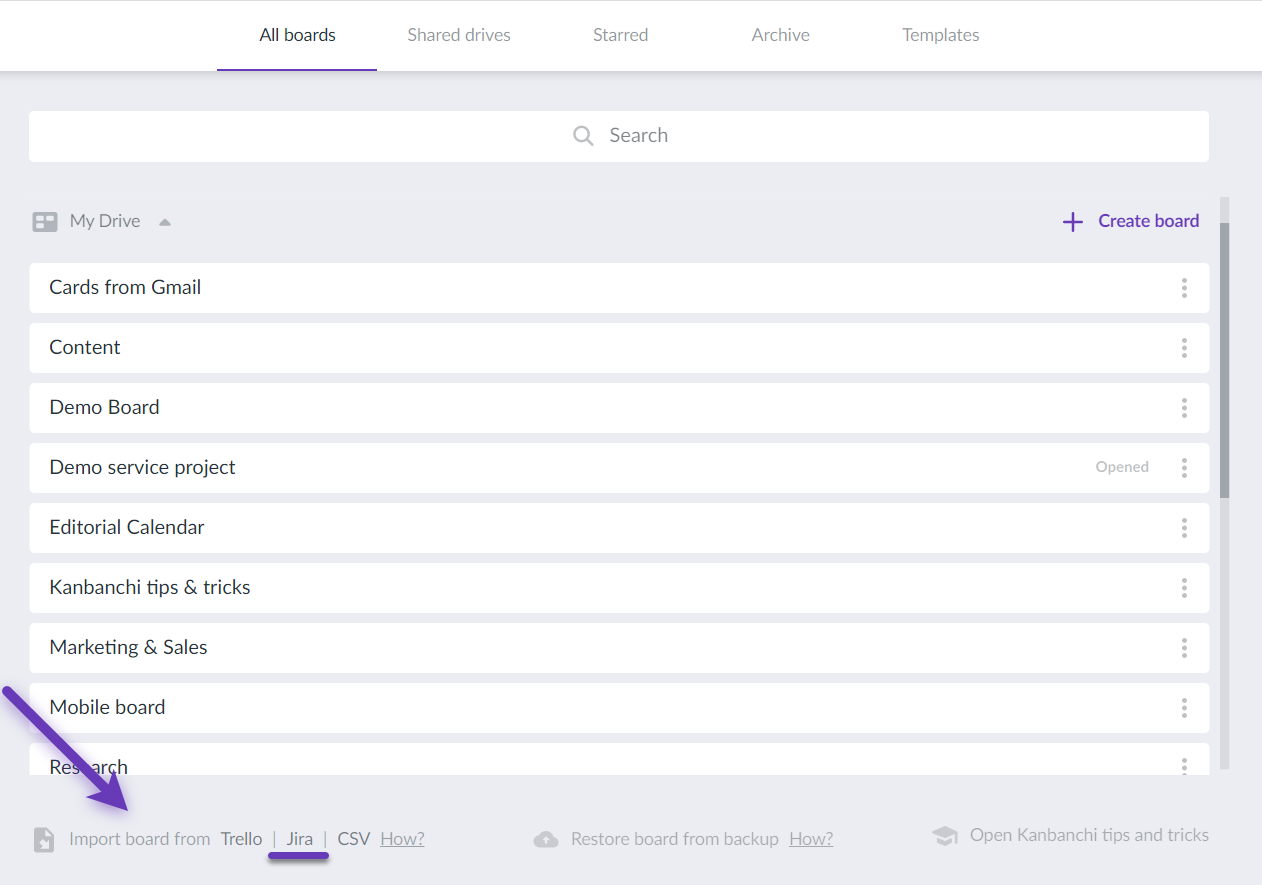
Step 2. Import Jira data to Kanbanchi
Open the list of your Kanbanchi boards. You will see the Import board from option at the bottom of the page. Please, click Jira and upload the file.
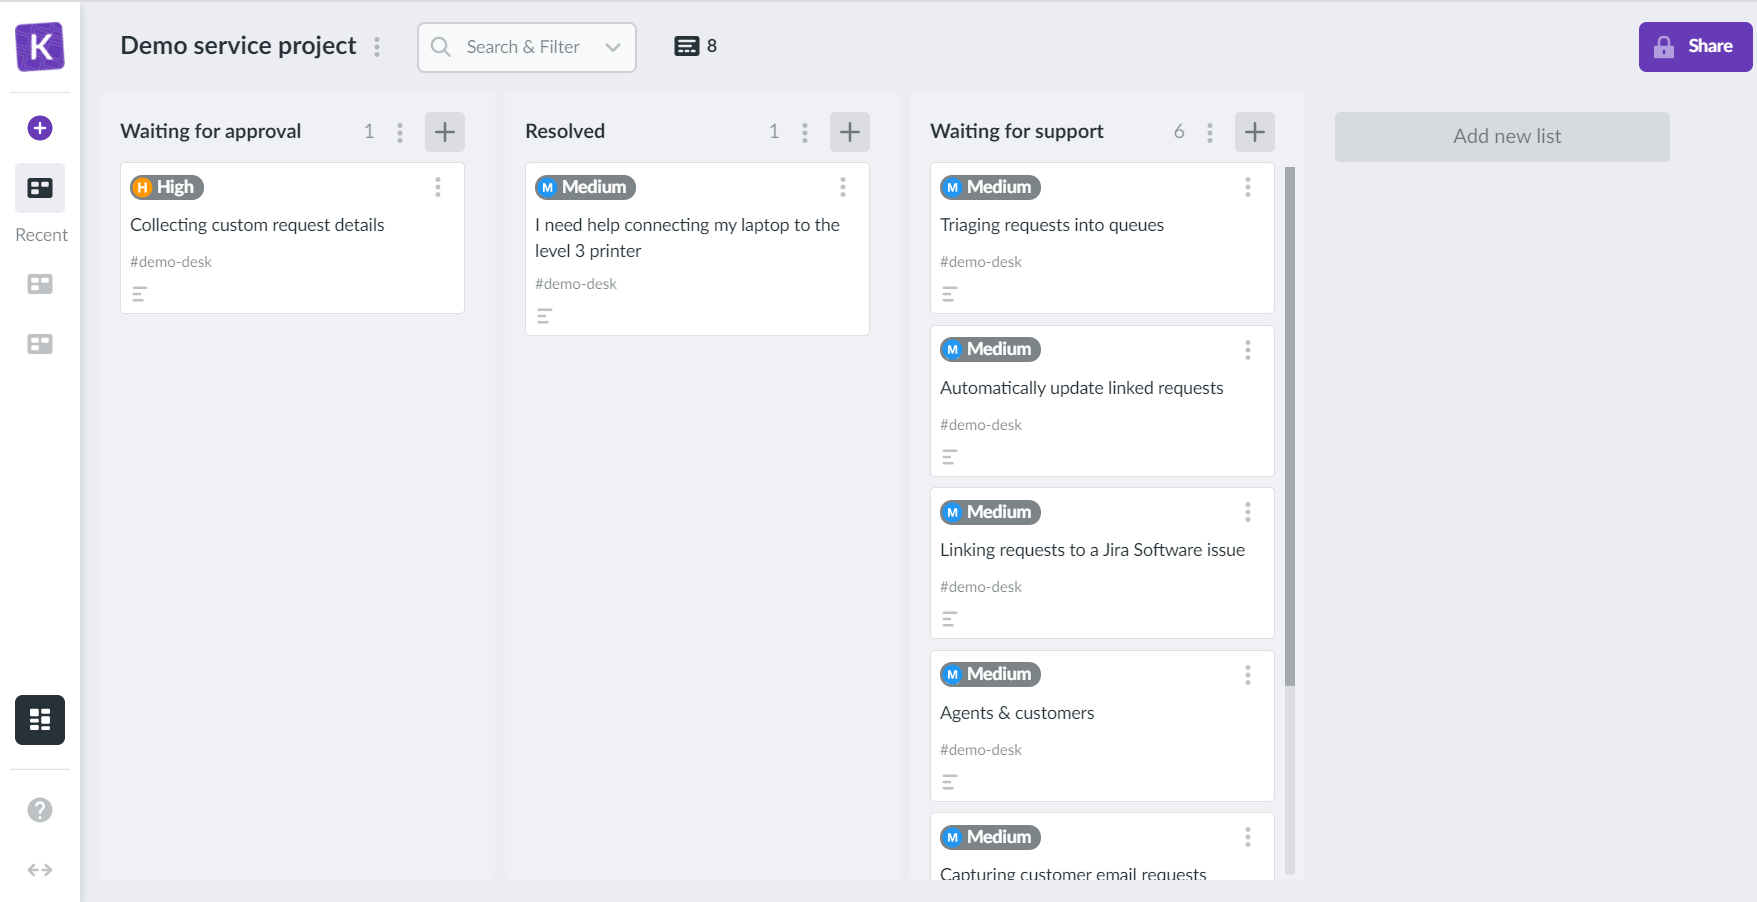
Kanbanchi will create a new board using imported data.
- 14. How can I import a CSV file to Kanbanchi?More
Step 1. Prepare a CSV file
A CSV file can be created and edited using any text editor. Additionally, you may export an Excel sheet or a Google Spreadsheet to create a CSV file and subsequently import it to Kanbanchi. You may use this spreadsheet as a template
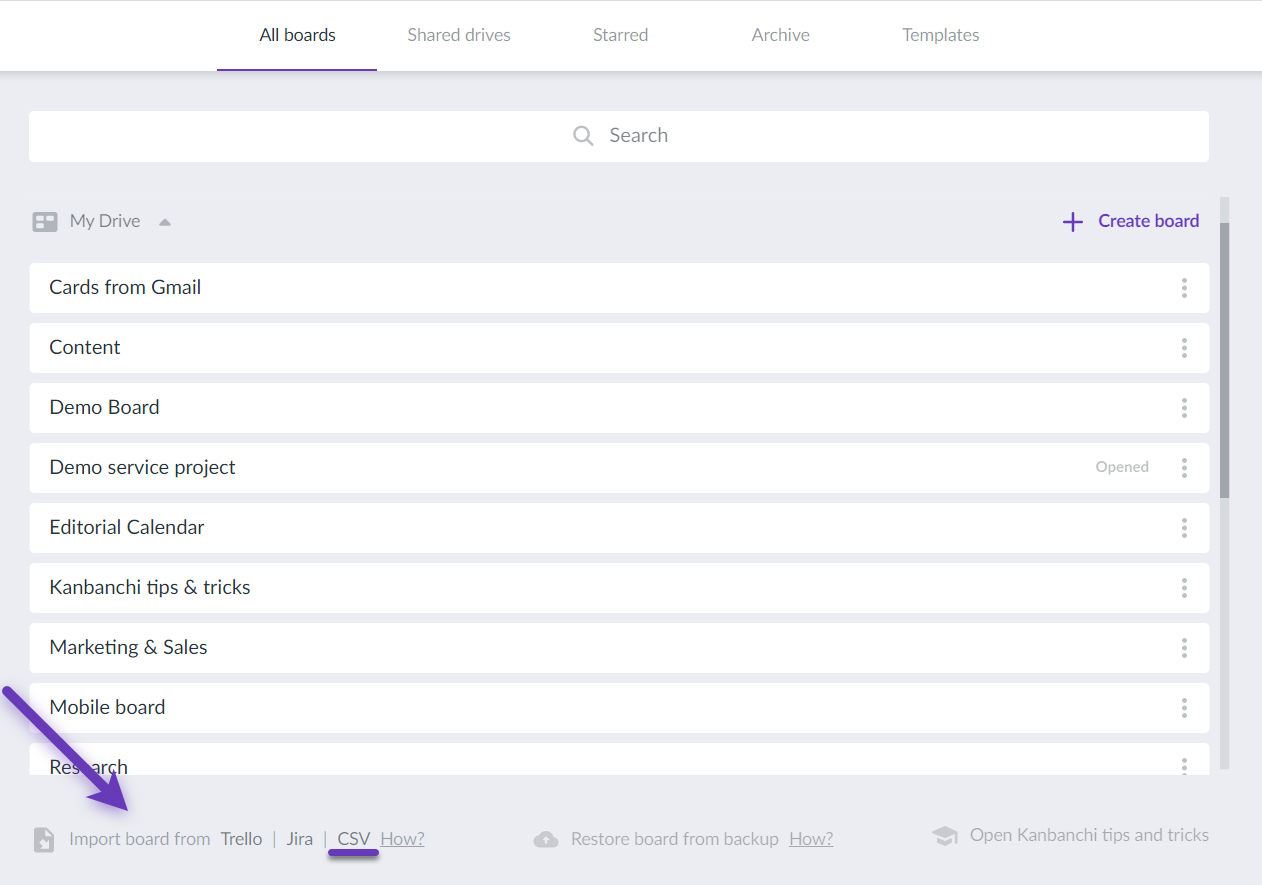
Step 2. Import the file to Kanbanchi
Open the list of your Kanbanchi boards. You will see the Import board from option at the bottom of the page. Please, click CSV and upload the file.
Kanbanchi will create a new board using imported data.
Please, note: only UTF-8 encoding is supported.
You may find out details about the other import options in this FAQ article:
- 15. How do I create new Kanbanchi board?More
You may create as many boards in Kanbanchi as you need. To create a new board click "Add board" in the top left corner.
Then choose "Create new board" from the drop-down list.
And you will get a standard Kanbanchi board ready to be customized.
You can also use board templates in Kanbanchi. Just click "Add board" in the top left corner, choose "Create board from template" and find the template most suitable for your needs.
Also, you can import Trello, Jira, and CSV files to Kanbanchi and Kanbanchi will create a new board using imported data. Just choose "Import board" and follow the detailed instructions.
- 16. May I have multiple boards in Kanbanchi?More
You may create and use as many Kanbanchi boards as you need. The number of boards is not limited. You may learn how to create a new Kanbanchi board in the following article.
To open an already existing board you just need to click the "Browse boards" button at the top left panel and choose the board from the board manager.
You can also open your boards from your Drive. Opening of often used boards is even easier as you can see all recently opened boards on the left.
- 17. Where can I find all attachments from the board?More
To find the attachments, navigate to the board setting and choose the Attachments tab.
The files are shown by the month. Also, there are three groups: All, Media, and Documents.
Moreover, you may choose how the files are displayed: Grid view or List view.
- 18. How can I export my board data to a Google Sheet?More
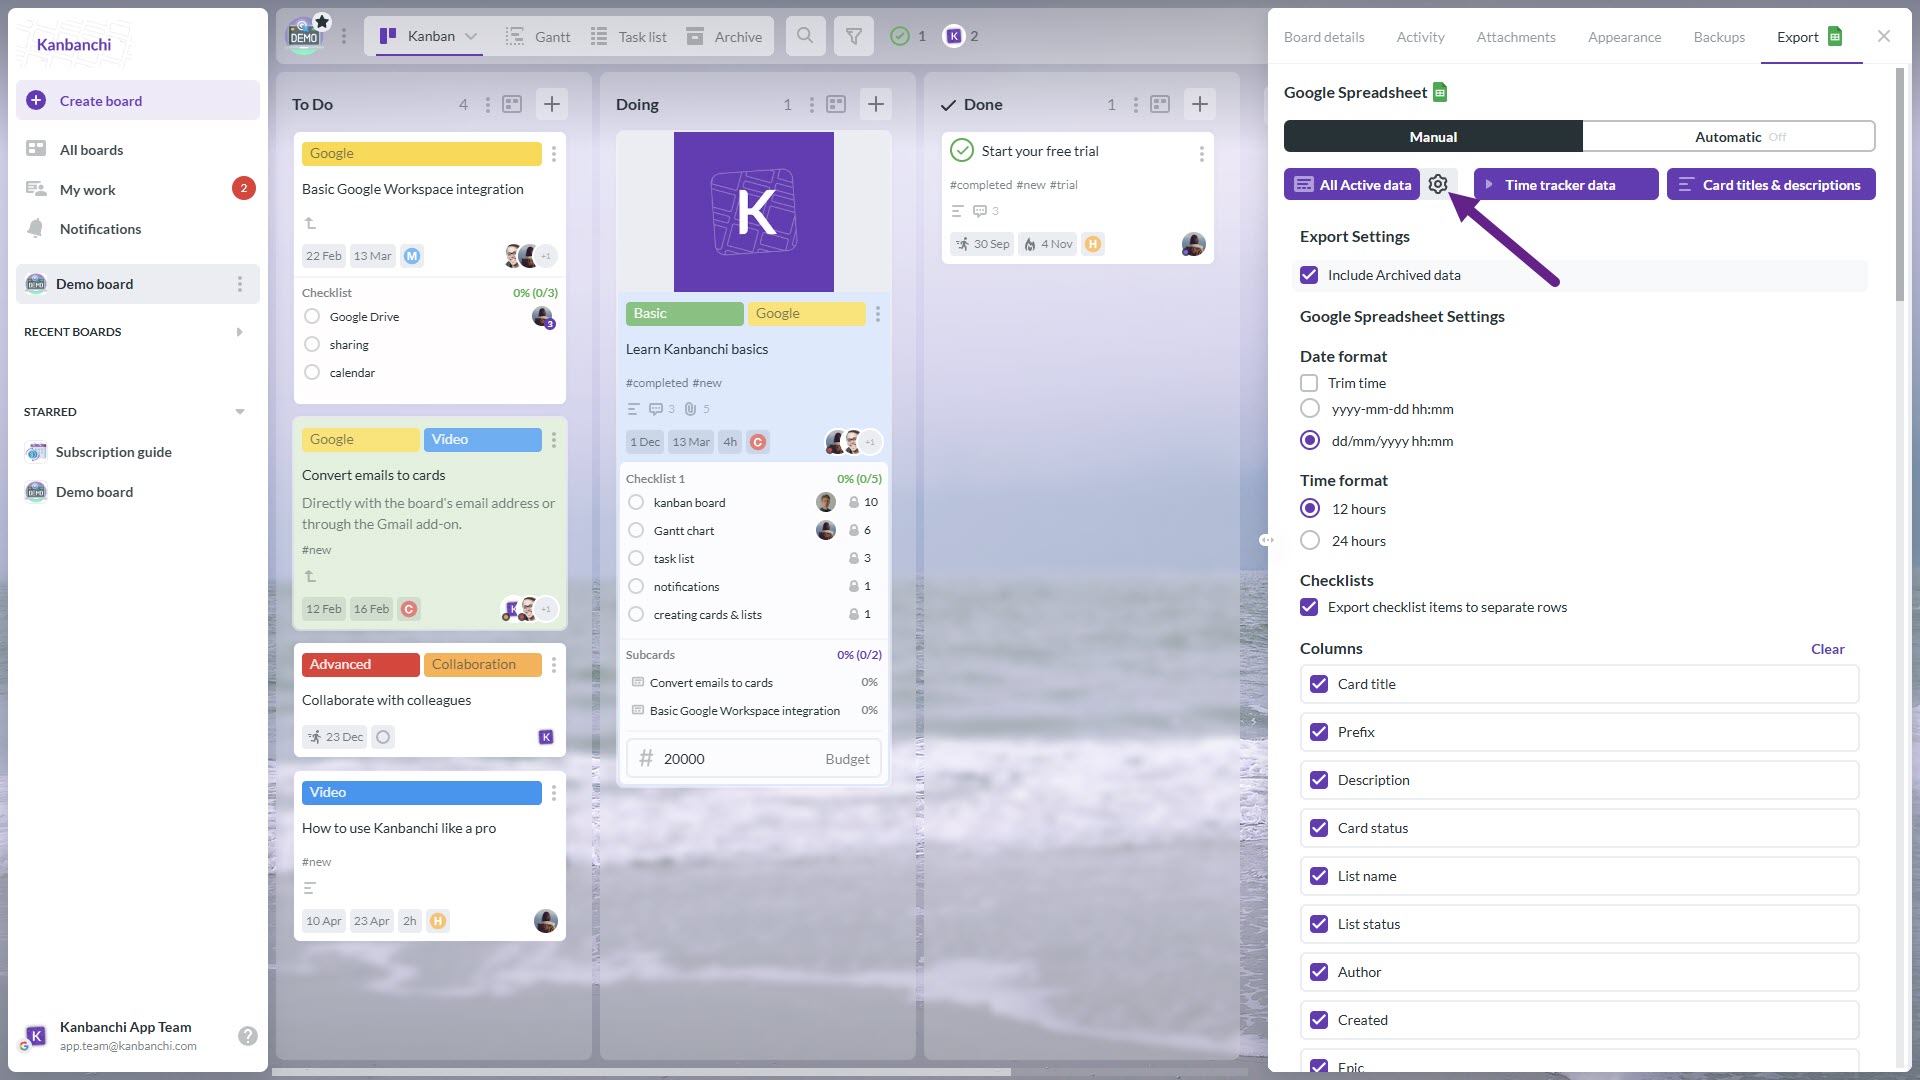
To export data from a board, click on the board's title on the top panel (or the three dots menu on the right of the title) and choose Board settings from the drop-down list. Board Details will open. Choose the Export tab at the top of the right panel. Choose the type of export you need:
- All Active Data. This will provide you with all the data that you have on cards from this board, excluding archived cards. Alternatively, you can choose to include the archived data when you come to the export settings.
- Time Tracker data. This will only export the time logged by collaborators on your board. Learn more about this export type here.
- Card titles and descriptions. This will pull out only card titles and descriptions of all cards on your board, including archived cards. This export will be made in the form of a Kanban board (columns and rows).
Additionally, you can choose your export settings for the active data. Click the gear icon, then select the settings you need based on what you want to see in your exported spreadsheet. Right after initiating the export, you will see a visual progress indicator. Please keep this tab open in your browser - the export will take some time.
When the export is complete, we'll send you an email with a link to a new spreadsheet containing the exported data. You can also open it from your Google Drive. The file will be created in the folder for your board, inside the Kanbanchi folder in your Google Drive, with the board name and export date in the title. Depending on your board location, it may be a folder inside the Shared Drive.
- 19. How can I export my board data to Microsoft Excel?More
To export data from a Kanbanchi board, click on its title in the top panel or use the three-dot menu next to the title. Then, select Board settings from the drop-down list.
The Board Details window will open. Navigate to the Export tab at the top of the right panel.
Select the type of export you need:
- All Active Data – Exports all information from active cards on your board, excluding archived ones.
- Time Tracker Data – Exports only the logged time entries from collaborators on your board.
- Card titles & description – This option exports only the titles and descriptions of all cards on your board, including archived ones. The data will be structured in a Kanban board format (columns and rows).
You can also customize the date and time format and select which columns should be included in the file. The order of the columns can be adjusted using drag-and-drop.
Once you start the export, a progress indicator will appear. Please keep this browser tab open, as the process may take some time.
When the export is complete, you’ll receive an email with a link to the new spreadsheet containing the exported data. You can also access the file from your OneDrive. It will be stored in the Kanbanchi folder within OneDrive, inside a subfolder named after your board.
- 20. Can I create card from email?More
You can create new cards on your boards by email. First, decide what board you want to send cards to by email. Click its title on the top panel to access Board settings.
Once there, find and click Board email on the right panel.
Copy the email address associated with this particular board.
Note: It’s a unique email address for your account, so when you create cards by email, they appear on the board as created by you. Keep it secret and don’t share it with others!
When you send a message using the copied email address, a new card will be created with card title being the subject of your message, and card description – the body of your message. You may add tags to the card placing tag names in the square brackets in the subject of the message and attach files to the message.
Card, that was sent to the board by email will have a tag “from email”.
Saving board's email address as a contact
If you're going to use this feature frequently, we recommend saving the board's email address as a contact in Gmail.
Add the first part as a name, and card@kanbanchi.com as an email address.
It shouldn't be any problem, as you can still star such contact and find it in the search field by typing the name of your board.
Please note: some email clients, e.g., Outlook, don't let save contacts with the same email address. These contacts are detected as duplicates. Saving multiple board emails as contacts in Outlook will lead to incorrect card creation.
You may also use Kanbanchi Add-on for Gmail to create cards from the inbox.
- 21. How do I rename a board or change other board settings?More
To make changes on a board, click on board's title on the top panel and choose Board settings from the drop-down list.
A popover window will appear for editing the board. Change the name of the board in the name field of Board Details and then click Enter. To add a description, click on Board Description under the board name field, type your text, and click Save changes.
In the same menu, you can make additional types of changes such as:
- creating a board copy;
- deleting a board;
- editing color labels for cards;
- setting up email notifications;
- enabling card prefixes;
- changing time zone;
- exporting board information (CSV, Google Spreadsheet).
- 22. How do I remove a board?More
Kanbanchi boards may be removed in two ways: within the app and within Google Drive.
Within the app
You will need to view the details of an open board to remove it from Kanbanchi. Click on the board’s name at the top of the screen or on its tab at the bottom of the screen to open Dashboard Details.
Click on Actions located at the upper right corner of the Dashboard Details and choose Delete Dashboard from the drop-down menu. When a confirmation window appears, click on Delete to finish removing the board from Kanbanchi.
Within Google Drive
Select a board in your Google Drive and then click on the Remove Icon (Trash Symbol)
or hit Delete on your keyboard to move your board into Trash.In both instances, the removed board will be moved into the Trash Folder of your Google Drive.
- 23. How can I make a copy of a board?More
In Kanbanchi you can easily make a copy of a board. To do it click on the board's title on the top panel and choose Board settings from the drop-down list.
Then just choose "Copy board" among Actions on the right.
A copy of the board with all cards will appear in the main folder of your Google Drive. It will also be opened next to the original board with the prefix "Copy of". All settings will be copied, excluding comments, sharing settings, notifications, and dates in Google Calendar. We also advise you to check Permissions of attached files, because the original files might belong to the owner and be placed in the owner's Google Drive.
If you choose the option "Copy board layout", no cards will be copied, but only the board layout (list names and board settings).
- 24. How can I receive email notifications when my board is changed?More
If you want to receive email notifications when changes have been made to your board you need to enable them in the Board Details. To do this, first click on the board’s title in the top panel, then select Board Settings from the drop-down menu.
After that, turn on email notifications.
Then you can choose from the drop-down list how often the App will send you emails:
- as soon as possible,
- once an hour,
- once a day.
You also need to choose which cards on the board you want to receive notifications for:
- all cards,
- cards assigned to me,
- watched cards.
You can tick all the variants.
Kanbanchi will notify you when:
– a card has been assigned to you
– a new card has been created
– a card has been deleted
– a new comment appears
– a card’s name has been changed
– a card’s description has been added or changed
– a file has been attached
– a card’s due date passed
– a card has been moved to another list
– a card’s priority has been changedNote, that notifications will be sent only if you are not the only member on this board and changes are made by other people.
If you would like to complement email notifications with in-app notifications, learn how to activate in-app notifications. You may also receive browser notifications in Kanbanchi.
- 26. How can I filter cards on the board?More
To filter cards on the board, just press the Filter options button on the top panel near the board’s title.
- 28. How can I set another background for a board and upload my company’s logo?More
Open Board Settings panel by clicking on the board name and choosing Board settings in the drop-down menu.
Choose the Branding tab located next to the Activity tab at the top of the popover window.
Background
To set an existing background, select it in the section titled Pick a premade theme. To browse your theme click on the Change background button in the Customize your own section. Then select a display mode for your background.
- Default - Use a default image size on background.
- Tile image - Image in the default size is used like a pattern for the background.
- Stretch to Full Screen - Image is enlarged proportionally to fit the screen width.
Tips:
- Maximum image size is 2MB.
- You can upload different images for different dashboards.
- Background will be displayed for every person who has an access to your dashboard.
Logo
To set a logo, click on the Change logo button within the Branding tab. Then choose Upload a new image and select a logo from your computer. If you want to get rid of an existing logo, click on Remove.
Tips:
- Maximum logo image size is 500KB.
- The uploaded logo is displayed on each dashboard of your account.
- Logo is displayed for every person who has an access to your dashboard.
Note: Only board owner can change board background and add logo.
- 29. How can I find boards in Google Drive?More
When you create a board it appears in Kanbanchi folder at the root of your Google Drive or on a Shared Drive depending on your Kanbanchi plan and choice. Inside the Kanbanchi folder you can find all boards, backups and attachments which you upload through Kanbanchi. You can organize boards within your Google Drive or on a Shared Drive as you like.
Also, you can use a special command "app:kanbanchi" to look for all boards in your Google Drive.
When your board is opened, you can easily go to the folder where this board is stored. To do it click on the board's title on the top panel and choose Board settings from the drop-down list.
Then just click on Open in Drive among Actions on the right.
- 30. How to import my Trello boards to Kanbanchi?More
Are you a Trello user curious to try out Kanbanchi? To ease the transition, you can import Trello Boards to Kanbanchi. Here’s a short set of instructions on how to do that.
Step 1: Export Your Trello Board
Log in to Trello and go to the board you’d like to export.
In the Board settings click Print and Export… and select Export JSON.
Don't be confused if you see the screen full of text. Click Save Page As... and the file in JSON format will be saved on your computer.
For further details, Trello provides a walkthrough for exporting.
Step 2: Import Your Trello Board to Kanbanchi
To import your Trello Board to Kanbanchi you need to sign in to the app. In the provided screen, сlick Import Your Trello Board.
You can select a file from your computer or Google Drive. Kanbanchi will create a new board using your imported data.
Here's the imported board!
Now your cards from Trello are in Kanbanchi. Play around and see what functionality Kanbanchi offers. Enjoy! :)
Watch a short video tutorial:
If you need any help with import from Trello, just drop us a message. We'll be glad to help you out :)
- 31. How to back up my board?More
With board backups feature, dashboard owners who want to be on the safe side can back up their most important boards for easy recovery.
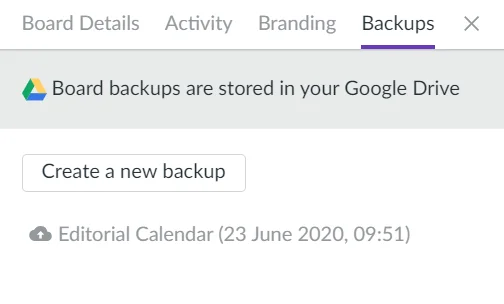
Creating a backup
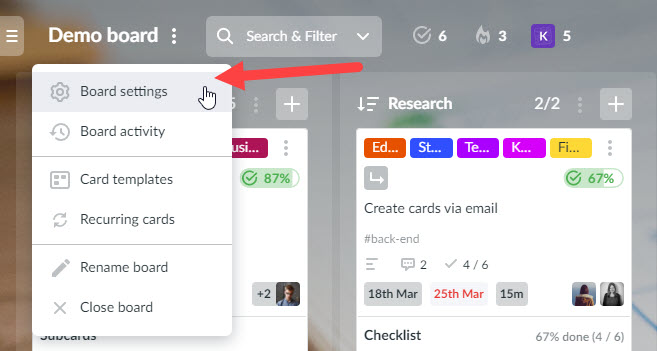
To back up a board, first, open the board settings. To do that, click on the board’s name at the top of the screen and choose Board settings in the drop-down menu. In popover window on the right, click on Backups section. When you choose an option Create a new backup, a new line will appear on the list of available backups with the name of the board, date and time of the backup. The backup file will be saved in the backups folder of the board in your Google Drive.
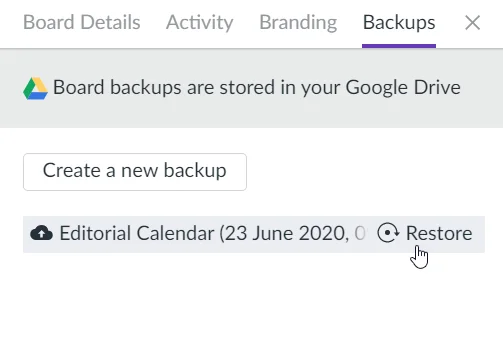
Restoring your board from a backup
To restore an existing board from a backup, open board settings, select any backup on the list and click Restore when you mouse over it.
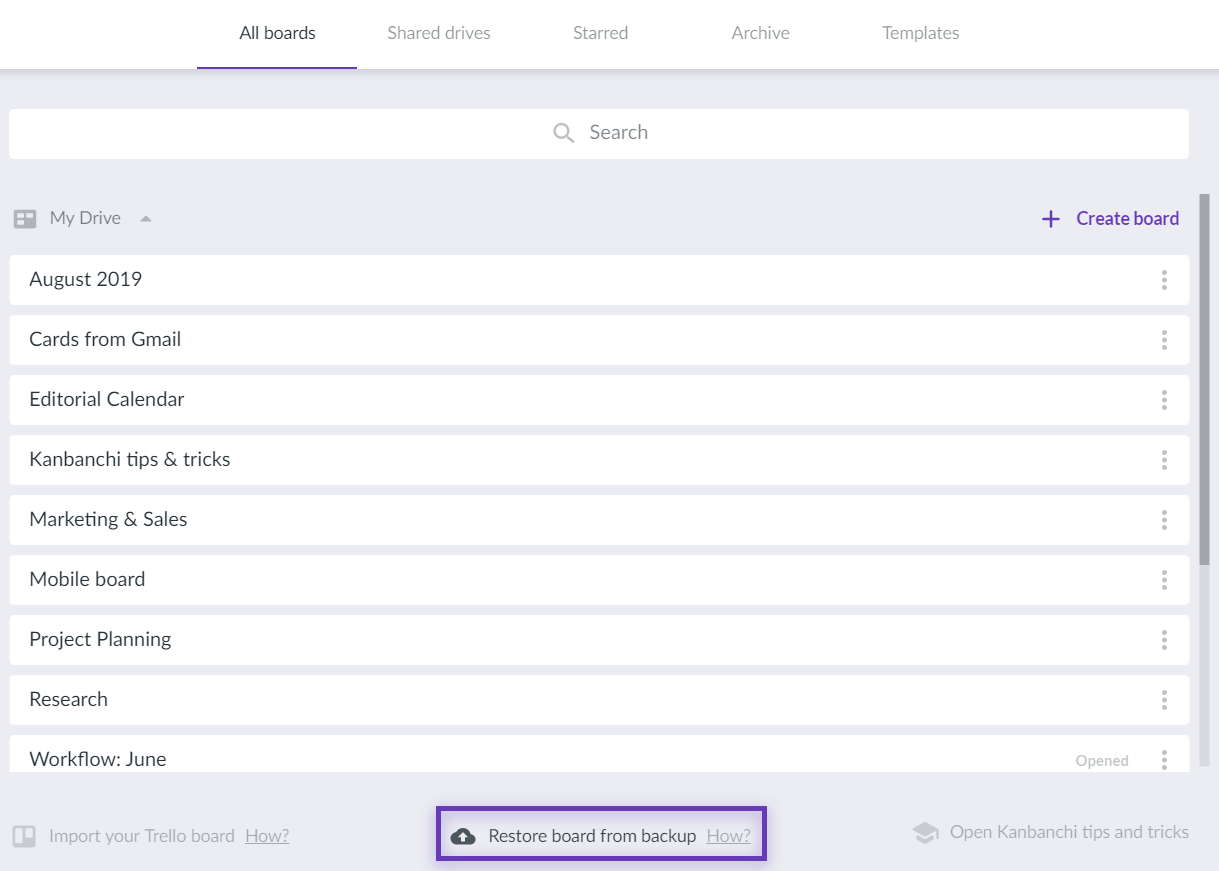
To restore a deleted board from a backup open the list of all boards and click Restore board from backup and choose a file from your Google Drive.
Video demonstration
- 33. How to receive in-app notifications in Kanbanchi?More
In-app notifications in Kanbanchi are updates about activity on Kanbanchi boards, which you receive in real-time in the app.
Enabling in-app notifications in Kanbanchi
In-app notifications are turned on for all new boards that you create. However, they may be turned off for some boards if they have been created a while ago. To enable in-app notifications for a particular board, first, click on the board’s title on the top panel and then choose Board settings from the drop-down list.
Turn on the in-app notifications first and then configure what types of notifications you want to receive. You may receive notifications about the updates of cards and important activities (for example, when someone assigns cards to you or mentions you in a comment). Also, you may choose cards on the board you want to receive in-app notifications for (all cards, cards assigned to you or cards you are subscribed to).
Here are the default settings for in-app notifications for all new boards. Please, note, that for some old boards that you've created some time ago, you will need to manually reset in-app notifications.
Receiving in-app notifications in Kanbanchi
Notifications are located behind the bell-shaped button in the top right corner. When you have new notifications, the badge appears, which displays the unseen notifications count. Click on the notifications button to view your notifications.
The red badge displays the number of unseen notifications
Notifications from all your Kanbanchi boards are gathered in one place. Looking at a new notification, you are able to see at a glance what board it belongs to, which card it is about and who performed the change. You can also use a filter to see notifications only from a current board or from all boards.
Due Date Notifications and Notifications before the Due Date
If you set a due date on a card, you will receive a notification in case it's overdue.
You may also set up notifications before the due date to be notified in advance. Consult this FAQ for the details.
Let us know if there're other types of notifications you would like to receive by dropping a message to Support. Also, learn more about an option to receive e-mail notifications and receive browser notifications in Kanbanchi.
- 34. How do I add my board address to contacts list?More
The structure of Kanbanchi board email address is a bit different from a usual one, due to security and uniqueness reasons. To be able to save it as a contact in Google Mail and any other email client, please, do the following:
- Add the first part as a contact name
- Add card@kanbanchi.com as an email addressIt shouldn't be any problem, as you can still star such contact and find it in the search field by typing the name of your board.
Example: board address is Kanbanchi-board_nu/0pcoDTGGEZDmZ5mPYLPR75mLEVQf0N1jRhwgKdgim9DcztBtXNT4zmg5MPp1K <card@kanbanchi.com>
First part: Kanbanchi-board_nu/0pcoDTGGEZDmZ5mPYLPR75mLEVQf0N1jRhwgKdgim9DcztBtXNT4zmg5MPp1K
Email: card@kanbanchi.com
The first part always starts with the name of your board. - 35. How can I apply a default template?More
There are 11 default templates in the app. You can find them in the Template tab on the start screen.
By hovering a mouse cursor on a template you may see its title, partly the description and 2 buttons: Preview and Use template.
To read the description click Preview.
You may click Use template in the pop-up window. The board from the template is created.
- 36. How to create a custom template?More
You may create your custom templates that will suit your personal needs.
Click Templates on the start screen.
Click Create new template.
The board for the new template creation is opened.
- 37. How can I delete my custom template?More
You can delete your custom templates.
Hover the mouse cursor on the custom template you want to delete.
Click Preview.
Click Edit in the opened window.
Click Ok in the pop-up window.
Go to board settings by clicking on the board’s name in the upper left corner of the screen.
Click Actions in the right panel.
Click Delete dashboard.
Confirm the deletion by clicking Delete.
The custom template is deleted.
